

How To Make A Collage Paper Background
Tutorial created in Photoshop CS6 and Photoshop Elements 15 (includes instructions for PS & PSE)
In this tutorial we’ll show you how to create a unique collage paper background using vintage ephemera. We’ll be using items from the following product to create the paper.
Products used:
ScrapSimple Embellishment Templates: Little Reader Collage
ScrapSimple Embellishment Templates: Painted Masks
The paper on the left is the paper I will show you how to create, but you can also make a more faded collage like the sample on the right where you reduce the opacity of the mask and/or collage layers until they suit the look you are after.

- Create a New Document (File > New) sized at 12×12 inches at 300 dpi with a white background. In Photoshop Elements, click File > New > Blank
- Open the vintage background paper called SRO_LittleReaderCollage_01.jpg from the SRO_SSEmb_LittleReaderCollage folder.
- Drag it onto your new document, pressing the Shift key as you let go of the mouse so that it lands in the middle and close the original
- Open SRO_SSEmb_PaintedMasks01.png from the SRO_SSEmb_PaintedMasks folder and drag it onto your page, pressing the Shift key as you let go of the mouse so that it lands in the middle, and close the original
- Press Ctrl T (Mac: Cmd T) to get a Transform Outline and resize it down proportionately until it looks roughly the same size as in the top right-hand corner of the example page. To resize proportionately, in Photoshop, press Alt Shift (Mac: Opt Shift) and click and drag from a corner handle inwards until it’s the size you want. In Photoshop Elements, just click and drag from a corner handle. Double-click inside the outline to accept the transformation and drag the mask into position.
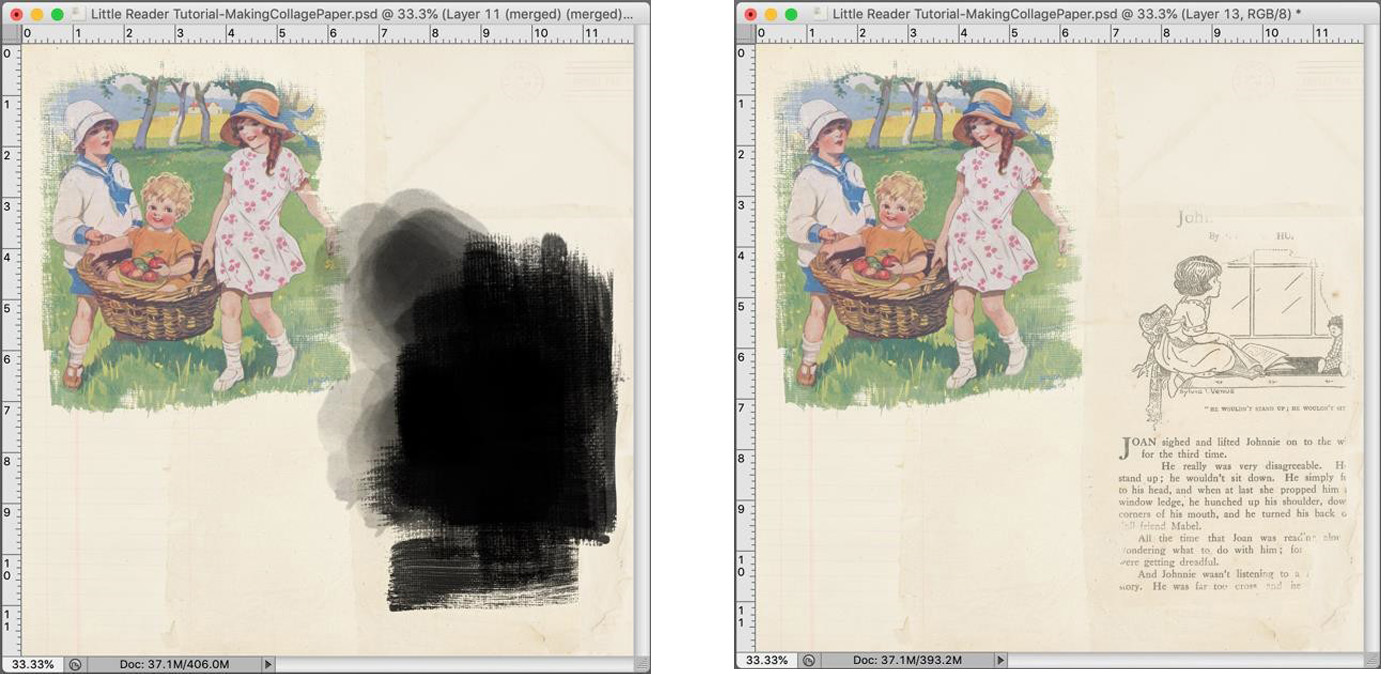
Before placing a picture inside the mask, it’s a good idea to group the mask with the vintage background paper first so that you won’t see any of the black mask peeping through. Once you do this, the mask will be invisible.
- Click on the background paper layer in the Layers panel and press Ctrl J (Mac: Cmd J) to duplicate the
- Drag the duplicated paper layer above the mask
- Position your cursor between the two layers, press the Alt key (Mac: Opt Key), and when you see the down-facing arrow, click to group them together. Your mask will now disappear because it is filled with the same background paper that is behind
- With both layers selected, press Ctrl E (Mac: Cmd E) to merge the two layers
- Open the SRO_LittleReaderCollage_09.jpg from the SRO_SSEmb_LittleReaderCollage folder, and drag it onto your page above the merged mask
- Drag it over the mask in the top left-hand corner, and resize it using the Transform Outline like before.
- Position your cursor between the two layers, press the Alt key (Mac: Opt Key) and when you see the down-facing arrow, click to group them
- Fine-tune your resizing, if you need to, until it resembles the example

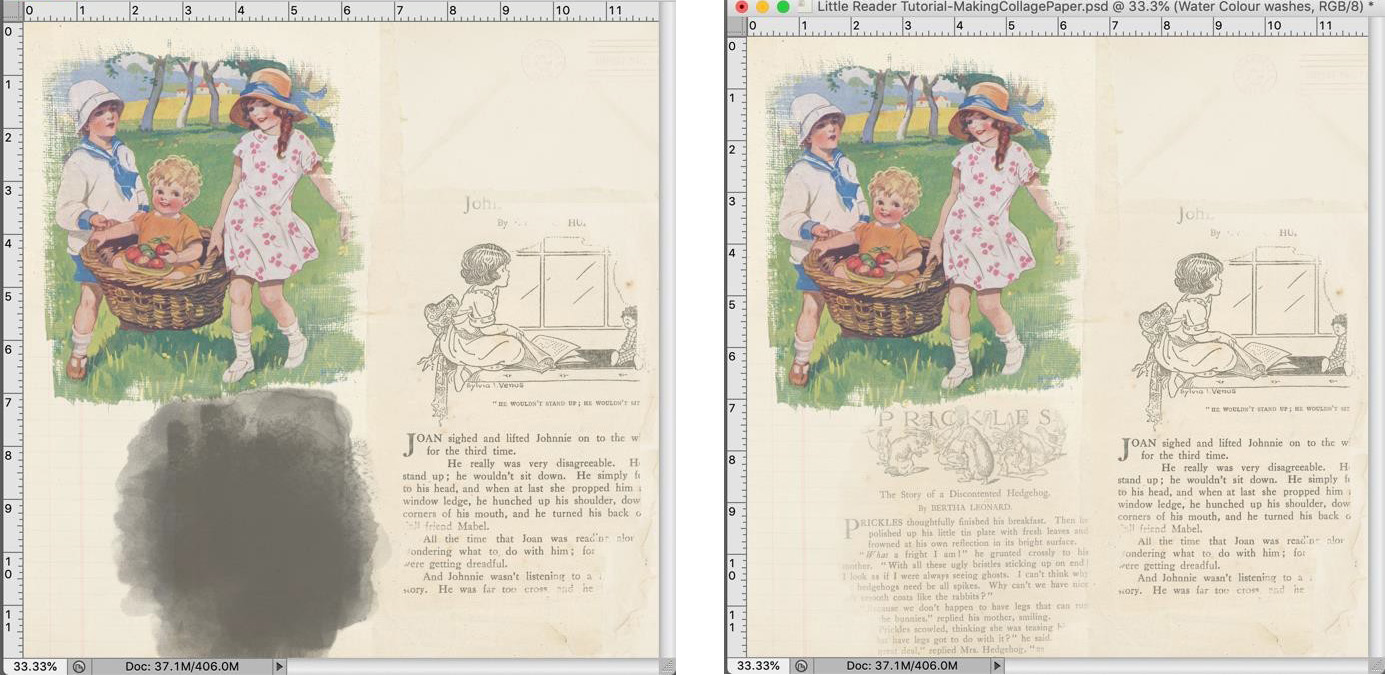
Using the same method, we can add other collage pieces to decorate the rest of the page. With this collage piece, SRO_LittleReaderCollage_06, I have used Painted Mask 2 but also added some brushes strokes from the brush set SRO_BSSB_WateryWashes on the left-hand side and SRO_BSSB_Canvas on the bottom. Once again, I grouped the background paper with the finished mask first before grouping the collage piece to it.
In this third example, I created a unique mask from the brush set SRO_BSSB_WateryWashes. Then I reduced the Opacity to 55%. The collage piece clipped to it is SRO_LittleReaderCollage_04.
This next one is Painted Mask 7 with SRO_LittleReaderCollage_07. However, I have duplicated the collage layer, changed the Blending mode to Screen and lowered the Opacity of that layer to 27% so it is a little less bright. That way, it didn’t dominate the page too much.

TIP:
Painted mask shapes and brushes are very forgiving. You don’t have to transform them proportionately, especially if a collage piece is going to be clipped to it. If you want to make a mask narrower or wider, only drag on your side handles when the Transform Outline is active. If you want it to be longer or shorter, only drag from the top or bottom handles. You will not detect any distortion, once the collage piece has been clipped to it. Also, I often add brush strokes to the masks (from different brush sets) to suit how much of the collage piece I want to reveal and the texture that I am trying to achieve. If I want it to look like watercolor splotches, I would use a watercolor brush set, such as my Brush Set: Paint Drips Biggie, which is available in my store, along with the Watery Washes and Canvas brush sets.
On the left-hand side, I used Mask 2 with Collage piece 08, repeating the duplication and Blending mode as in the previous step with the Opacity at 23% on the second layer.

The last step to complete the collage paper is to add some brush strokes from SRO_BSB_TinyPaintDrips. The color I used is slightly darker than the background paper, Hex Code: #b6926f, and then I lowered the Opacity to 21% on that layer to make them appear more transparent.

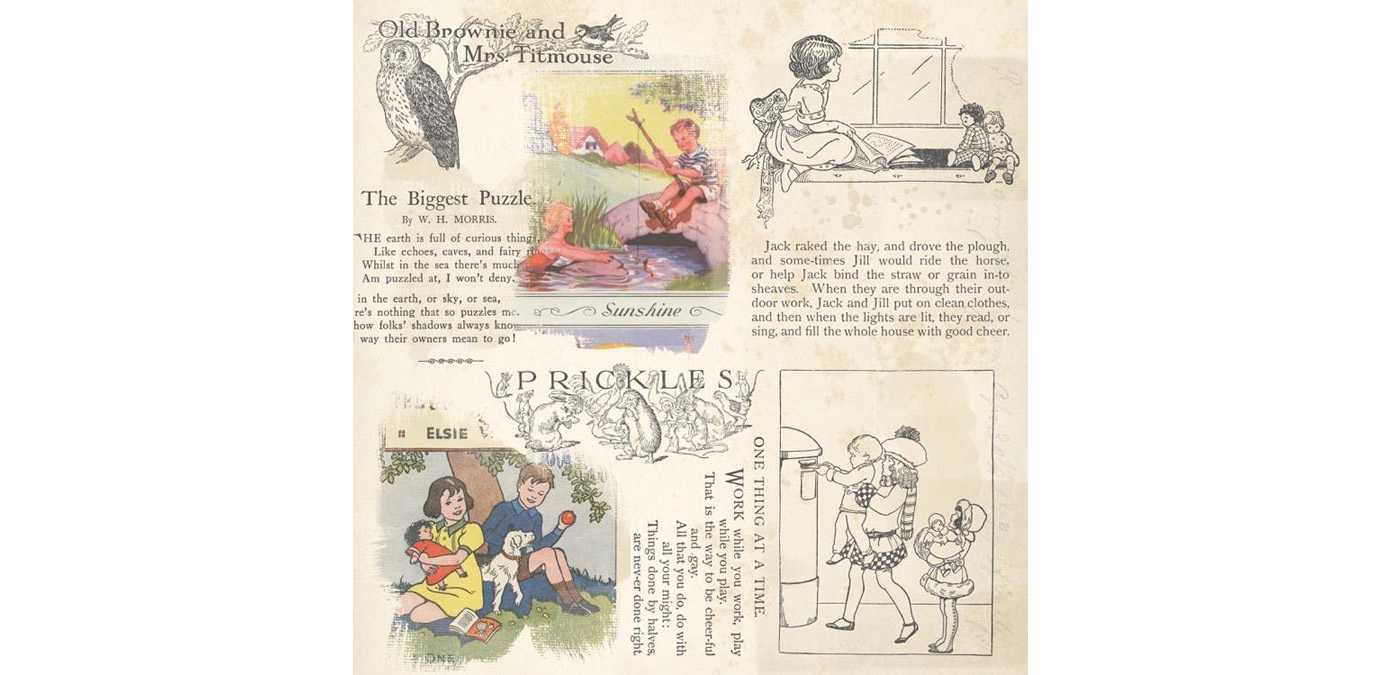
As you can see, there are lots of variations when you create collage paper backgrounds!
Here is another paper that may give you some more ideas. I used the brush set SRO_BSSB_LittleReader and stamped the images of pictures and text over my paper in a charcoal gray, Hex Code: #555555, rather than black, which is too harsh.
Here is my finished page using the vintage end paper from Tutorial 1 as a background. I transformed the collage paper down in size to fit the album and then changed the Blending mode of the paper to Darker Color. I also added a few splotches from SRO_BSSB_WateryWashes.

![]()
Tutorial written by Susie Roberts


