
Just like with any hobby, words and jargon might not make a lot of sense to new scrapbookers. “Mask” is one of these words. To the rest of the world, a mask is something you wear with a costume. Or to rob a bank. Or maybe it’s a type of tape you use to cover trim while painting. You might wonder what masks have to with Photoshop/Photoshop Elements and why people keep talking about them.
In digital scrapbooking terms,
a mask is simply a way to change the appearance of a layer
without actually altering it.
There are about a million applications for masks in Photoshop Elements. For example, a clipping mask (shortcut: Ctrl-G) forces a layer to take on the exact size and shape of the layer below it. I like to imagine a photo or paper being folded under the mask layer. You haven’t trimmed them away, all of the extra parts are still there, waiting, just in case you change your mind and unclip it from the mask. Since it doesn’t matter what the shape of the mask is, our talented scrapbooking designers create beautiful and intricate masks for us to use.
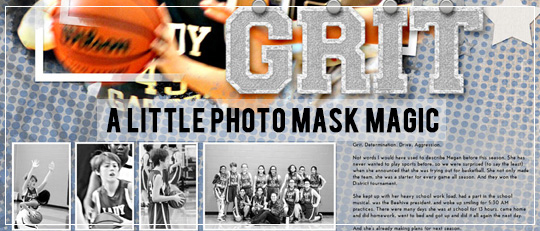
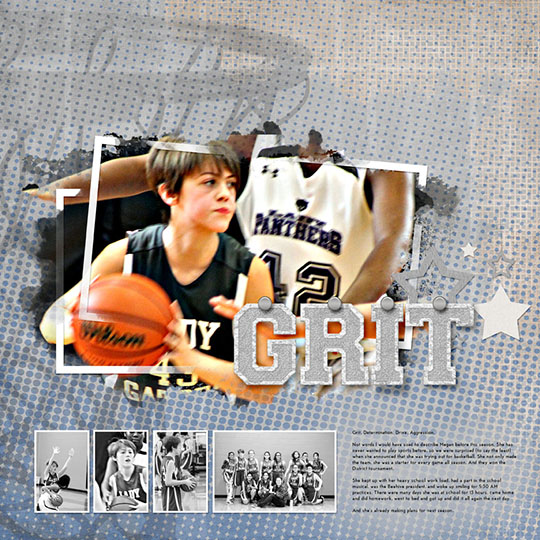
In this particular example, I used ScrapSimple Embellishment Templates: Stacked Photos, Vol. 6. Each of the masks comes with a frame and a shadow layer. Clip your picture to the mask, add some embellishments, and you’ve got a layout.
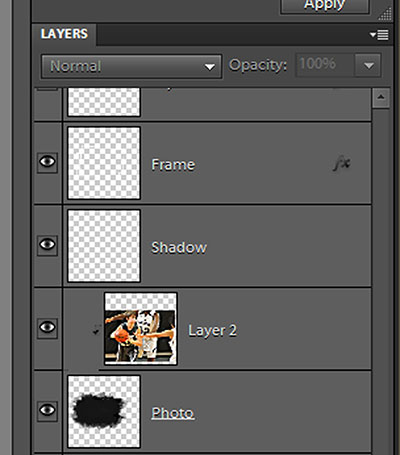
Some photo masks include a few more layers, so they look a little more complicated, but they work the same. You just clip a photo to each mask layer.
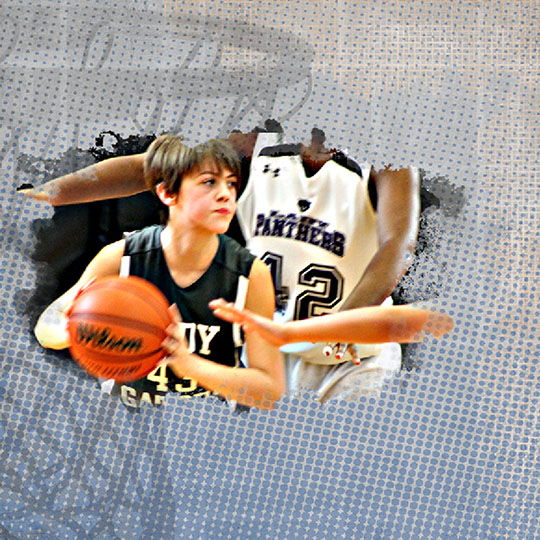
In the next example, I used ScrapSimple Embellishment Templates: Out of Bounds Frames, Vol. 3. I used three copies of the same photo, each clipped to a different photo mask. Each mask can be combined with the others to create different looks, with the photo “spilling” out of the frame in different places, depending on the look wanted. By clicking on the Eye icon by each mask in the Layers palette, I can play around until I get the look I want.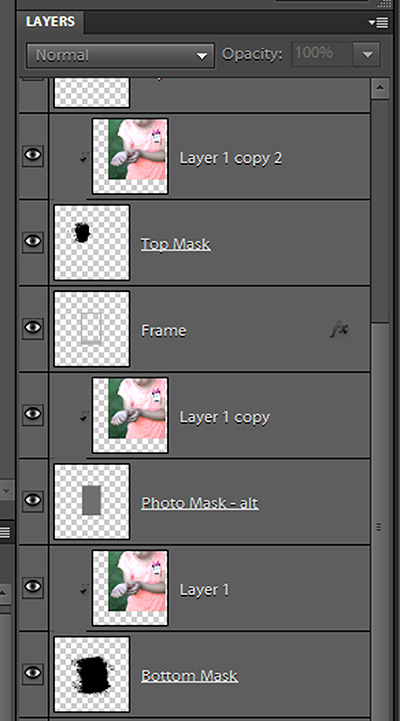
 I hope you’ll experiment with photo masks. They are an easy way to create interesting shapes and designs with your pictures, all with the click of a few buttons. Be sure to upload your layouts to the Scrap Girls Gallery so we can all be inspired!
Photo Mask products used: (Click on image to be taken to product page)


Other products used:
Basketball Dream Team Collection Mini
ScrapSimple Tools – Styles: Shadow Me 6301
![]()
 Tutorial written by Anna Mansfield


