

Fun Ways to Use Brushes
Tutorial uses Adobe Photoshop Creative Suite 5 on Windows 7
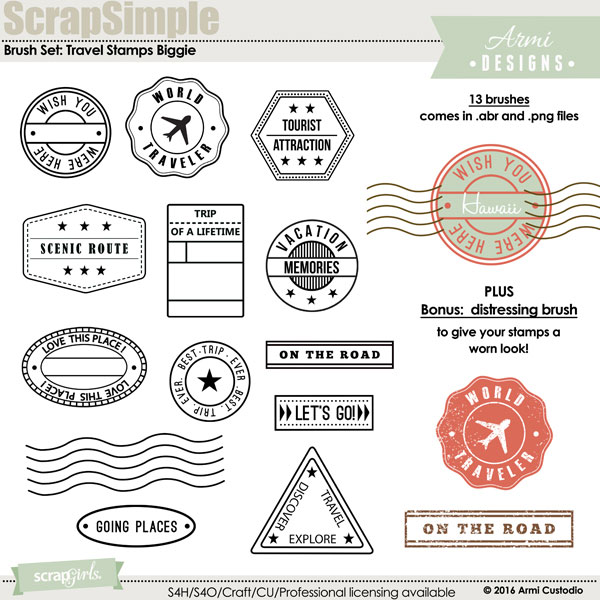
This tutorial will give you some creative ideas on how to use Brush Set: Travel Stamps, but also applies to other brush sets.
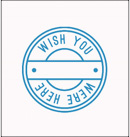
If you are new to brushes, then you might think there is only one way to use a brush. Like this:
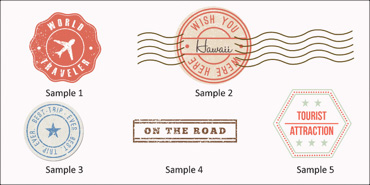
But did you know you can also create these?
If you want to level-up your use of brushes, then follow along!
1. Grunge them up.
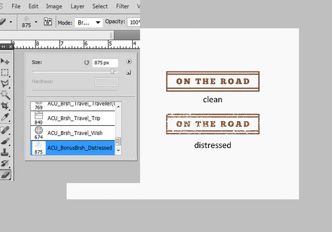
Samples 1 and 3 have a distressed, worn look that can be achieved by simply using a grunge or distressing brush. First, load both ABR files for ACU_Brsh_TravelStamps and a grunge or distressed style brush set into your Brush palette.(See below for Grunge style brush suggestions)
With your Foreground Color set to the desired color, click the Brush tool, select your chosen travel stamp, and brush it into a blank layer. To distress, click on the Eraser tool and select the distressing brush from the drop-down box. You can now erase parts of the Travel Stamp that you want to look worn.
2. Do selective coloring.
A brush will take on whatever color you have set in the Foreground color box. This means a brushed-on layer will have only a single color. Coloring individual parts of a brush, such as in Sample 5, will entail an extra step or two. Here is how you do it:
With your stamped layer active, select the Magic Wand tool and hold down the Shift key while clicking on the parts you want to recolor. You will see the “marching ants” highlighting your selection. When you are satisfied with your selection, fill with color using Edit > Fill > Foreground Color. You can also use the Lasso tool to select parts to isolate and color.

3. Fill the transparent parts.
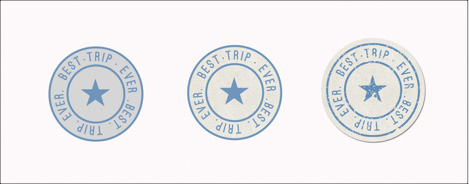
In Samples 1-3, the transparent parts of the brushes are filled. Filling these parts allows us to clip papers and apply styles, giving our brushes a totally different look!
Filling the transparent parts is easy! First, create a shape in the layer below your Travel Stamp; it doesn’t matter what shape because we will be cutting away any excess later. Just make sure the shape you choose is bigger than the stamp itself in order to fill all the transparent parts of the brush. Next, rasterize the shape layer by clicking Layer > Rasterize > Shape. In PSE: In the Tool Options, click Simplify.

On the brush layer, click anywhere outside the brush. Make the rasterized shape layer active and hit Delete. Now you can clip a paper to the remaining shape or apply styles.
In Sample 3, I clipped a paper from my Sweet Love Collection Mini and used the bonus brush to subtly distress the stamp. I also slightly enlarged the shape to give my new embellishment a small border, finishing it off with a drop shadow.
I hope this tutorial has given you some helpful tips on how to use Brush Set: Travel Stamps.
![]()
(Click on the images below to be taken to the product page)

Additional Products in Samples:
Sweet Love Collection Mini
Grunge & Distress Brush Options
Value Pack Brush Set: Artful Brushes
Brush Set: Essential Light Grunge
![]()
Article written by Armi Custodio


