

Using The Alignment and Distribution Tools in Photoshop
Tutorial created using Photoshop CC with Windows 7
Tutorial written using Photoshop CC2018 on Windows 7
Have you ever had trouble getting things evenly spaced on your pages? Is it sometimes difficult to get alphas to line up the way you’d like? If so, the Alignment and Distribution tools in Photoshop can be your new best friend! These tools help adjust spacing between different layers in Photoshop. This tutorial will show how to use the Alignment and Distribution tools.
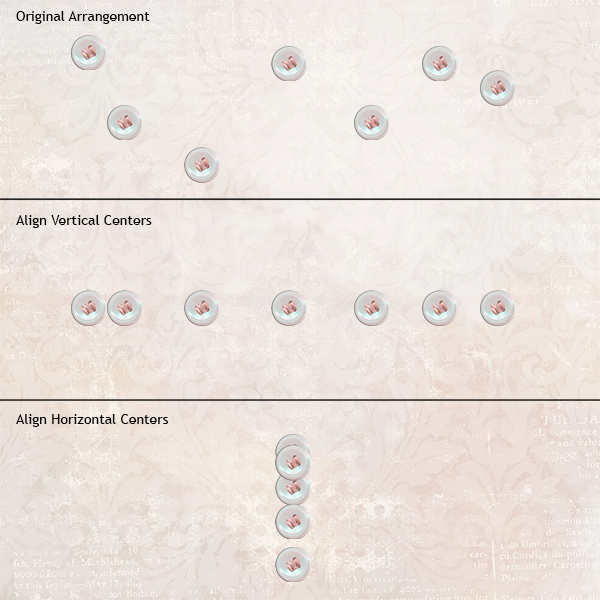
Let’s get started with some buttons. Drag several buttons onto your page and move them around a bit.

With the Move tool active, the different Align and Distribute options will show in the top bar. You can see what each tool does by hovering over it. For the tools to work, all the layers you would like to align need to be selected in the Layers panel.

When you choose an Align option, it will move all the selected items so they are in line with each other. This shows what happens to the same grouping of buttons when you use a few different options on them.
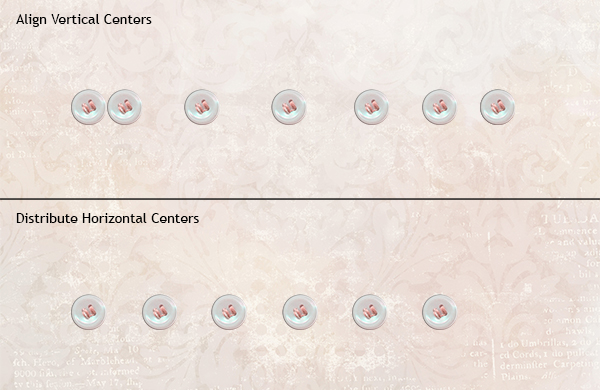
Now we that have the buttons in a nice straight line, we can use the distribute options to make the spaces between the buttons equal. Look at those perfectly spaced buttons!
Try playing with all the different options to see how they work. You can use the Align and Distribute tools with text blocks, photos and any other embellishment you have on your page. In the layout below, I used “Align bottom edges” to put the alpha letters on a straight line. While you can use the distribute options to space the letters, you will most likely need to refine the spacing because each letter is so different. I definitely did!

Supplies:
![]()
 Tutorial written by April Martell


