

Botanical Grunge Papers
Note: Tutorial created using Adobe Photoshop CS6
In this tutorial, we will create a botanical grunge paper from scratch, using textured overlays, grungy brushes, ephemera brushes, and botanical overlays. Every one you make will be different as you mix and match overlays and brushes to create unique effects.
Products used:
ScrapSimple Paper Templates: Botanical Edges
ScrapSimple Paper Templates: Textured Overlays 5
Prepare the Workspace
- Create a new 12 x 12-inch document at 300 ppi (File > New) with a white background.
- Press the letter X to change your color chips to the default of Black and White.
- Click on the Foreground Color Chip to open the Color Picker and type in the Hex Code: f3ebe1, which is a pale beige. Click OK. (You should now have a beige foreground color chip and a white background color chip.)
- Click on the New Layer icon in the Layers panel to create a new layer.
- Press Alt Backspace (Mac: Opt Delete) to fill the new layer with the Foreground color.
- Open one of the overlays from SRO_SSPaper_Textured Overlays 5. I’m starting with the fifth one in the set.
- Press Ctrl A (Mac: Cmd A) to Select All.
- Press Ctrl C (Mac: Cmd C) to Copy.
- Activate your document and press Ctrl V (Mac: Cmd V) to paste the overlay on the layer above the beige background.
- On the overlay layer, press Ctrl Shift Backspace (Mac: Cmd Shift Delete) to fill the overlay layer with the background color chip of white.
- Select another textured overlay from SRO_SSPaper_Textured Overlays 5 and repeat the above steps to copy and paste it to your document, and again, change the color to white.
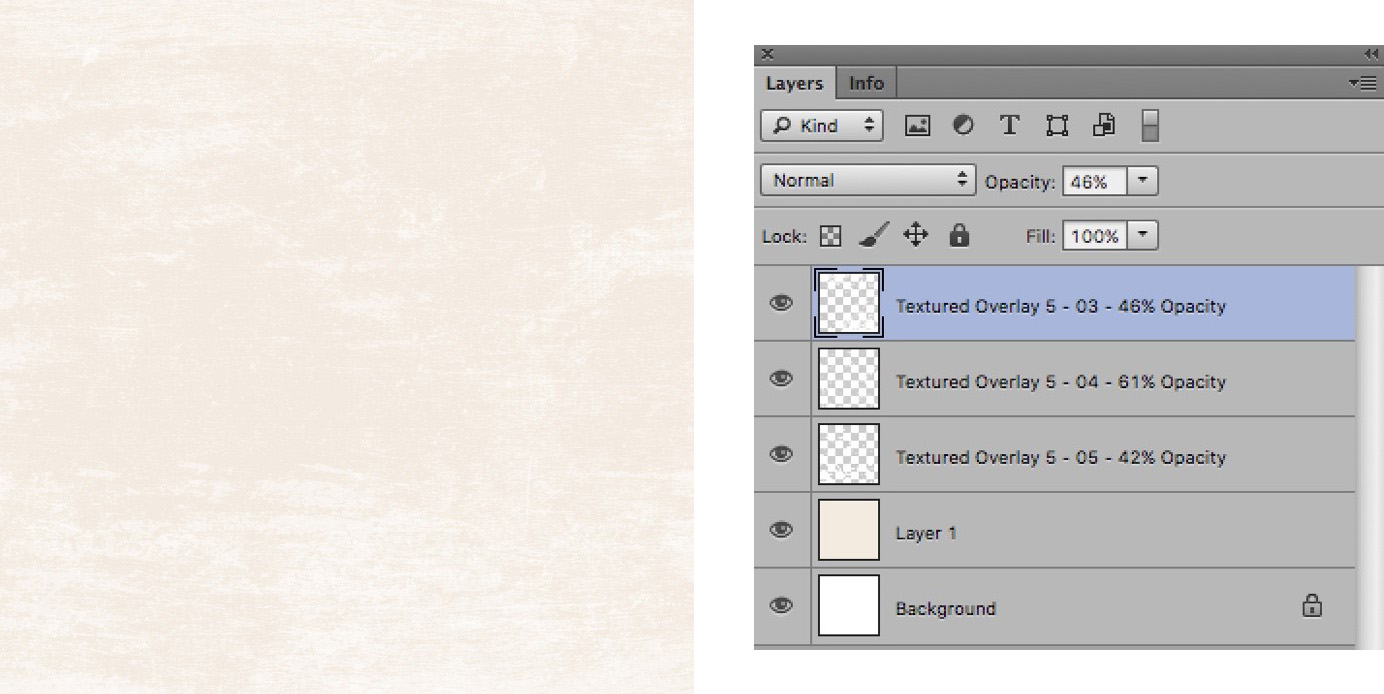
If the grunge is too strong, lower the opacity of one or more of your textured overlay layers until the effect pleases you. I like a subtle effect. For example, on the paper below, this is my recipe:
Layer 2: Textured Overlay 5 – 05 – 42% Opacity
Layer 3: Textured Overlay 5 – 04 – 61% Opacity
Layer 4: Textured Overlay 5 – 03 – 46% Opacity
- You can fine-tune your grunginess by adding yet another overlay and changing the color of it back to the original beige. This will cover up some of the other grunge layers.
- Alternatively, use the SRO_BSB_PaperGrunge.abr brushes to add little amounts of grunge to parts of the paper in either white or beige.
- Get the Brush tool and in Tool options, open the Brush Preset Picker. In the upper right corner, click on the down-facing arrow to open the fly-out menu and choose Load Brushes. Navigate to the folder where you have downloaded the brush set, select it, and click Open.
- Click on the New Layer icon in the Layers panel to create a new layer.
- Press the letter X to switch the Foreground color to White.
- Select a brush to work with from the Brush Picker and begin stamping on the new layer.
Note: Always create a New Layer before you stamp with each brush as it will give you more flexibility for making small changes. Don’t forget to play around with the Opacity of the brush layers in the Layers panel to get the effect you want.
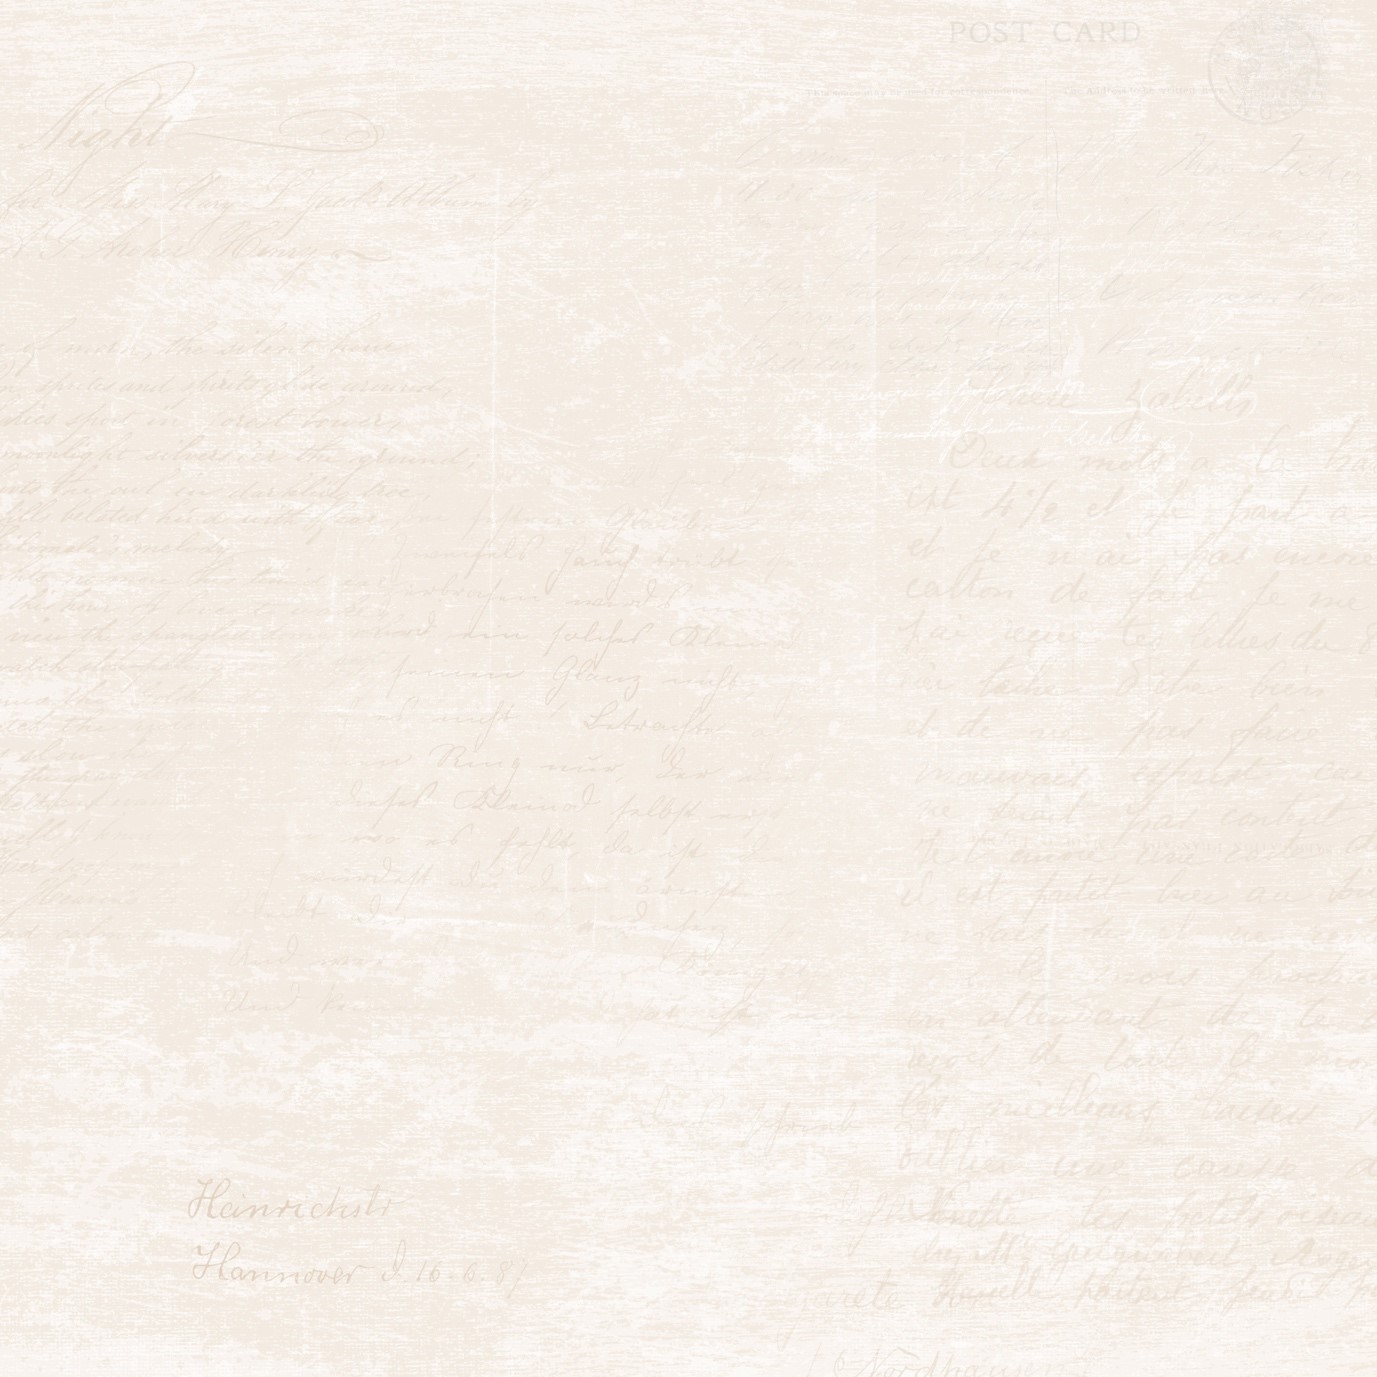
- The next step is to start adding more complexity to your paper with the SRO_BSB_VintageHandVol2 brushes. They will add some subtle vintage handwriting to your paper. I have changed my foreground color to Hex Code: ddd2c2, which is a slightly darker color beige. You can increase the size of the brushes before you stamp by pressing the ] (right bracket) key. Now my paper looks like this:
Add the Botanical Edger
- Get the Move tool and open the Botanical Edger (File > Open) of your choice from the
ScrapSimple Paper Templates: Botanical Edges
- Copy and paste it onto your page, and drag it over to the left side of the page.
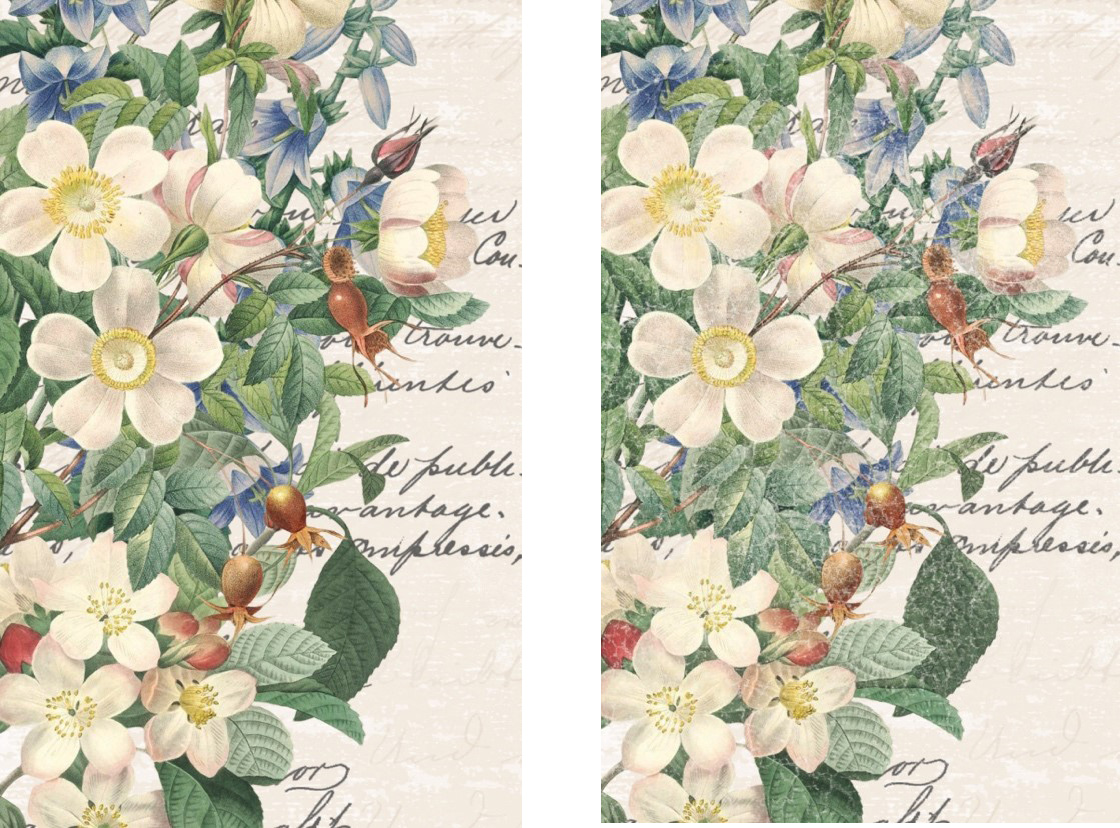
- Get the Eraser tool and select the number 16 brush from the SRO_BSB_PaperGrunge.abr. This is a very light crackle brush.
- Stamp over your botanical edger with the Eraser tool to grunge it up a little. Of course, this step is optional as you may prefer the pure look.
Before After
Once you’re happy with the effect, save your document as a JPG with a quality of 10.
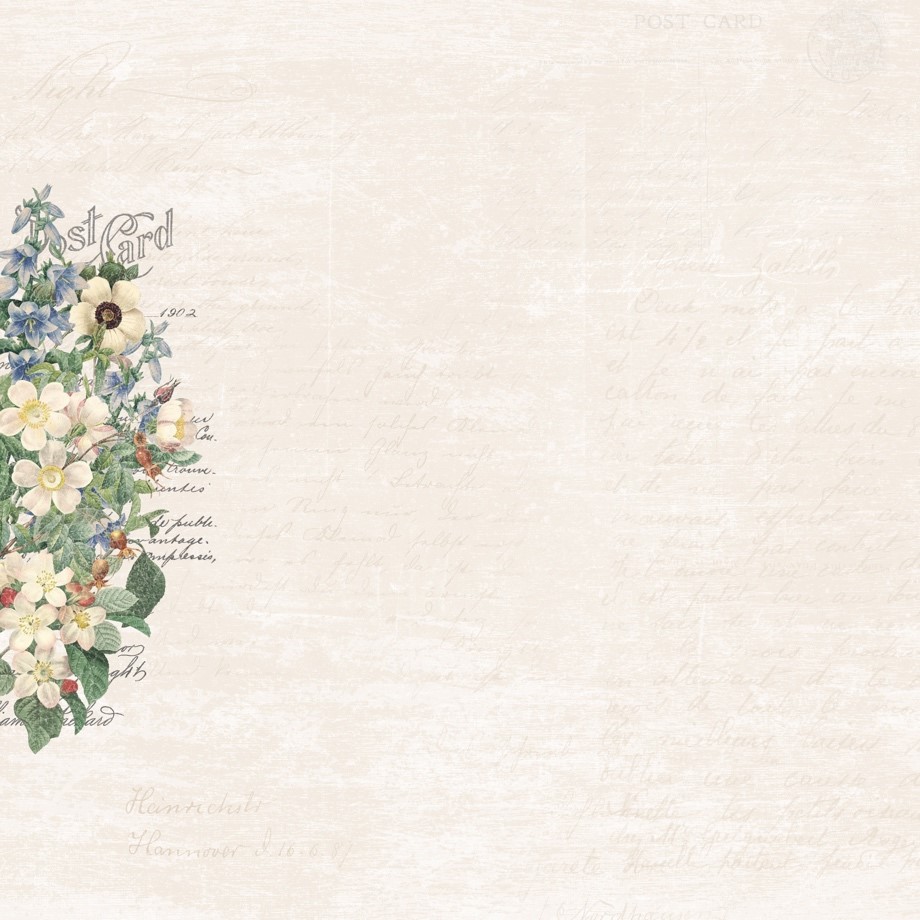
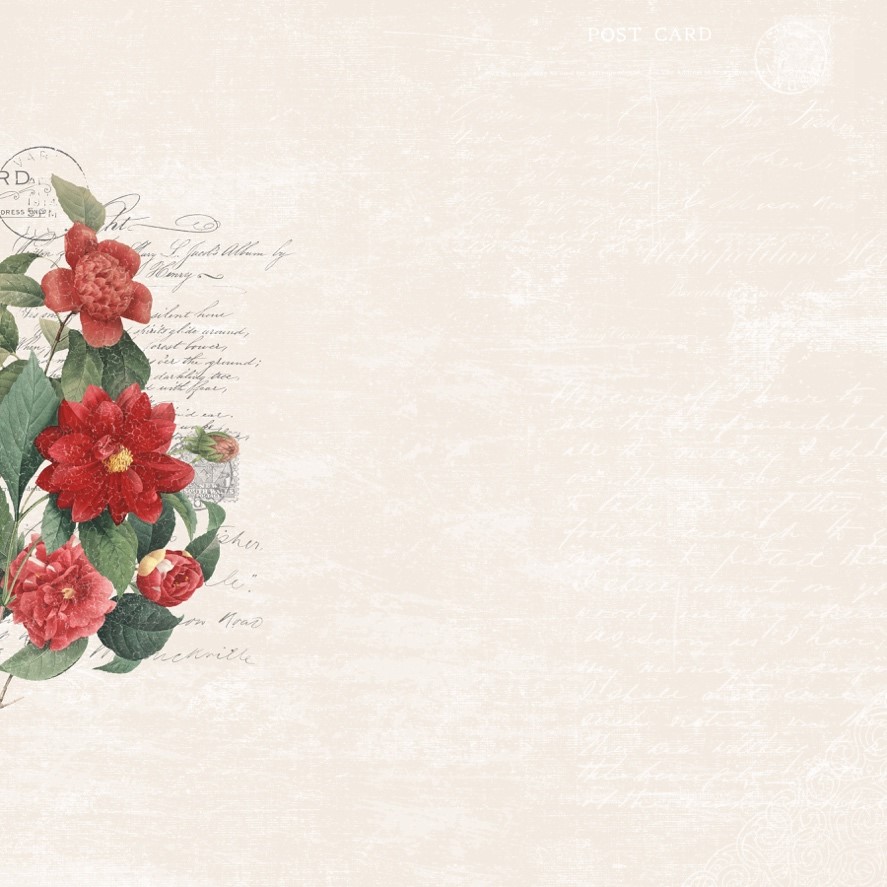
Here’s another example of a finished paper using a different botanical edger. As you can see, the possibilities are endless. I’d love to see your layouts so be sure to post them in the Scrap Girls Gallery!
Other products by Susie Roberts that you can use to decorate your papers:
Sheet Music Overlays Embellishment Mini
My Grandma’s Garden Collection

Tutorial written by Susie Roberts


