
Christmas time is a busy time of year, so I’ll take all the scrapping help I can get, and it doesn’t get any more helpful than making a layout using a gorgeous pre-made layout! I found a
JIF Plus layout in the store I loved and really wanted to use, but the color palette is mostly cool blues, creams, and some pink. My Christmas photos are mostly reds and greens, so the layout and my photo didn’t really work together. Luckily, there are a few quick photo edits that can fix this little problem! Let me show you what I did to make this layout and the photo work perfectly together.
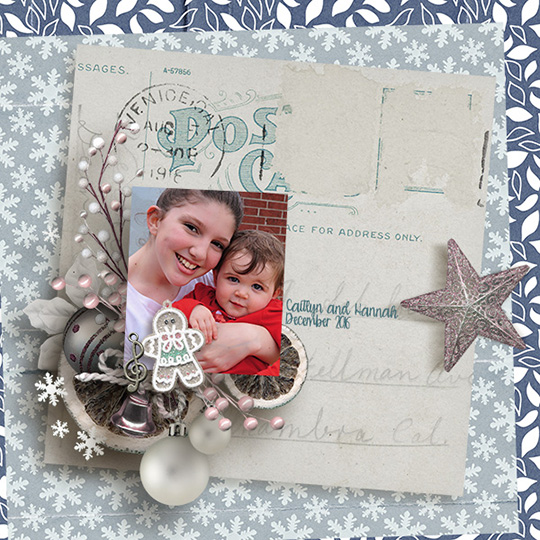
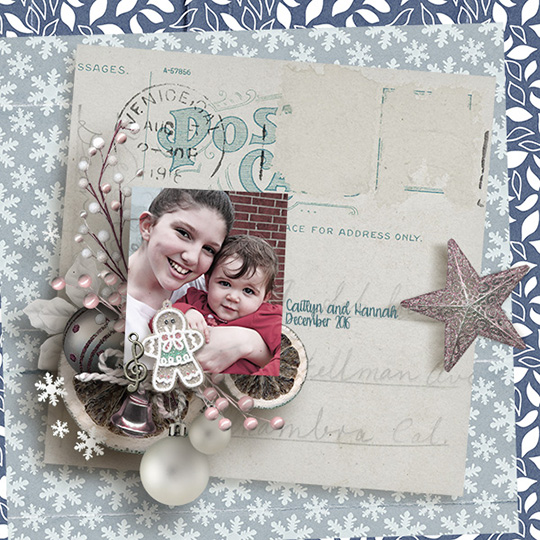
Here is my original layout with this darling photo of my daughter and my cousin’s daughter. Super cute, right? But the warm, bright colors in the photo are just too distracting for this layout. Here are a few options for adjusting your photos:
Option 1:
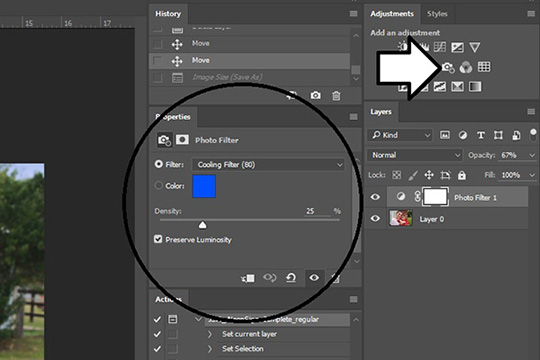
Add a photo filter adjustment layer by clicking on the little camera icon in the adjustments tab. Then, using the drop-down menu in the properties dialogue box, you can choose your filter and make adjustments. I often use a cooling filter to tone down the warm yellows and red tones in my photos.
 Option 2:
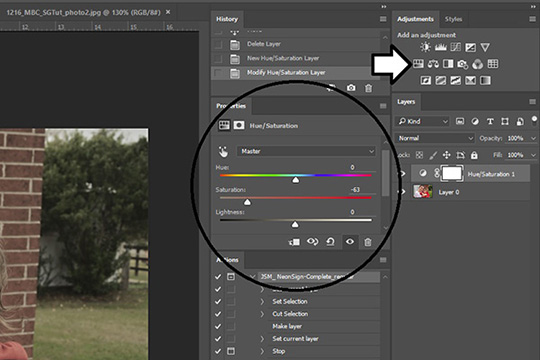
Simply desaturate your photo by adding a Hue/Saturation adjustment layer to your photo and moving the sliders until you get a look you like. This is a good choice when your colors coordinate, but are just a bit too bright for the collection you are using.
 Option 3:
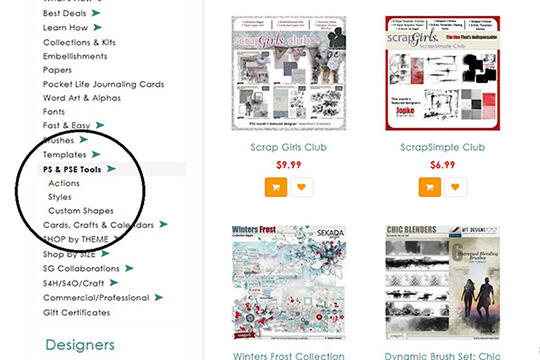
Use any one of the many styles or actions available in the
SG Store. These can be found by clicking on the PS & PSE Tools in the menu bar, and choosing from the drop-down menu.
I use all of these options on my photos, depending on the amount and type of adjustments my photos need. Taking just a few minutes to quickly edit the temperature, saturation, or color on your photos can make a big difference on your layouts. Take a look at what the adjustments produced for this layout – and you can see how the photo and the layout all work together beautifully now!

 Article by Melanie Cockshott


Thanks for this photo adjustment techniques. The photo desatuation made a tremendous difference.