

Have you ever looked at a mini scrapbook kit and thought it was pretty, but wondered if it would be limited in the amount of layouts you could create with it? In this article I’ll show you how to take a mini kit and get the most mileage out of it, by creating not only layouts but other fun stuff!
I find that limiting myself to one kit and maybe a layout template helps me to think outside of the box. Plus, I spend a lot less time searching for things on my computer!
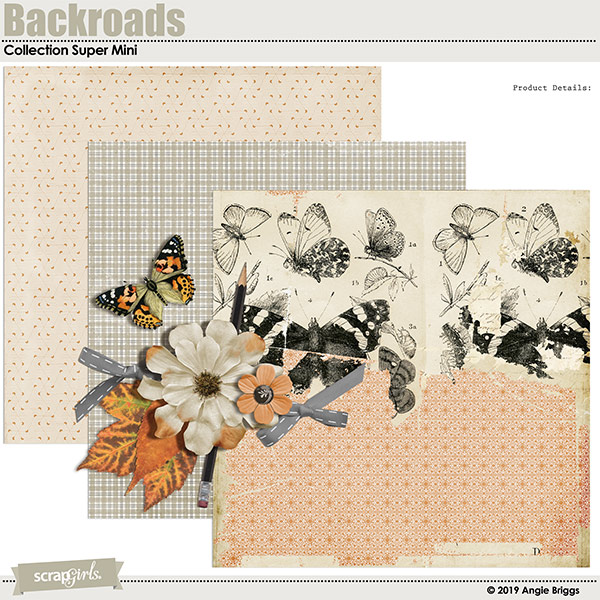
For this article I used Angie Briggs’ Backroads Collection Mini – it caught my eye right off the bat. The vintage butterfly and peach collage paper drew me right in, I love the look of this limited color palette!
To make sure I kept myself on track and didn’t take too long to create my layouts and projects, I used a 12×12″ template from my ScrapSimple Embellishment Templates: Blended Masks. By moving around the elements of the template, I created two unique layouts, and three printable projects!
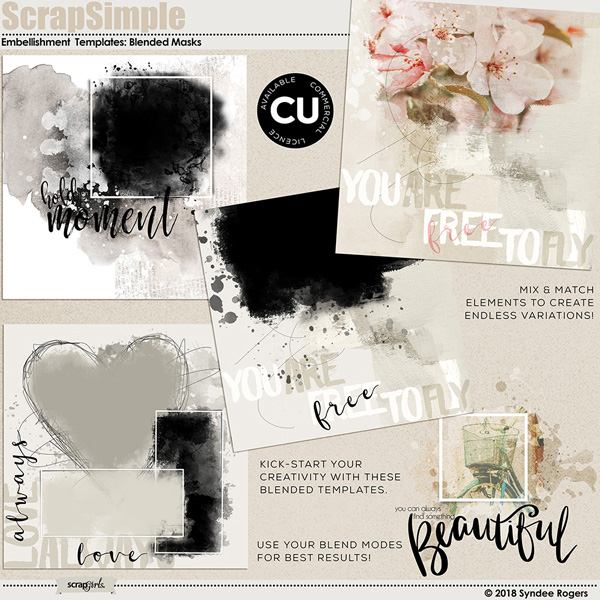
IDEA 1: I used the SNU_SSEmb_BlendedMasks-3.psd template as is for this first layout. The template includes a photo mask and a paint mask. The paint mask is perfect for clipping Angie’s butterfly paper to. I love how this layout turned out – I think it was one of the fastest layouts I’ve created!
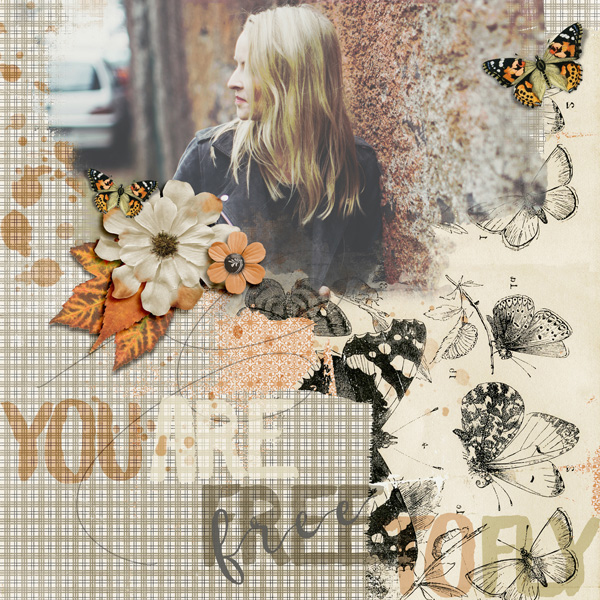
IDEA 2: In this layout I rotated the butterfly paper clockwise and rotated the photo mask counter-clockwise. Then I moved the elements around to create a whole new layout. Another super quick one! I only used two of the four papers in the kit between the two layouts, so I can get a lot more layout mileage out of this kit.

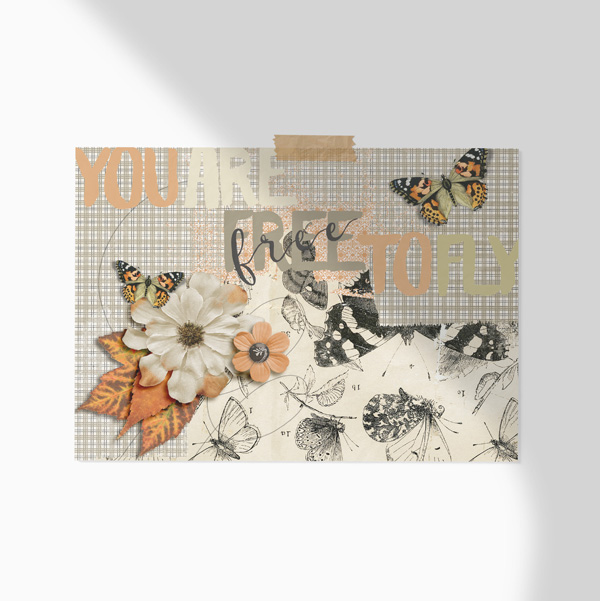
IDEA 3: I am a huge fan of hybrid projects! I don’t even mind the little paper scraps that litter my desk and floor after creating a more ‘hands-on’ project because it fills me with such a sense of accomplishment. When looking at the first layout I thought the quote would lend itself well to a printable wall art I could hang on my wall.
I started with a 11″ x8.5″ blank document and just started dragging the elements over from my layout that I wanted to use. I moved the papers and elements around until it was pleasing to the eye. After saving the layered PSD, I also saved a jpg to print out. So simple and makes a great gift!
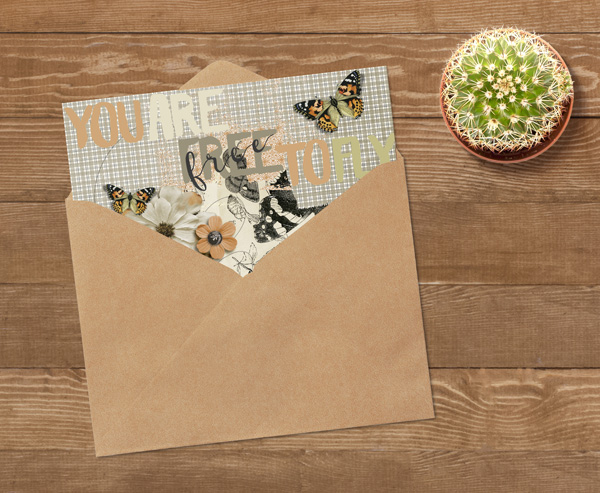
IDEA 4: As I was repurposing the layout for the wall art, I though ‘hey, this would make a great card’. Once you get into the right mindset you’ll be amazed at all the ideas that will start popping up!
For the card, I made a duplicate copy of the wall art psd file and closed the original. I then reduced the size by 50% to make the card 5.5″ x 4.25″. Super quick!
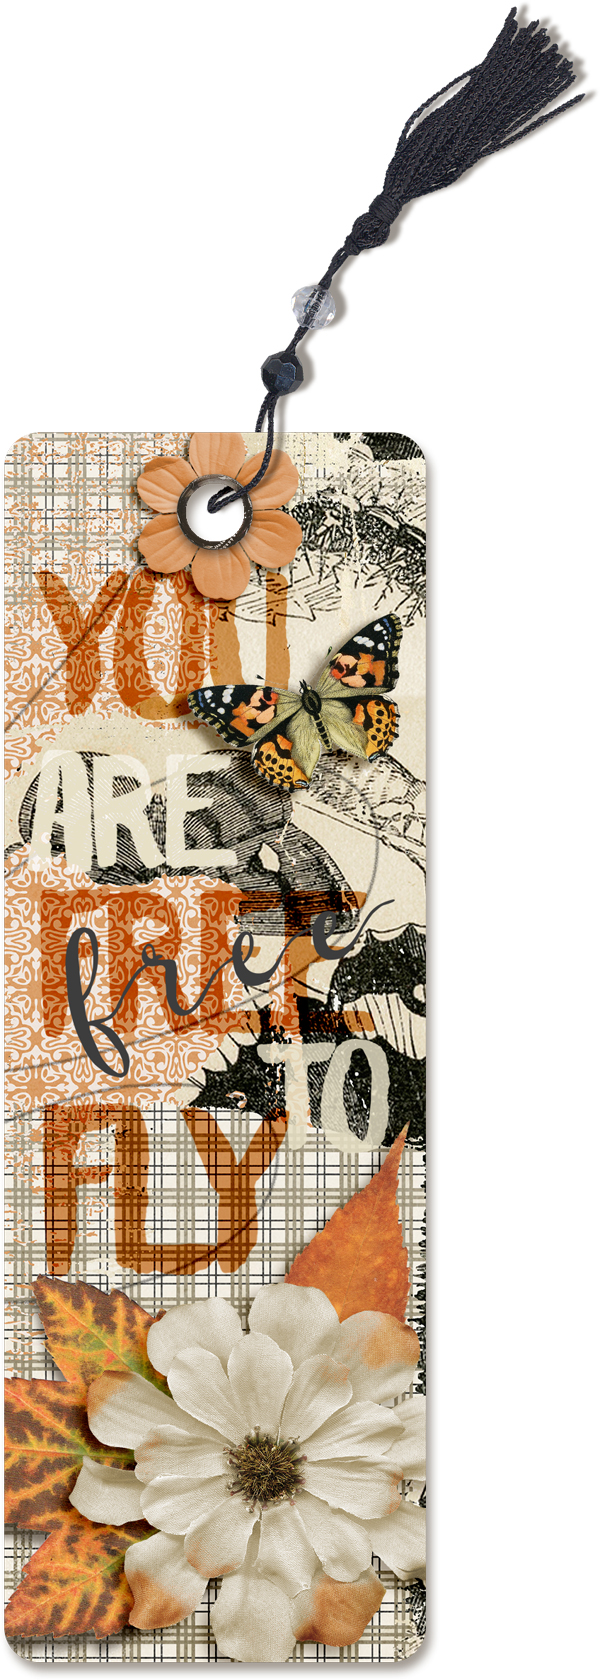
IDEA 5: And finally, I created a printable bookmark. I used the elements and papers from the first layout again and just moved things around until I was pleased with it. I also fiddled a bit with the Blend Modes of the word art. You can add several bookmarks to a letter size document and print out multiple bookmarks at one time. It’s a perfect gift to mail to a friend!
OK. So I totally could have continued on making all matter of fun things but I had to reign myself in at some point! I hope this has you breaking out your mini kits and letting the creativity flow. And if you were eyeing some mini kits but were on the fence – go grab them and get cracking!
Happy creating!


