

Photoshop Elements keeps surprising me with their Guided Edits. There are not only the tried and true edits like cropping, resizing and basic photo editing, but there are a lot of fun and artistic effects to take your photos up a level. In this tutorial we’ll be using the Watercolor Guided Edit. This edit showed up for the first time in Photoshop Elements 2018.
Step 1: Begin in Expert Mode and open a photo (File > Open). Make a duplicate copy (File > Duplicate) and close the original photo.
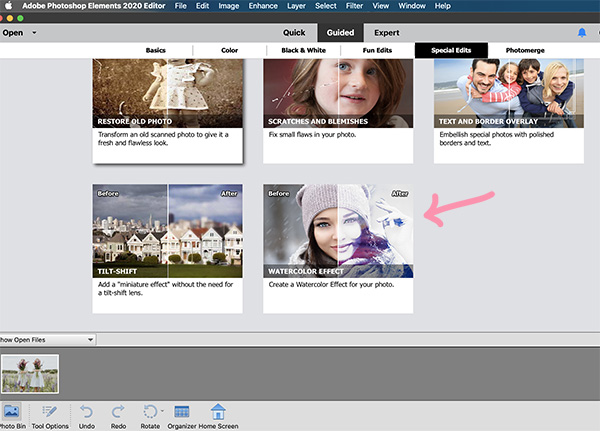
Step 2: Click on the Guided Tab at the top of your Photoshop Elements Window. Then click on the Special Edits tab. Double-click on Watercolor Effect.
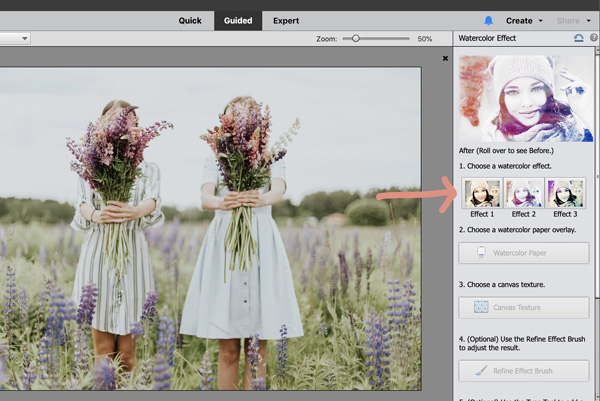
Step 3: As you can see we now have a Watercolor Effect panel on the right side of our workspace. This is where the ‘Guided’ part of guided edits comes in. It’s like a recipe, and walks us through the steps. The first thing we need to do is choose a watercolor effect. Click on Effect 1 (or whichever one you would like).
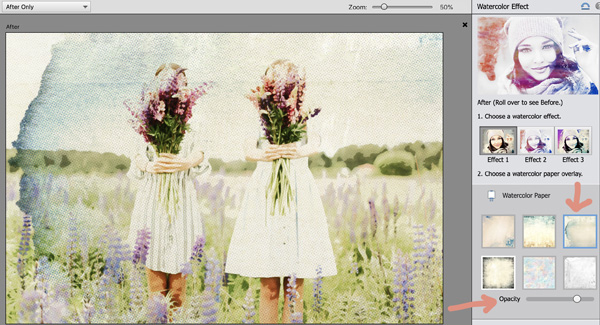
Step 4: Next click on the Watercolor Paper tab and choose a paper.

This is where you can have a lot of fun playing with the different effects! You can also adjust the opacity of the paper, basically the amount of the paper showing through.
Step 5: The next step is to choose a Canvas Texture. There are three to chose from and you can also adjust the intensity of the texture.

Optional: You have the option to refine with the Refine Effect Brush. This tool allows you to add or remove the effect to the area you paint over with the brush. We won’t be using that in this tutorial.
Step 6: Next, we can add text to our image using the Type Tool. Click on the Type Tool button and then choose a Font, Size, Color, and Alignment. I chose the Great Vibes font, set the Size to 129, Color to Black, and clicked on the Center Text icon.

Step 7: Then click on the document where you want to place the text. Type your word or quote. Click the checkmark to commit.

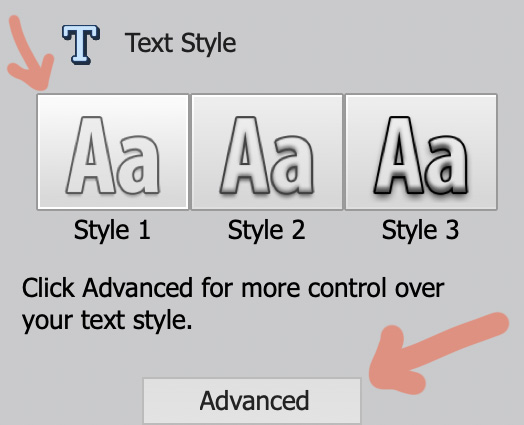
Step 8: We can add a Style to our text by clicking on the Type Style button. And then choose one of the Styles. Next, click on Advanced to modify the style.
Step 9: I added an Outer Glow and used the sliders until I was happy with the effect. Click OK. You can also add a Drop Shadow, Bevel, or Stroke Style.

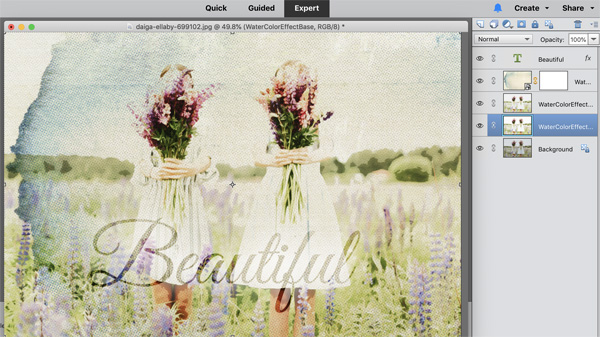
Step 10: Once you are happy with your results, click the Next arrow at the bottom right corner of your Photoshop Elements window. It will now ask you what you would like to do next. You can save it, share it or continue editing it in Quick or Expert Mode. I chose to continue editing in Expert.

Once in Expert Mode you will see that all of the edits happened on their own layers. So you can modify the layers and text, And that’s all there is to it!
Here are a couple examples of some of the other Watercolor Effects possible using this guided edit. This is the perfect guided edit to play and have fun with!


