
Tutorial written using Adobe Photoshop CS5 with Windows 7
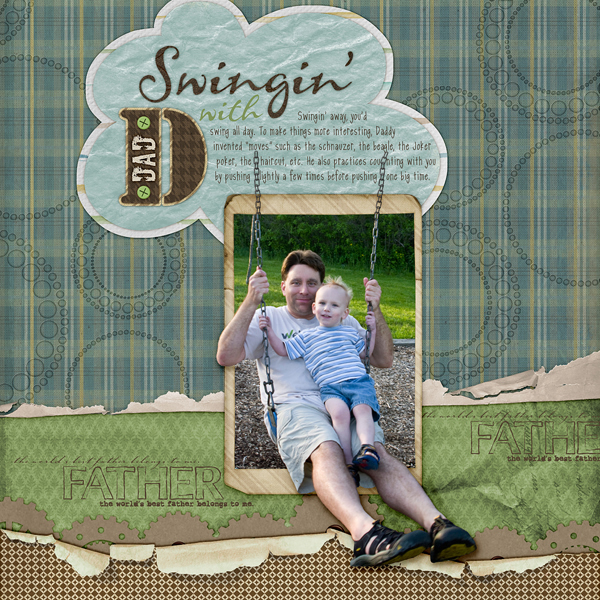
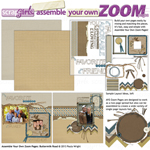
Today, I’m going to show you one of my favorite ways to achieve the out-of-box technique – a way to make portions of your photo extend beyond the frame. This photo of my husband and son on the swing together was just begging to be framed with legs (and as it turned out, also an arm) sticking outside the frame. If you have never worked with layer masks, you’re in for a treat! Let me show you how easy they can be!
First, I duplicated my photo layer by holding down the Alt key while left-clicking on its layer in the Layers Palette, then dragging up just a little to have the copy layer on top of the original layer in the palette. (As with everything in Photoshop/Photoshop Elements, there are many ways to achieve the same thing – many people right-click and choose “Duplicate Layer” in the fly-out menu.)
Next, I linked the layers together to be sure that if I tilted or resized one photo layer, the other layer would follow suit. Finally, for now, I turned off the visibility of the top photo by clicking on the eye icon to the left of that layer.
I chose a frame that coordinates with my layout and brought the frame layer below the photo layers and sized the photo so that the main subject is within the frame. However, I purposefully left my husband’s legs sticking out of the frame. Since the frame did not come with a photo mask layer, I created my own (using the Magic Wand Tool) in the center of the frame (with the Contiguous box checked up in the Options bar), then the Paint Bucket Tool on a new layer above the frame.
Then I clipped the bottom photo layer to the mask layer using Ctrl+Alt+G. At this point, your Layers Palette should look like this, with your photo copy at the top and your frame as the bottom layer:
photo copy
original photo (clipped to the mask)
photo mask
frame
At this point, I turned the visibility back on for the photo copy then lowered the Opacity a bit to be able to see the frame below. In the Layers Palette, I made sure the photo copy layer was active then clicked at the bottom of the Layers Palette on the icon for Layer Mask – a circle within a rectangle. Then I clicked on the layer mask itself, which is the box to the right of that layer in the palette.

Once the layer mask itself was active, I switched to the Brush Tool (shortcut “b”). The rule with layer masks is black conceals, white reveals. So if I painted with black on the layer mask, that part of the photo will be hidden or made invisible. If I accidentally painted too large of an area with black, I simply switched to painting with white, and it would reveal what was hidden. The beauty of a layer mask is that it allows non-destructive editing – if I make a mistake, I can always go back and paint in the opposite color to fix the mistake. Whereas if I use an eraser, the Lasso Tool, and the Delete key, I cannot fix mistakes made several steps ago.
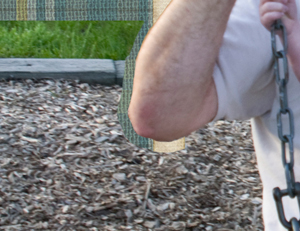
I zoomed in close to really see the edges well and started painting away with a small, hard-edged brush, painting in black. As I went along, I turned the Opacity up or down on the photo copy layer, as needed, so I could see where the edge of the frame is located. The photo below shows that I have outlined the edge of the arm that sticks out over the frame.
Now that I’ve done the edge work there, I can use the right bracket key ] to quickly enlarge my brush and finish up the rest of the work here more quickly. The right bracket key enlarges brushes, and the left bracket reduces brush sizes.
If I have a really large area I need to conceal, I can even use selection tools such as the Rectangular Marquee Tool, then quickly fill with black using the Paint Bucket Tool.
I absolutely love how this layout turned out! The swing evokes motion, and with the arm/legs breaking out of the picture frame, it all makes that motion seem more real, even on a two-dimensional digital scrapbooking layout!
Do you have questions regarding layer masks? Ask away on the Scrap Girls Forum or send me a private message. Layer masks can be used for all sorts of things besides out-of-the-box techniques! See what you can come up with and share with us in the Scrap Girls Gallery!
Digital scrapbooking supplies used:
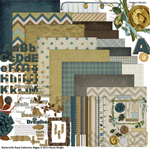

Commercial license versions of ScrapSimple Type Paths: Spring and ScrapSimple Tools – Styles: Emboss and Engrave Super Biggie are also available.

Tutorial written by Cheri Thieleke


