 Article written using Photoshop CS5 with Mac
Without a doubt, the Selective Color Technique is my favorite quick and easy way to change a targeted color in a photo or digital scrapbooking product. Even the slightest alteration in the hue of an object can make the difference between a harmonious digital scrapbooking layout and one that looks just a bit “off.”
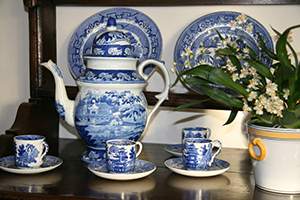
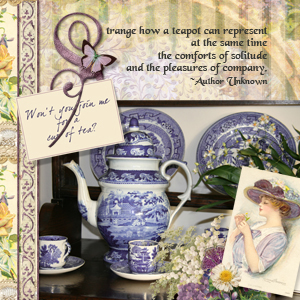
I wanted to use Kerry Veale’s beautiful violet tones found in a number of her collections to create a layout around a photo of my mother’s blue and white teapot and cups. However, the blue was a bit intense and harsh. In just a few steps, I was able to change the blue ever so slightly. Follow along with me.
Here’s the original photograph:
First, use the Lasso Tool to make a rough selection of the color that you want to change. Go to
Layer> Create Adjustment Layer> Hue/Saturation. Near the top of the window, you will see the word
Master. From the drop-down menu, select the color that is closest to the color that you want to change.
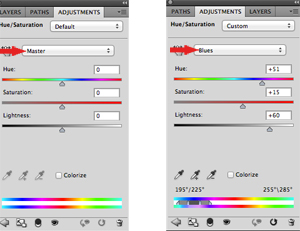
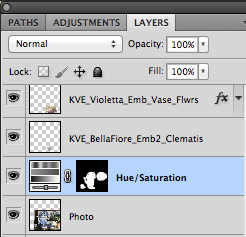
Using your Brush Tool, with the color white selected in the Color Picker Tool, brush over the area that needs altering. Should you accidentally brush an unwanted area, you can easily correct your mistake by brushing over the section using the color black instead of white.
I think you will be pleasantly surprised by the difference a little tweaking of color can make to your layout. A successful digital scrapbooking layout depends on attention to detail. Join me for a cup of tea in the
Scrap Girls Gallery while we admire your layouts using this Color Selection Technique!

Tutorial written by Joyce Schardt


