Audience: Beginners
Category: Photoshop Tips
Operating System: Windows 7
Software: Adobe Photoshop CS5
Nothing says Valentine’s Day than brilliant bursts of rosy color, and the Love So Sweet Collection Biggie by Doris Castle, is bursting with shades of pretty pink, passionate purple, and romantic red.
It’s packed with plenty of inspiring papers, a seemingly endless array of embellishments, frames, accents, and two fun alphas to play with! You’ll find hearts and flowers galore, along with ribbons, lace, and some sweet surprises. What a treat for those Valentine-themed digital scrapbook layouts and cards, or make use of the included JIF Plus layout, which does all the design work for you.
There’s even a mini collection of soft, romantic watercolor papers, one of which I immediately envisioned for the background of my digital layout. Here’s how I gave my layout a romantic feel:

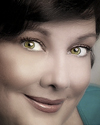
And speaking of romantic, I added a little soft and dreamy touch to my photo. I shot it in the studio, so it was nice and sharp. But when I placed it on the page, I decided to give it a subtle softness to complement the watercolor background.
You don’t need any special actions, overlays, or filters. It’s super easy!
Open the photo you want to work with in Photoshop or Photoshop Elements.
Press Ctrl+J (Mac: Cmd+J) to duplicate the layer.

In the Menu bar, choose Filter > Blur > Gaussian Blur, and set the blur radius to about 15 pixels. Click OK.

In the Blend modes menu at the top of the Layers panel, choose “Screen.” Then adjust the opacity of the layer until the photo looks soft, dreamy, and romantic to you!

This technique works beautifully on almost any photo. It’s particularly nice on wedding photos, floral images, and portraits.
Here’s a little extra tip when you’re working on a portrait like this one where the subject is facing the camera straight on; for a more natural look, return some clarity to any reflective surfaces, mainly the eyes, teeth, and lips.
Click on the Layer Mask icon at the bottom of the Layers panel, and you’ll see the layer mask appear beside the thumbnail on your top layer.
At the bottom of the tool bar, make sure your color chips are set to their default position of black over white.

Get the Brush tool, and in the tool options, select a soft brush, and set the Opacity to about 50%. Tap the left bracket key to make your brush smaller if you need to, and then brush over the inner portion of the eyes (just the irises and whites of the eyes) and just slightly extend out to include the upper eyelashes. (Because my subject had gorgeous, strong eyebrows, I also brushed over those. If you do the same, and the eyebrows look too strong, just reduce the opacity to 25%.)
If you get any of the skin or the brushing looks obvious or unnatural, press X to reverse the color chips to white over black, and brush the skin back in.
Now do the same for the teeth first, and extend out to the lips. Doing this will make the portrait look a bit more natural, while leaving the skin soft and dewy. Again, be careful not to get any of the skin around the mouth. If there is any jewelry in the photo, adjust your brush size accordingly and brush over that as well. You’ll love the difference it makes when the reflective surfaces are unblurred. See how soft and romantic this looks?

Once you’re satisfied with the way your image looks, press Ctrl+Alt+Shift+E (Mac: Cmd+Opt+Shift+E) to merge all your layers together. Save the file as a JPG with a new name, and you’re ready to put it on your layout.

Digital scrapbooking products used:
Tutorial written by Jan Walker


