

Article written using Adobe Photoshop Elements 9 with Windows 7
I have to tell you a secret. Sometimes ScrapSimple digital scrapbook templates intimidate me a little. But I’ve found that when I do use them, they aren’t at all scary or difficult to use. In fact, they are a lot of fun! If you’ve ever felt overwhelmed by any of the ScrapSimple products, never fear. I know where you’re coming from, and I have a fun and easy technique to help you get started with them.
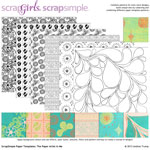
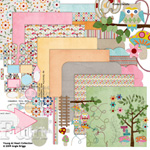
For my technique, you’ll need a ScrapSimple patterned paper template that has the different parts of the pattern broken down into layers. A template that has line-drawn patterns without grunge will work best. I used Paper 1 from theScrapSimple Paper Templates: The Paper Artist in Me set. You will also need some prefinished solid colored papers from one of your favorite digital scrapbook collections. I used papers from Young at Heart Collection Biggie by Angie Briggs.
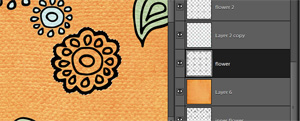
First, open the ScrapSimple paper template in Photoshop Elements. (To keep your original template safe for future use, stop now and save the template with a new file name.) You’ll see lots of individual layers in the Layers Palette. Next, open several solid-colored papers from the collection you chose. You will use these papers to color the template. You will need one solid paper per layer in the template, but you can use the same solid paper more than once.
Click and drag the papers onto the ScrapSimple template document. Arrange them so that each solid paper is directly below the template layer that you want to recolor. For example, I placed an orange paper below the layer named “flower” and a yellow paper below the layer named “inner flower.”

One of the coolest things about Selection Tools is that you can make a selection using one layer, then switch layers and make changes. We are going to make a selection using the ScrapSimple template layers, and then delete parts of the solid paper layers using that selection.
With the top template layer active, use the Magic Wand Tool to make your selection. Make sure the Contiguous box has a check in it. Click anywhere except on or in that layer’s bit of pattern. You should see “marching ants” outlining the edge of the document and the pattern. Switch to the colored paper layer below, and press Delete. The paper will be cut away, leaving just the parts inside the selection. Ctrl+D will get rid of the marching ants.
Repeat these steps with each set of template/solid paper layers until you get to the bottom of the Layers Palette, leaving you with a fully colored template.
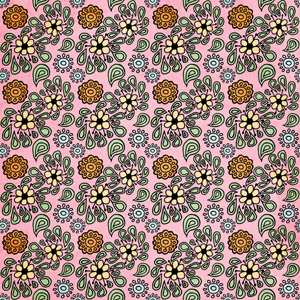
Finally, merge or save as a JPG – and you have a unique paper, ready to use in your project!
I was so excited when I learned this technique for coloring ScrapSimple paper templates! I love being able to create new papers that are perfect for whatever project I’m working on at the moment. If you’ve been nervous about using ScrapSimple products, I highly recommend giving them a whirl! Don’t hesitate to post your template questions in the Scrap Girls Forum, and once you’ve created something unique, be sure to post it in the Scrap Girls Gallery so we can see what you have come up with!
Digital scrapbooking supplies used:


Tutorial written by Anna Mansfield


