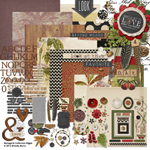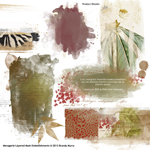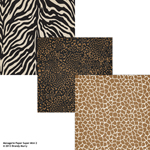
When I first had the privilege of working with Brandy Murry’s Menagerie Collection Biggie, for this month, I was totally excited at the theme and all the earth-tone colors. As the mom of an “animal family,” this collection is heaven! In our house, we have plenty to scrap with all the natural and animal aspects of this digital scrapbook collection – the zebra-striped papers, the giraffe print tape, and the wooden alphas. The embellishment masks are spectacular! The wash effects of the natural elements, combined with the animal prints, make for some very unique and creative embellishment masks!
For this tutorial, I thought I would show you a new way to use an embellishment mask from the club. This month’s designer, Brandy Murry, has creatively and thoughtfully provided us with PSD versions of the masks. One of my favorite ways to use a mask is to clip the photo onto it, so the photo takes on the shape of the mask. Another application of the mask is to use the entire mask as a matte underneath your photo or embellishment cluster. However, these masks, with all the layers, textures, and opacities, were just begging for something different.
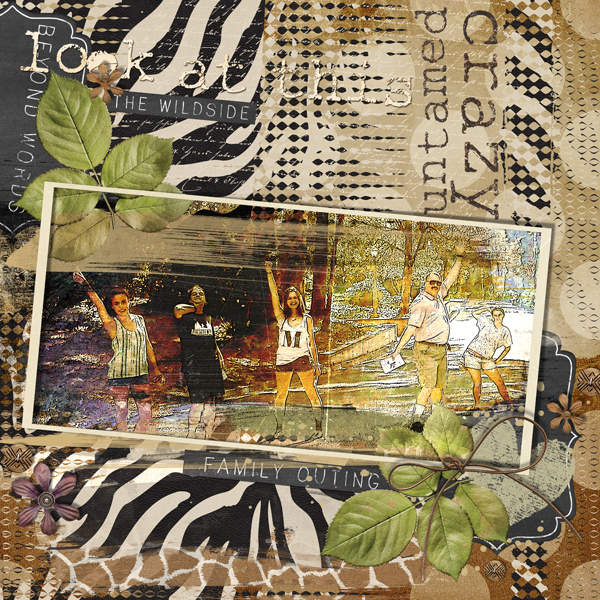
Let’s break up the embellishment mask into its layers and see what we can come up with. I’m using a fun photo of a day at our local zoo with our foreign exchange students last summer.
For starters, I opened the selected mask file from Menagerie Layered Mask Embellishments. I chose mask #4 with the zebra stripe along the bottom. When you open the file in your software, you will see the mask is comprised of five layers. With all the layers of the mask locked together, bring them onto your layout. The largest white portion of the mask seemed like it wanted the picture clipped to it, but my picture, with its long, narrow aspect ratio, did not fit correctly onto that portion of the mask. I enlarged the entire mask grouping, but it still didn’t look right. The simple solution was to not even use that portion of the mask. So, I clicked the eye icon to the left of that layer to turn off the visibility of the mask layer. One of the beauties of working with layers is that all the layers don’t need to be used.
Next, let’s place the photo on the layout without clipping it to the mask. The remaining mask grouping has now become the matte under the photo. It can be moved around as a whole to emphasize part or all of the photo.
Now is when the fun starts. Simply start rearranging the layer orders of the embellishment mask. You can place some on top of your photo, beside your photo, or even across the page from your photo. In my layout, most layers were left under the photo to remain as the matte. One layer, however, the tan paint wash layer of the mask, was placed on top of the photo. The vision was that of a broad paint brush stroke over the top of the photo. That looked well enough, so then an embellishment was added to two of the corners on top of the paint wash, and a frame was placed over that.
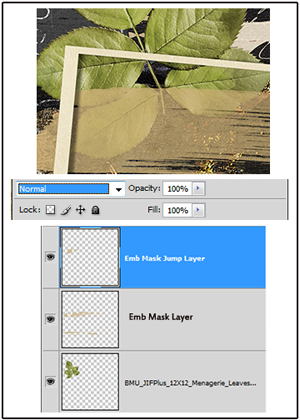
The Layers Palette for this part of the layout looked like this:

The position of the embellishment on top of the paint wash looked fine. However, as my digital scrapbook layout was taking shape, I decided the paint wash layer needed to be over the leaf layer to look as though the broad stroke of paint was applied after the leaf was laid down. Simply enough, I rearranged the layers so that the paint wash layer was over the leaf layer like this:

This wasn’t quite the look I was aiming for either. The detail of the leaf and leaf shadow is lost. The paint wash where it intersects with the leaf doesn’t look natural at all. Time to do some Photoshop magic on that piece of mask to gain back the realism and get the natural effect that I was after!
To gain realism of the paint wash on the leaf, let’s take the following steps:
First, with the leaf layer highlighted, Ctrl+Click on the thumbnail of the layer to activate the “marching ants” around the leaf.
Then, with the “marching ants” of the leaf still active, activate the Emb Mask layer.
Then, use the keyboard command Shift+Ctrl+J. This creates what I call a “jump layer.”
The “jumped” piece is a piece of the embellishment mask layer, cut out and placed on its own layer, in the exact shape of the “marching ants” from the leaf layer. Whew! Say that three times fast, huh?
With the “marching ants” turned off, your Layers Palette will look like this after you have taken this step: (I renamed the layers for the purpose of this tutorial.)
Initially, there doesn’t seem to be any apparent change when you first look at that paint wash piece over the leaf. What was the Emb Mask layer (the paint wash) is now two layers, and each can be managed separately from one another. Therefore, the Blending Mode on the “Emb Mask Jump Layer” was changed until the look of the paint on the leaf looked realistic. The Blending Mode that achieved that in this case was “Hue.” The Blending Mode of the original portion of Emb Mask layer was left at “Normal.”
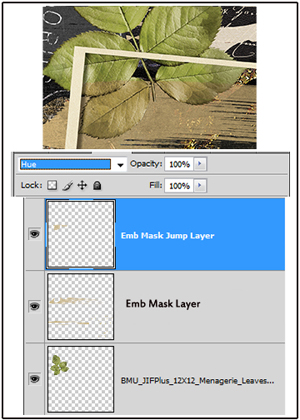
See how dramatic the difference is? It allows the “paint” on the leaf to look like it is part of the leaf. It allows the veins and the detail of the leaf to show through the paint, and the shadow below the leaf can again be seen. This looks as though the paint wash was brushed across the photo after the leaf was laid down. A simple change of the Blending Mode on that one small piece of embellishment mask created a very realistic effect on this highly digital page.
Photoshop has once again done its magic! Small but simple changes can have subtly dramatic effects in your digital scrapbooking. By breaking up or turning off layers of your embellishment masks, you can achieve additional creative effects beyond using them whole. Think of how this might extend your scrap supply stash! In addition, Blending Modes are your friend and using them can create rich effects in your digital scrapbooking layouts. I hope this article inspires you to try your hand at different techniques and using Blending Modes with your embellishments masks!
After you give some of these techniques a whirl, be sure to post your layouts in the Scrap Girls Gallery so we can enjoy your creativity, too!
Digital scrapbooking products used: