

Tutorial written in Adobe Photoshop CS5 on a Mac running OS X Lion
What are Blending Modes? What do they do?
These are questions I run into frequently. Today I’m going to try and answer those questions for you. There is a lot of information out there about Blending Modes, and a lot of it I find to be confusing and way too much information for what I want to know. I’m going to keep this on the simple and hopefully easy-to-understand side! I think you will find that you will use the same Blending Modes over and over, while you won’t bother with some at all.
So what are Blending Modes exactly?
Basically, Blending Modes give us different options for how our layers interact or blend with each other.
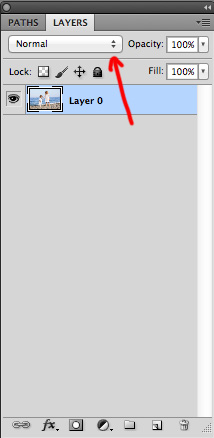
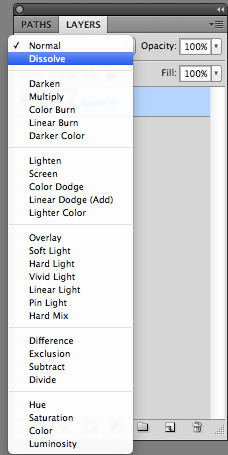
The Blending Modes live in your Layers Palette; notice the little arrows next to Normal in the upper left corner of your Layers Palette. If you click on the arrows, the Blending Mode drop-down menu will appear which contains 25 different blending options.
When using Blending Modes on an image, it cannot be a background or locked layer. The layer below the image you are working with can be a locked layer. In the examples below, I placed a photo on top of a couple of cardstock papers.
If you would like to follow along with me, open up a background paper and a photo, then drag your photo on top of your paper.

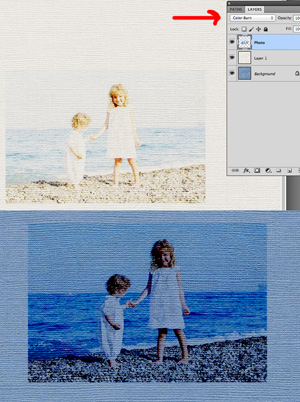
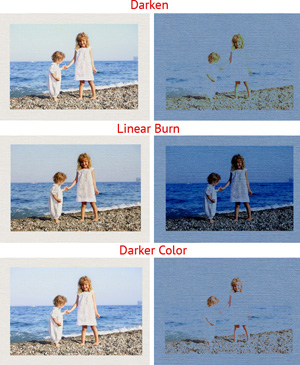
The examples below are the results of using the “Multiply” mode – first, on an off-white paper and then on a blue paper. Notice how different the results are. Remember that the “Multiply” mode belongs in the Darkening Modes.
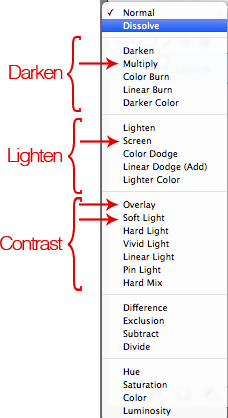
Here are a few more examples of the Darkening Blending Modes and what effects they have on white and blue backgrounds. It’s hard to see in these examples, but on the white samples, the texture of the paper shows through and gives it a nice effect.
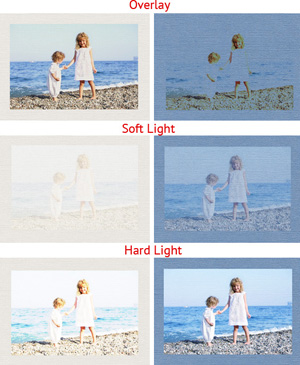
The next set of examples contains Blending Modes that I use frequently – “Overlay,” “Soft Light,” and “Hard Light.” These Blending Modes belong in the Lightening section.
I used the “Pin Light” Blending Mode in the example below; it gives the photo an almost painted look on light colored papers.
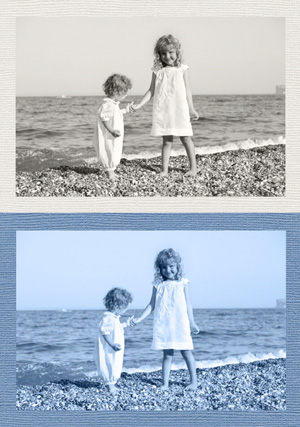
For the final sample, I used the “Luminosity” Blending Mode, and as you can see, it turns the photo black and white on top of the white paper, while the photo on the blue paper takes on a blue cast. This is where it’s very apparent that the Blending Modes interact with the layer below.
When using Blending Modes, you will find that experimentation is fun and you never know what you’re going to come up with! The colors in the photo (or other elements that you blend with the layer below) will change depending on their colors, so there are endless combinations and effects!
You can cycle through the Blending Modes while you are trying to decide on which one to use by holding down the Shift and hitting the + (plus) to move to the next Blending Modes or Shift – (minus) to get to the previous Blending Mode.
Now that you know some of the basics, I hope you have fun playing – and creating – with Blending Modes!


