• Facebook
  • Twitter
  • Google
ScrapGirls
  • SHOP
  • LEARN HOW
  • BLOG
  • FORUM
  • CHAT
  • CONTACT US
Select Page
Home / All Posts / A Closer Look at Selection Tools in PSE: The Marquee Tool

A Closer Look at Selection Tools in PSE: The Marquee Tool

Selection Tools in Photoshop Elements - Marquee Tool - tutorial intro banner

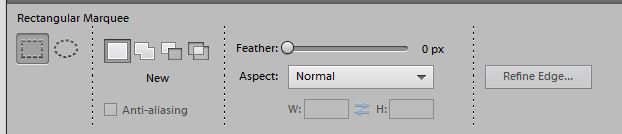
In this tutorial we are going to look at the Marquee tool to discover what it does and when to use it. Let’s start by looking at where the Selection Tools are found. In PSE they are found under the heading ‘Select’ on the left hand side menu.

selection tools in pse

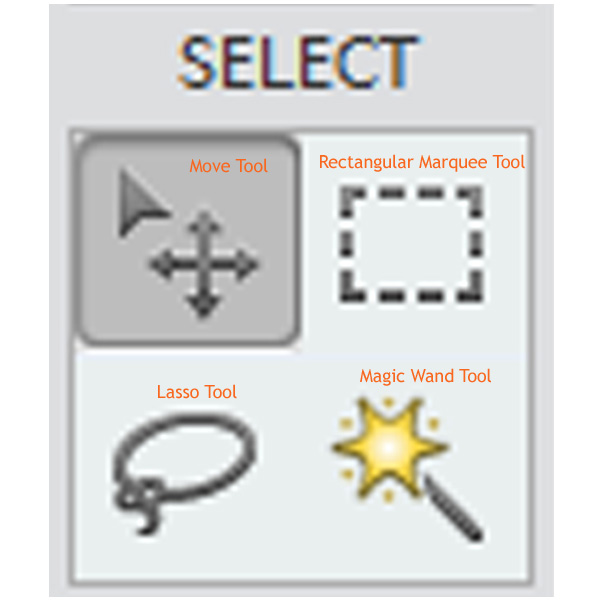
My screenshot shows the Move Tool, the Rectangular Marquee Tool, the Lasso Tool and the Magic Wand Tool.  Under each of these buttons are grouped tools with similar uses.

This tutorial takes a closer look at the Rectangular Marquee Tool (and it’s counterpart the Elliptical Marquee Tool).  This is the tool I use on most layouts as it allows me to make rectangular (square if I hold down Shift whilst selecting) selections merely by dragging out a box.  It also has other uses.  Let’s have a look at these various uses in practice:

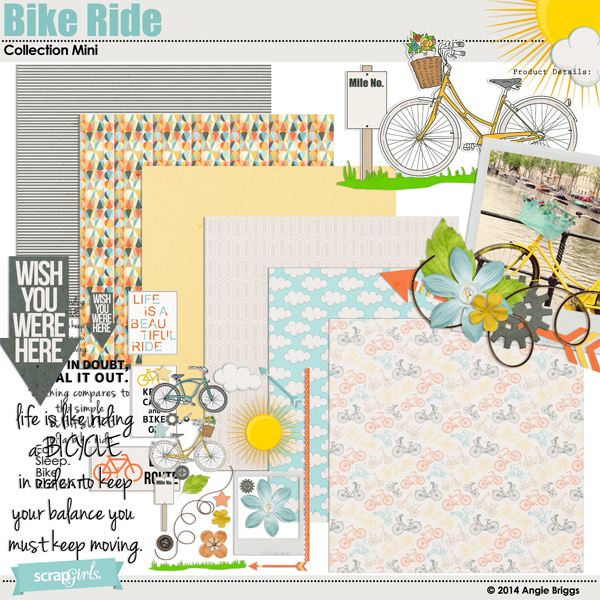
On my layout I used the Rectangular Lasso Tool many times.

A digital scrapbooking layout made in photoshop elements

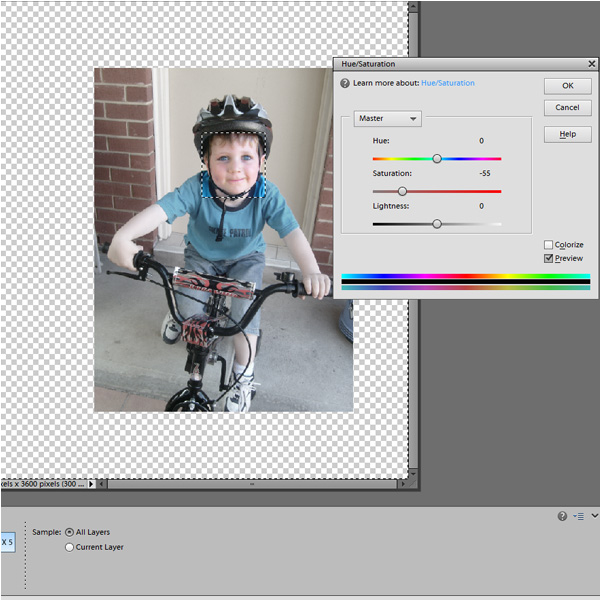
Firstly, I edited my photo, drawing a close cropped square around Callan’s face where I wanted the focus kept.  But I did not want to brighten his face anymore, I wanted to reduce the colour of the background.  This is done by using Select>Inverse, which changes my selection to ALL areas OUTSIDE of my original selection on the same layer.  The keyboard shortcut for Select>Inverse is Shift+Control+I on a PC (Mac: Shift+Cmd+I).

With the inverse selected, I simply desaturated the background until the colours were not so dominant, and attention was subtly kept on his face.

I could have used the Elliptical Marquee Tool if I were being more precise but this worked well for what I wanted.

desaturate in pse

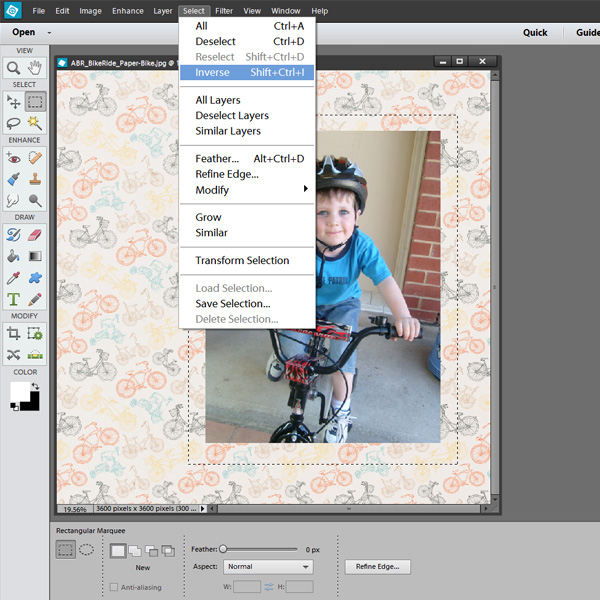
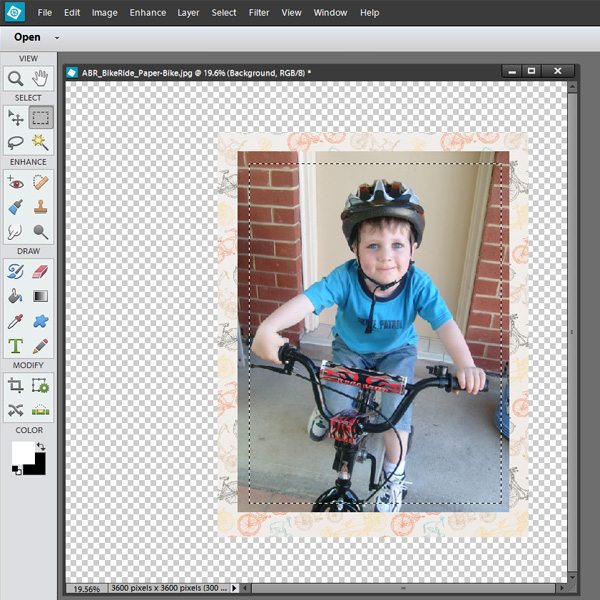
I then used the same simple technique to draw a rectangle around my photo, and making sure I was on the background paper layer, chose Select>Inverse and deleted the part I did not want.

selecting a rectangle with the marquee tool
Next I drew out a smaller rectangle from this newly cropped paper and deleted the interior section, giving me a unique and perfectly sized frame.  I can now move my photo layer underneath the frame layer.

add a frame
If you forget to check your layers (and it is easy to do!), simply undo Ctrl +Z on a PC (Mac: Cmd+Z) and correct.

Now onto the rest of my page.  After lining up my scalloped borders and recoloring them, I used the same Rectangular Marquee Tool to draw a small rectangle, and then selected each layer separately and erased the ends so that they all ended flush on the right hand side.  This was purely for visual interest but it was so quick and easy to do.

adding borders
Finally, I created an area for my journaling by drawing a small rectangle on a new blank layer and filling it using the Paint Bucket Tool.  It is the right size and shape for my frame.  I could just as easily have filled it with a style or used brushes to decorate, making my own journaling card, rather than a label.

adding labels
The Tool Options menu at the bottom of the screen houses the variations you can make to each tool.  The alternate to the Rectangular Marquee Tool is the Elliptical Marquee Tool, which is used for making oval (or by holding down the shift key whilst selecting, circular) selections.  It works in exactly the same way as the Rectangular tool and is interchangeable with the Rectangular Marquee Tool in its menu location.  The left hand side menu shows the last tool used, so sometimes you may see a hashed ellipse rather than a rectangle.

elliptical selection tool
When making simple selections with the Marquee Tool you may sometimes need to change the Feather setting.  When making a selection with a normal hard edge this setting will be at 0.  If you need a softer edge, such as when you want a selection to transition better (for example: I could have done this with Callan’s face in my layout) you may decide to feather the edge.  This removes random pixels so that the edge is less obvious and the transition softer and less intrusive.The other settings can be ignored for now.  These are for use with more advanced selections we will be covering in later tutorials.

I hope you will try the Rectangular and Elliptical Marquee Tools and discover just how quick and easy they are to use for editing and cropping photos, and even making custom embellishments.

Digital Scrapbooking Supplies Used:

Bike Ride mini digital scrapbooking kit

Bike Ride Collection Mini

Jody West
Article written by Jody West

Welcome to the SG Design Shop Blog - where modern memory keeping meets heritage scrapbooking! Here you'll find digital products and all the inspiration you need to complete your projects.

subscribe-imgTo our Free Newsletter

Search the blog

Favorite Categories


Learn How Sidebar Badge
Tutorials Sidebar Badge
hybrid projects sidebar button
art journaling sidebar button
mobile scrapping sidebar button
planners sidebar button

Connect with us

SG Facebook Image

Partners

Qwiklearn -The easiest way to learn digital scrapbooking!

Adobe Photoshop Affiliate Badge

Links

  • About Us
  • Storefront
  • Terms of Use
  • FAQs

HELP

  • Contact Us
  • Email

FOLLOW US


© 2023 Scrap Girls - All Rights Reserved.Privacy PolicySite Map