
While this Photoshop tool may sound like it belongs in a rodeo, it comes in really handy for making selections and rounding up pixels. It’s truly one of the more versatile selection tools in Photoshop. This tutorial will show the basics of using the Lasso tool and demonstrate a few ways you can use it for your scrapbook pages.
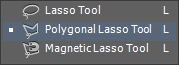
In Photoshop, the Lasso tool nests with two other related tools on the tool bar. When you right-click on the tool, you will see three options: the Lasso tool, the Polygonal Lasso tool, and the Magnetic Lasso tool.
How to Use this Tool:
The Lasso tool allows you to click and draw a selection using your mouse, touch pad, or tablet pen. Click and hold as you draw the selection. Make sure you close the selection at the start point or Photoshop will do it for you when you release the mouse.
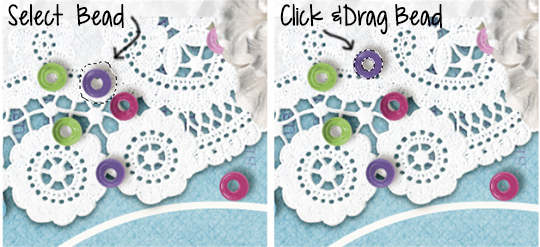
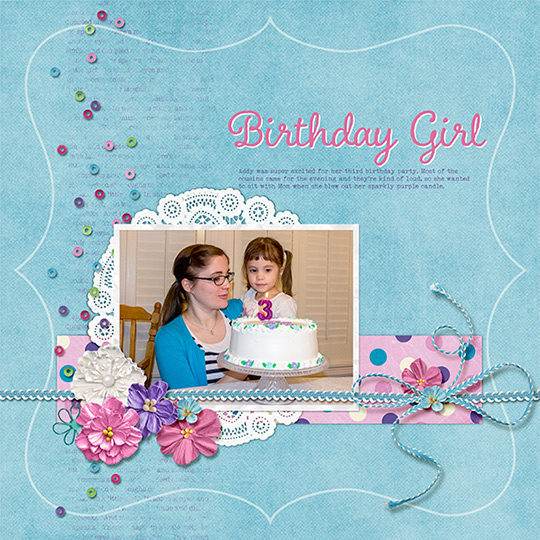
For the example below, I used the Lasso tool to select and move single beads in a bead scatter on my layout. When I duplicated the bead spill to make a long border, there were several places where the beads ended up too close together
How to Use this Tool:
To move a single bead, select the correct bead spill layer in the Layers panel and then draw a lasso around the bead you would like to move. Switch to the Move tool (Shortcut: V) and then click and drag the bead where you would like it on your page.
You can also create more beads for this spill by creating a new layer with the selection (Control-J) and moving the new bead to the desired spot.
Note: While this technique works well on transparent (png) images, it won’t work on a jpg.
Girl Joy Collection Biggie
ScrapSimple Embellishment Templates: Paper Flowers
Color My Heart Collection Biggie
ScrapSimple Paper Templates: Stackers Biggie
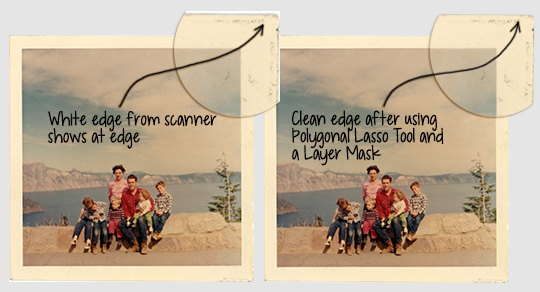
The Polygonal Lasso tool, as the name implies, is used to create polygons. This tool lets you set points as you click, creating straight lines between each point. In the example below, I used the Polygonal Lasso tool to trim the white background from a scanned image. I wanted keep the photo’s original white border and take advantage of its aged edges.
How to Use this Tool:
To create the selection, set points along the straight edges as often as needed. If the edges aren’t entirely straight, you may need to set extra points along the straight sides. For the curved corners, just put the points much closer together. Once you have the entire edge of the photo border selected, created a layer mask or invert the selection and delete the excess.
Tip: Sometimes the lasso tools can be a bit tricky. If you try to change tools, it often creates selection points all over your page. If you set down points in places you don’t want them, simply use the Delete or Backspace keys to delete the last points made. This works for both the Polygonal and Magnetic Lasso tools.

GoodBye Summer Collection
GoodBye Summer Addon Paper
Traveler’s Notebook Collection
The Magnetic Lasso tool snaps to the nearest borders as you trace your image and sets anchor points to outline your area. This is really handy for extracting images. Keep in mind that you’ll get a better selection if there is contrast between your image and the background.
How to Use this Tool:
In the first image below, you can see that the first selection missed a few small areas. You can refine the selection using the Add to Selection and Subtract from Selection settings on the top toolbar. Alternately, you can hold down the Shift key to add to your selection or hold down the Alt key to subtract from it. Once you have a good selection around your image, simply use it to create a layer mask.

![]()
 Tutorial written by April Martell


