Tutorial created using Photoshop CS5 with Windows 7
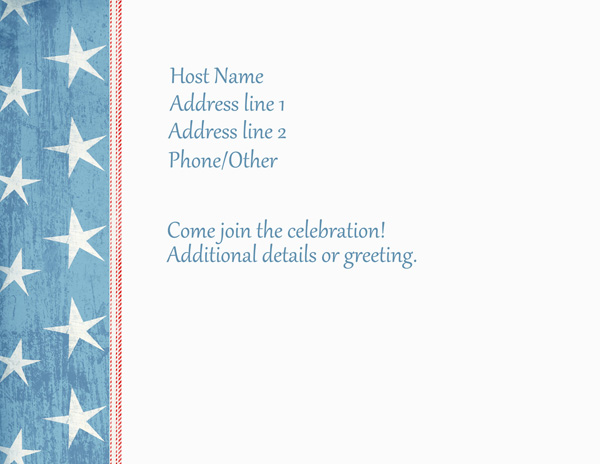
Postcards are a fun, easy, and an inexpensive way to send out an invitation. I am making this invitation for my upcoming 4th of July party. Today I will show you just how quick and easy it is to create this printable invitation from scratch using the digital scrapbooking collection America Collection Mini.
The first thing you should know is that to qualify for the First Class Mail postcard price, your postcard must be rectangular, at least 3.5 inches high, 5 inches long, 0.007 inches thick and no more than 4.25 inches high, 6 inches long, and 0.016 inches thick.
Then you will need to purchase glossy postcard stock with perforations. Often you will find, for example, 5.5×4.25-inch blank postcards are available four-up (four per page) and are printed on an 8.5×11-inch paper. This is the size postcard I will be using for this tutorial.
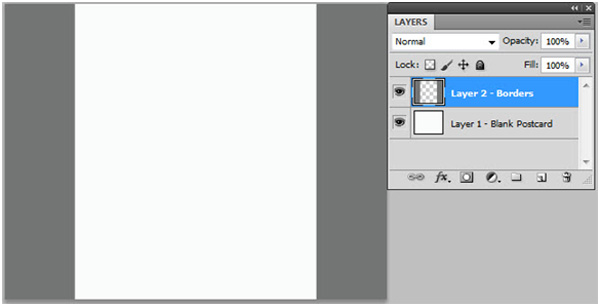
And now the fun begins! Start by opening up a document the size of your postcard and adding two rectangles at either end. I made mine one inch thick and the length of the postcard. Fill in the rectangles with a color by going to Layer> New Fill Layer> Solid Color and clicking OK, and then selecting your color by using the Color Picker Tool and clicking OK again. This will fill the adjustment layer with the current foreground color. Although in this case, the color doesn’t matter because we are going to cover it.
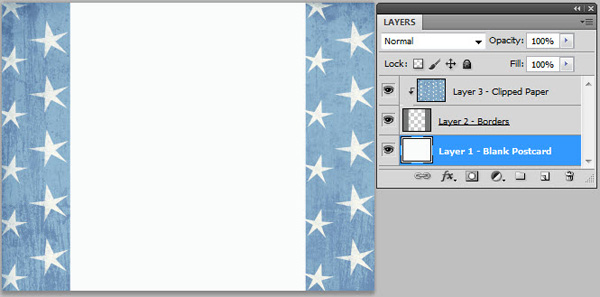
Next, I chose this great blue-and-white-star paper from the America Collection Mini to use for the rectangular border trim.
Now, simply line up your paper over one of the rectangles and click Shift+Ctrl+G (or Cmd+Opt+G on a Mac) to clip the paper layer down onto the rectangle object. Then repeat on the other side.
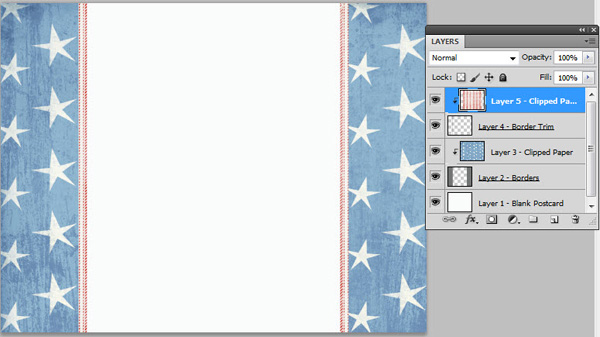
I have decided to add a trim to the rectangular border as well.
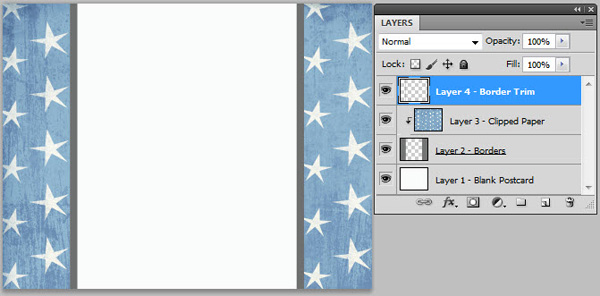
After adding a thinner rectangular layer to the inside of the border trims, I chose a different paper from the America Collection Mini and applied the same process as above to clip the paper to the new trim objects I made.
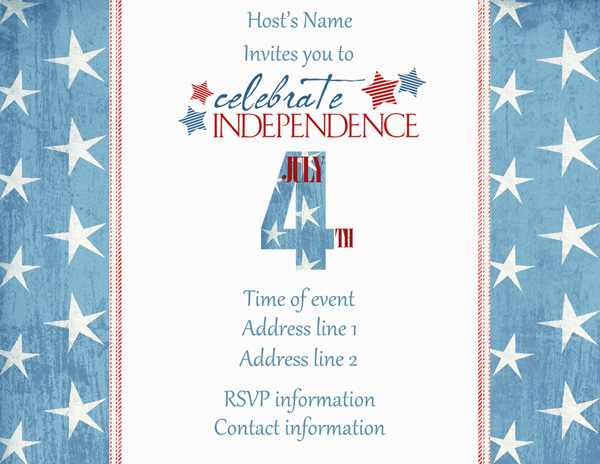
Next, I selected some fun word art from the America Collection Mini and used my Type Tool to write out all the party details on the front and back of the postcard.
And there you have it! In just four easy steps, you’ve created this great printable invitation that is fun, festive, and inexpensive to mail.
Printable postcard by Cindy Rohrbough
Ingredients:
America Collection Mini
http://store.scrapgirls.com/product/9787/

Tutorial written by Cindy Rohrbough
https://www.scrapgirls.com/AboutUs/AU_CindyRohrbough.html

