

Using Blending Modes
Tutorial created using Adobe Photoshop CS5
I love working with Blending modes. I love the creativity and freedom they give you, and the fact that no matter what combination of modes and papers you use, you will never get the same look twice.
Recently, while meeting up with some other Scrap Girls from the Midwest area, I was playing around with Blending modes while working on a layout, and a small grouping gathered and watched what I was doing. It was at that time I realized that while Blending modes are something that all Adobe users have access to, but not everyone takes the time to actually play with them or understands the power that they hold.
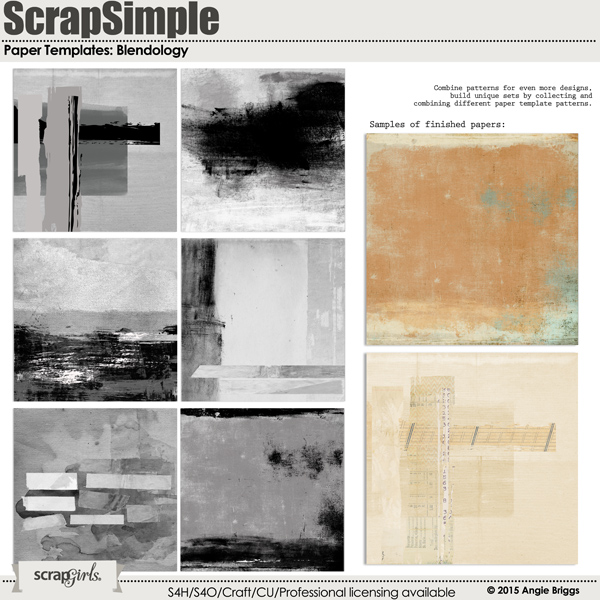
So I wanted to share with you a tutorial I did for my ScrapSimple club Blendology. This tutorial will share some of the Basic 101 steps on using Blending Modes. Once you’ve learned some of the basics, you’ll be amazed at the different things you can use them for. For this tutorial, I’ll be using the ScrapSimple Paper Templates: Blendology and the Captured Collection by Brandy Murry.
The first thing I need to show you, if you’re not familiar with Blending modes, is where they are located. They can be found in the Layers palette to the left of the Opacity drop-down menu.
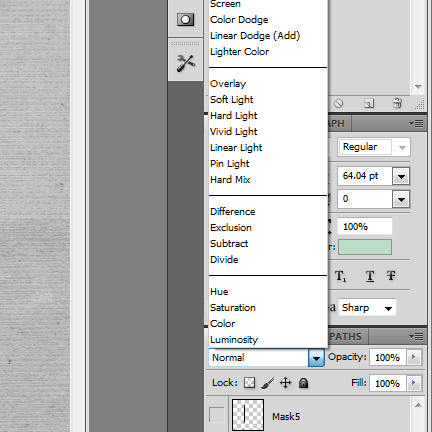 The key to understanding Blending modes is to know what they do to layers. When you apply a Blending mode to one layer, it actually affects the layer below it. It interacts with the layer under it. This differs from just changing the opacity or fill because Blending modes allow the texture of the two layers to still be shown and to blend with each other.
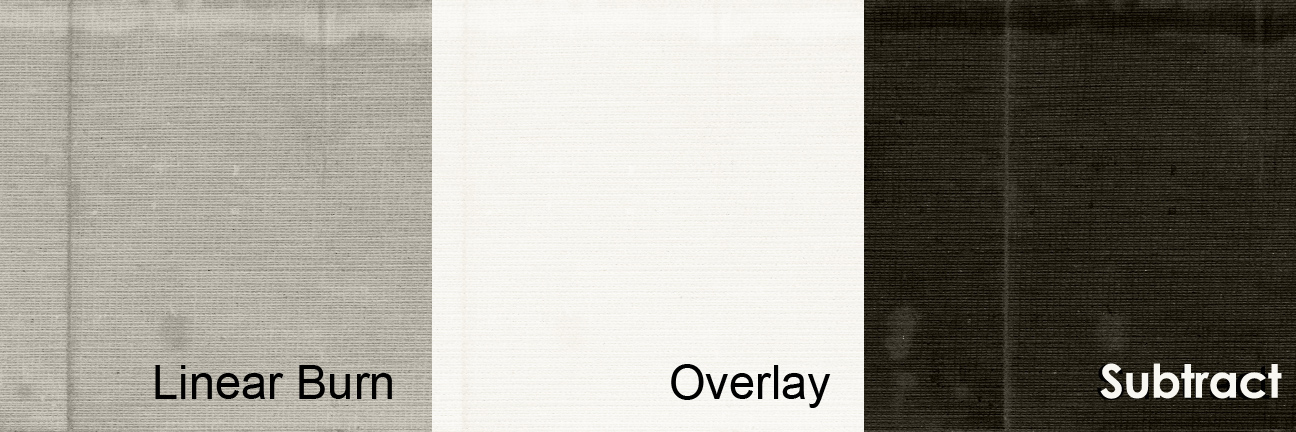
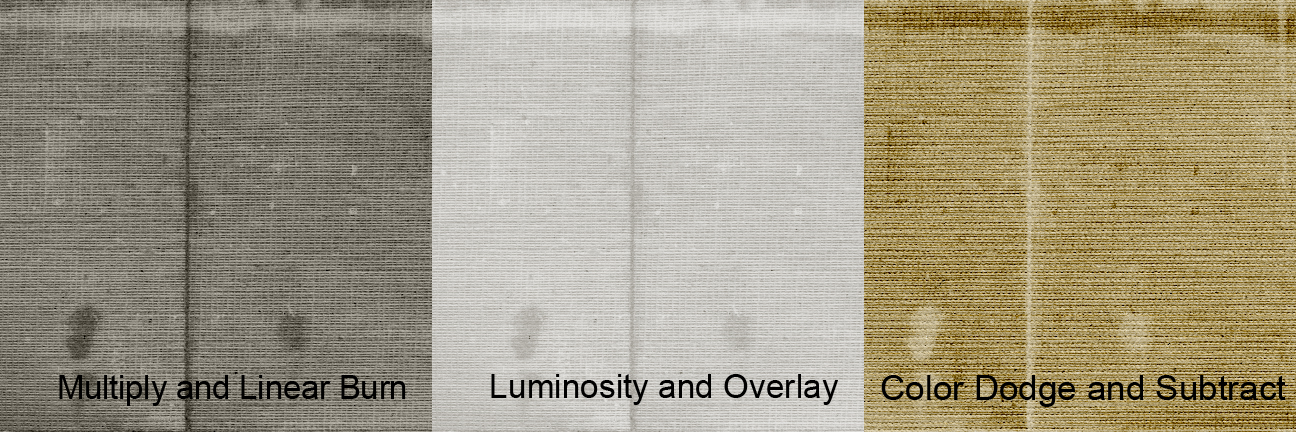
Let me show you a quick example of this. We’re starting with the Ivory paper from the Captured Collection on the bottom layer and the background from ABR_SSPaper_Blendology1 on the layer above, and we’ll apply the Blending mode to this layer. Below are three different looks we can get with different modes.
Sometimes I find that after I’ve gone through all my Blending modes, I still can’t find a look I like. Some modes may be too dark, while others are too light or just not the look I want. This is when the best thing to do is just play around with stacking Blending modes!
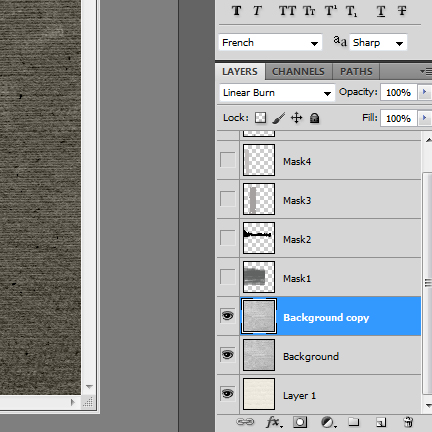
For the samples below, again we’ll be using the Ivory paper from the Captured Collection on the bottom layer and the background from ABR_SSPaper_Blendology1 on the layer above. Only this time, we’ll have two layers of the background from ABR_SSPaper_Blendology1 with a different Blending mode on each. If you’re trying this on your own, your Layers palette could look similar to this:
Here are three examples of adding two Blending modes to one paper:
Sometimes you still can’t get the look you’d like, so you just need to play a little bit more. The next thing you can do is add adjustment layers to your paper or mask.
To do this in Photoshop, choose the Adjustment Layer icon in your Layers palette.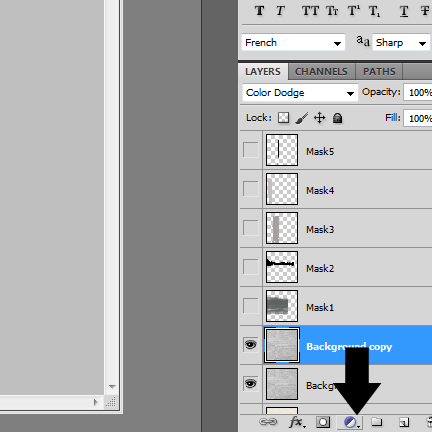
Now, play around with the different options. For example, when you choose Hue/Saturation, the following box will come up: 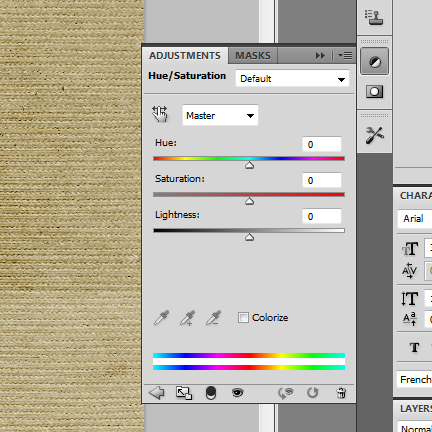
Playing with these sliders will allow you to change the color of the papers below it.
Here is an example of a new paper I created using the sliders: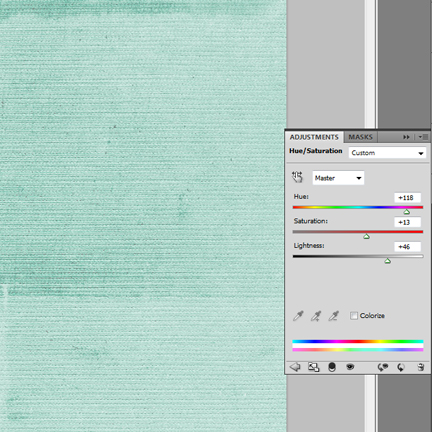
One thing to keep in mind when adding adjustment layers. When you are applying them to something other than a full background, remember to clip them to the layer you are applying it to. That way it doesn’t affect everything under it.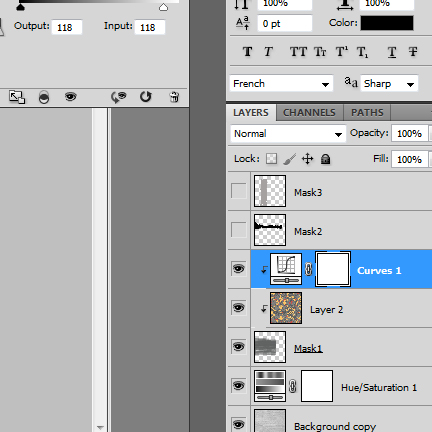
In Photoshop Elements, you still have many of the same options. This is a screenshot in Photoshop Elements 11 which shows where to find the Adjustment Layers option. This location could vary depending on the version you are running.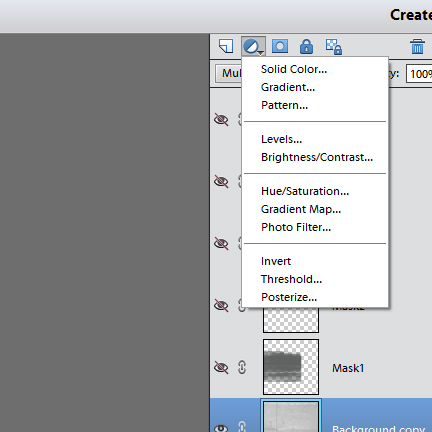
Keep in mind that when you combine Blending modes and/or adjustment layers, what you end up with on one combination of papers may be awesome – but it may not work with another combination of papers. That’s where the adventure is – you just keep working and trying new things because there’s no right or wrong way when you’re playing with Blending modes!
Hopefully, this gives you a basic idea of working with Blending modes, and perhaps you learned a few tricks you hadn’t tried before.
 Tutorial written by Angie Briggs


THANK YOU THANK YOU THANK YOU!!!!!! This tutorial was EXACTLY the guidance I needed to advance to the next level! Thank you SO MUCH!!!
Glad it helped you out!
Thank you for this great tutorial ! Just what I was looking for as I do the scrapbook my trip to Europe!