
My dad was a photographer, so our entire family grew up in front of the camera. But before his kids came along, Dad had his camera during WWII and even before that. As we were growing up, we all watched Dad sort his slides with a light table as each slide was perfectly catalogued and filed away in a cigar box. Hundreds of them. Thousands of them. Now that he is gone, we are left with a closet full of Dad’s work. We are very thankful for each and every slide. However, getting all of those photographs and slides into a digital format has been quite a task. Every time I go back home, I scan a few more. My last trip netted over 500 scans!
Once we got home and I downloaded all the scanned images, it was clear that not all of the images were perfectly scanned. Some were blurred, and some had dust specks on them. Since we have so many boxes of slides to go through, it would be difficult for me to go back and find the slide to re-scan it. I decided the next best option was right at my finger tips – that’s right, Photoshop to the rescue!

Luckily, within Photoshop, there are several tools we can use to repair photos easily. Today, I am going to show you how to use the Spot Healing Brush tool. You will be amazed at how easy and effective this tool is for fixing small areas on your photographs.
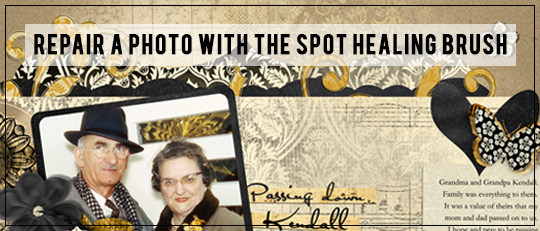
Let’s look at the image below. This photograph of my grandparents was scanned from a slide. You can see the dust all over my grandma’s face and chin. The white walls have dust all over them, too. The dust may have been on the slide itself or on the scanner bed. Either way, the spots are distracting and need to be removed. Since these spots are small (but many!), the Spot Healing Brush tool will be the perfect weapon of choice.

For starters, open your photo in your software and save it under a new name. I always work on a copy, even when improving the photo.
Since the Spot Healing Brush tool is a brush, we will do the brush work on its own layer, as we do with all brush work.
Create a new layer above your photo, and rename it “Spot Healing Brush.” All the brush work will be done on this layer. I also go the next step and lock the two layers together.

Next, find your Spot Healing Brush tool. It is grouped in with the other Healing tools on the tool bar. The icon looks like an adhesive bandage with a small white spot underneath it. If this tool isn’t evident on the toolbar, click your mouse on the little black corner of the Healing tool button and a fly-out menu will appear. Then click on the Spot Healing Brush tool.

Next, select your brush. For this type of repair, I chose a small hard brush in the “Basic Brush” group that comes with Photoshop. I left it very small, about 5 pixels, so that the brush is just ever so slightly larger than the spots I want to remove.
Looking at the Spot Healing Information Bar, click on “Proximity Match.” This allows the tool to “read” the area in close proximity to the spot you want to heal. Since we are doing our brush work on a separate layer as the photograph, be sure to also click on “Sample All Layers.” This allows the tool to “read” the layer below even though we are working on a new blank layer.
![]()
Now, working on the new layer that you created and renamed as “Spot Healing Brush Layer,” start clicking and brushing away those dust spots. Just place your mouse right on top of the spots and click. If the dust is longer, like a fine hair, you can drag the mouse along the length of the dust spot as well. If the spot is a little larger, make your brush a little larger. If the spot is a little smaller, make your brush a little smaller. The concept here is that you want to “grab” a little bit of the surrounding area of the spot that you are trying to eliminate. That little bit of background in the immediate proximity of the spot is replicated and blended so that the repair is as seamless as possible.
For the purpose of display, in the next image I have changed the Blending mode of the Spot Healing Brush layer so all the brush strokes that were made are clearly evident.

By changing the Blending mode back to “Normal,” my final healed image is below.

If you are dissatisfied with your results, the brush work layer can be deleted, and you can try again. That’s the beauty of doing the brush work on its own layer – it’s non-destructive to your original photo.
After the Spot Healing Brush work was complete and the image looked satisfactory, the original photo layer was merged with the brush work layer, still being sure that I saved it as new file. It’s my personal preference, but I never save over the original file, even if it’s for an improvement. I never know when I may want the original for reference or for an alternate photo treatment.
Next, I didn’t like the color cast on the photo, so I made some further image adjustments before bringing it onto the layout. Then, the layout was created as normal.
Since I scan images frequently, discovering this simple tool for minor improvements has been a real find. I can foresee utilizing this tool for not only imperfections from scanning, but also for small aberrations in a photo such as:
- Small tears or creases
- Small objects in a photo that you want removed, such as a logo on a shirt
- Small background distractions
- Small skin imperfections
How many photos with small imperfections do you have that are just waiting to be scrapped, but you haven’t tackled them due to those pesky imperfections? Try out the Spot Healing Brush tool and see how easy it is to repair those photos and to get them into beautiful layouts to share with your family. Then share your results with us in the Scrap Girls Gallery!
![]()
Tutorial written by Amy Flanangan


