This month Silhouette is offering discounts on both their popular Silhouette machines as well as their Designer Edition Software. Check out the ad at the end of the tutorial; and make sure to use the Code: SCRAPGIRLS during checkout to receive your discount! Lori Aragon came up with a quick and easy (not to mention super clever) tutorial on creating monogram cards and a cute fabric purse to hold them! Take it away Lori…
I don’t know what happened to me… I never used to be a girly girl. Growing up as a tomboy I wore jeans as much as possible while other girls styled in pretty dresses. To be honest, I still enjoy wearing my jeans, but now I also adore the color pink, lace and all things girly.
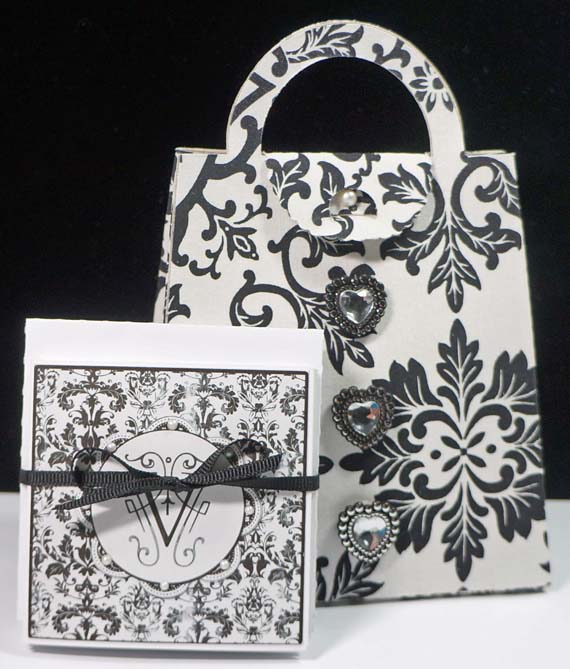
Today’s project was inspired by Jeana’s post HERE. After seeing her cute project, I hopped on over to the Silhouette Online Store to browse the cut files. Then I found IT…When I saw the potential for this adorable purse, I had to have it even though I already own a number of other purse designs LOL. I needed something NEW.
How perfect are these beautiful monograms for print and cut 3×3 cards? At first I was going to create the entire card for the Silhouette to print and cut, but then realized it would be better to use the card stock (scraps) that I already had – cut to size waiting for a project such as this! You can create these easy printable monogram cards even last minute!
Digital Scrapbooking Supplies Used:
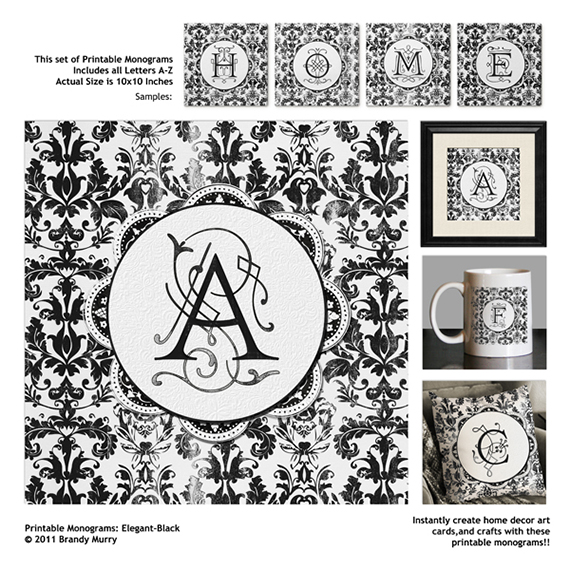
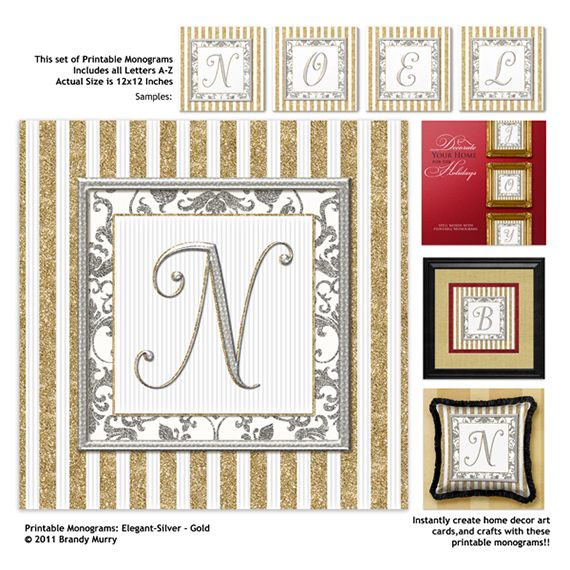
Printable Monograms – Elegant Black; Elegant Silver & Gold
Supplies Used for Cards:
Silhouette Cameo and Software – I use *Designer’s Edition
Envelope 3×4 – resized to fit cards
Cardstock for print and cut – Georgia Pacific
Cardstock for card base – Papertrey Stamper’s Select White
Best Glue Ever – ScraPerfect
Paper Trimmer
Additional Supplies Used for Purse:
3D Box Purse 1 of 2; 2 of 2
Fabric Blade
Heat Transfer Fabric Interfacing
Chipboard
Fabric – Beverly’s
Heart Embellishments – Michael’s
Before I get to the How To, I’d like to share a couple of reasons why I use and LOVE the Silhouette Software *Designer’s Edition:
1. I really LOVE the ability to import svg files. There are lots of FREE files out there and many times they are svgs!
2. I frequently use the guides and rulers. When resizing or making sure things will be in the right place, these are indispensible! Grids are helpful too, but with the Designer’s Edition, you can go further with your creating.
3. Lastly, I simply like all the bells and whistles lol! If I had to decide all over again, I would definitely purchase the Designer’s Edition. I’m very happy I did!!!
Instructions:
Step 1: In your photo editing software, open your digital scrapbooking supplies for the front of your cards. In this case, I used Printable Monograms – Elegant Black; and Elegant Silver and Gold by Brandy Murray. I adore these!
Step 2: Open up a new blank 3″x3″ file and insert your chosen monogram. Save this as a PNG file which is useful when dragging into your Silhouette software because it will stay the same size! A jpeg will work, but will open very large…
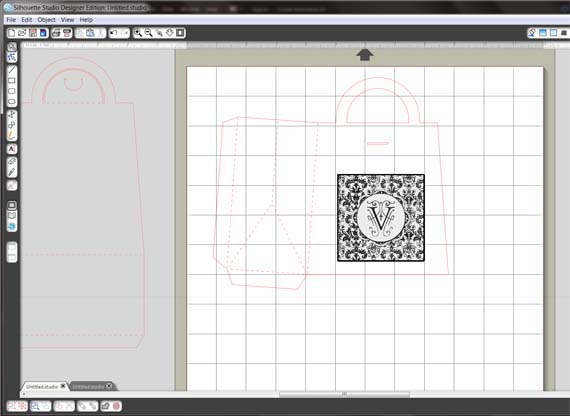
Step 3: In your Silhouette software, drag the PNG file onto the mat and open the purse cut file. I’ve already checked for size here, but if you wanted to make either the purse or the cards a different size, you can make sure they’ll fit before you begin cutting!
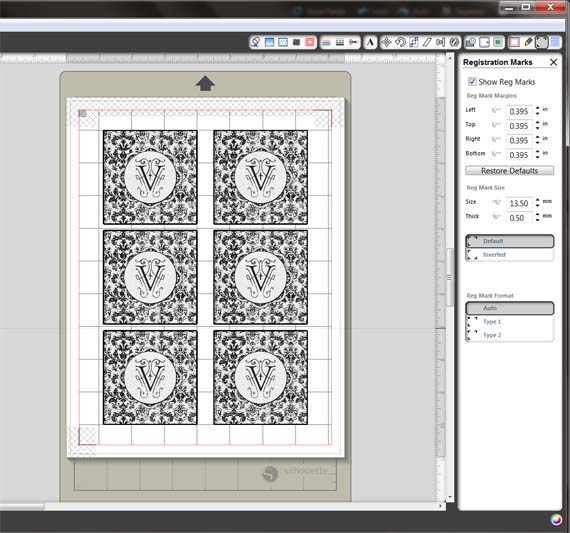
Step 4: Moving the purse out of the way, fill the page with your monograms by selecting the image, go to the “Replicate” window and click on “Fill Page.” Be sure to turn on registration marks and if needed, reduce the size of the margins there so that your images are within the boundaries. Print.
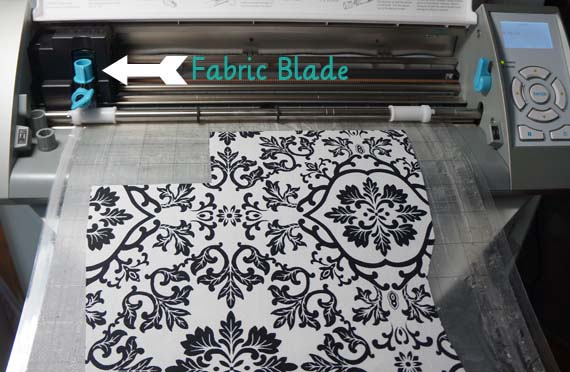
Step 5: Place the prints on your mat the same direction as in your software and insert into your cutting machine. Adjust the blade if necessary (usually mine is on 3 for Georgia Pacific cardstock). Here you see I’m about to cut fabric for the purse. *A lesson I’ve learned: Cut one side of the purse from chipboard and BEFORE moving the file to cut the other side, prepare and cut your fabric!!!


Step 6: Adhere to your card base using Best Glue Ever! Honestly, this is a great adhesive. You only need a tiny bit and it holds so well. A word of warning… if you are a messy gluer, this may not be the glue for you as it doesn’t come off very easily!

Step 7: If using fabric, iron onto Silhouette chipboard pieces – fold along perforations while warm and assemble purse. Decorate as desired.
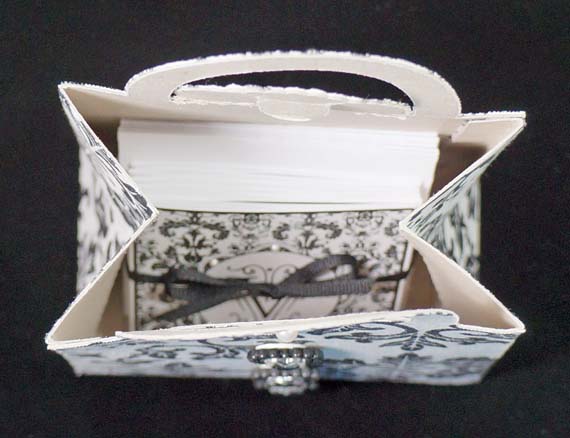
I chose not to put fabric on the inside, but you could easily do this by reversing the cut file so the fabric will be ironed on opposite of the outside. Did that make sense? lol!
So here I am… a girly girl loving purses and all things pretty… it’s about time huh?
Imagine the possibilities using these Printable Monograms! So quick and easy!!! I hope you will try these – with or without the purse 🙂 Please show us your creations at Scrap Girls Hybrid Gallery.

Tutorial written by Lori Aragon
Check out these great deals on the Silhouette Cameo and Silhouette Portrait as well as their Designer Edition Software! Please click HERE to take advantage of this month’s discount and don’t forget to enter SCRAPGIRLS as the promo code. Hurry this offer is only good thru July 10th! ***** PLEASE NOTE Sale has been extended through July 12th!