
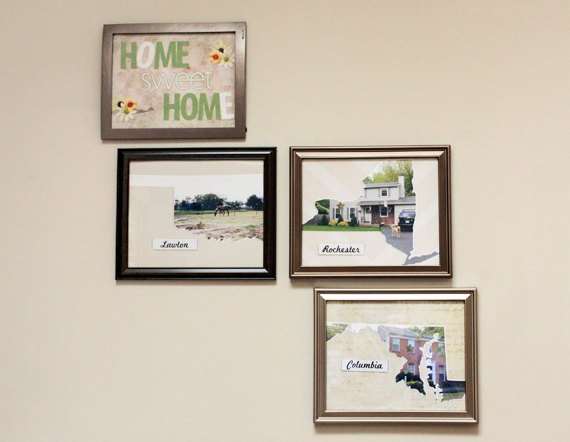
We are a military family and have moved around some. Not as much as most military families, but we have lived in 3 different states. I thought it would be fun to celebrate all of the homes we’ve shared so when we finally retire to one place, we can look back and see where we’ve been. Let me show you how I did it!
Supplies:
Photo quality printer paper
Photo frames
Scissors
Photos
Glue Dots or other adhesive
Let’s get started! The first thing I did was decide what photos I wanted to use. I have photos of the houses in two of the three states we lived in. Our first home was an apartment and I don’t have a photo of the building, so I chose to use a photo of my favorite view from our living room window: the horses at the farm across the road. Once my photos were chosen and scanned in to my computer, I got started with the layouts.
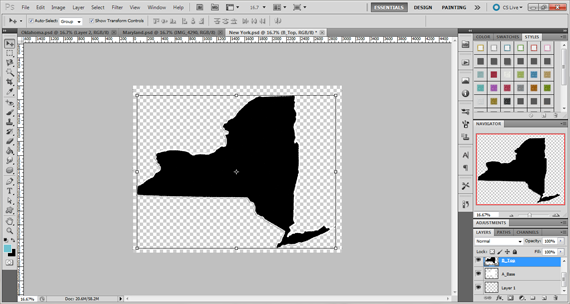
I am using 8 in x 10 in photo frames. So I opened a new document in that size in my scrapbooking software program (CS5). Next, I chose to start with my home in New York, so I dragged the New York ScrapSimple embellishment template onto my document and resized it to fit the space.
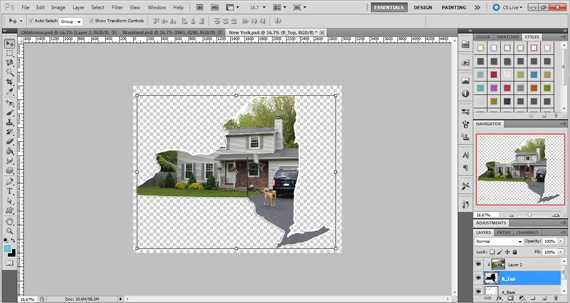
Next, I dragged the photo on top of the embellishment template. I resized the photo and moved it around to best fit the shape and still be able to see what the photo is. I used a clipping mask (control+alt+G for Photoshop) so my photo took on the shape of the state. For states like Maryland and Hawaii, it’s really a challenge!
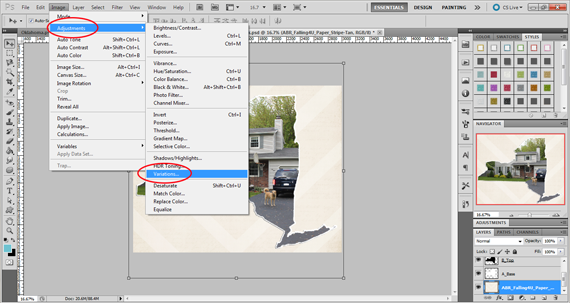
Finally, I chose a background. I wanted something fairly neutral so the shape and photo would stand out. The paper I chose came from Angie Briggs’ Falling for You Collection Biggie. But it was kind of light for my photo. I decided to darken the paper a bit. To do this, with the paper layer selected, I went to Image>Adjustments>Variations.
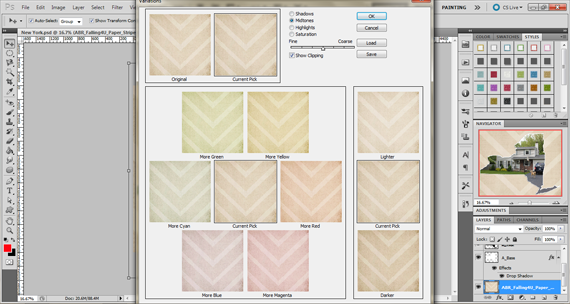
Then I chose the Darker Option and clicked a few times until the paper was what I wanted.
Now, I am happy with the paper.
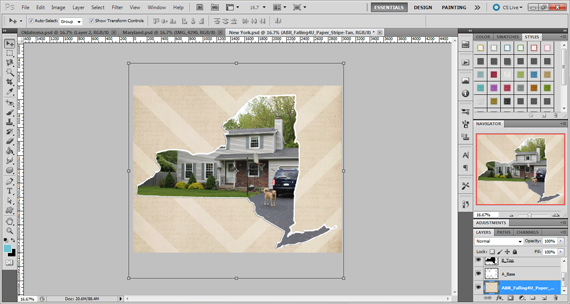
I added a drop shadow to the base of the state shape and saved as a jpeg file for printing.
We’ve lived in three different states, so I repeated this process with the remaining two states. I printed the jpeg files and trimmed the pages to 8 in x 10 in.
The three states would look ok together, but I really wanted something to tie them together. So I opened another 8 in x 10 in document and added the phrase “Home Sweet Home” from Angie Briggs’ ScrapSimple Word Art Templates: Title It Home. I adjusted the spacing and scattered the words a bit more.
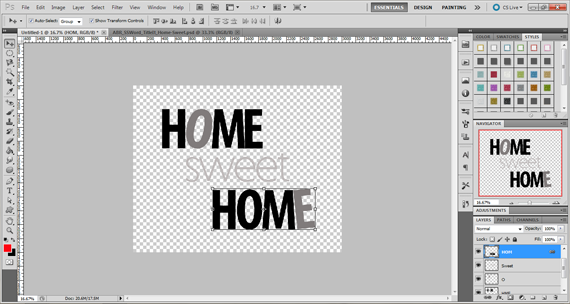
Then I built my layout by adding papers, using clipping masks and embellishments. After adding shadows, I saved and printed out my page.
To give my state pages some added dimension, I added some labels with the cities we lived in and a star to represent the area on the photo where the city is located.
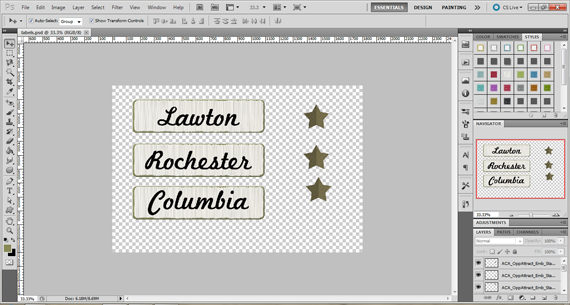
I printed these out using photo paper to match the background, then cut them out and attached the labels and stars to my page using glue dots. This gives a little dimension, but will still fit in a frame. The next step is to add your pages to the frames and add to your wall!
Not only could you do this for the states you have lived in, you could do this project for vacation locations, including countries in Europe and Australia (using Brandy Murry’s ScrapSimple Embellishment Templates: Europe and Australia Biggie or ScrapSimple Tools – Shapes: Europe and Australia Super Biggie )! You are only limited by your own imagination! I will continue to add to this project with each new state we call home until retirement is upon us. Until then, I’d love to see what you create! Share your projects in the Hybrid Gallery for us to admire! But most of all, have fun!
Digital Supplies Used:
ScrapSimple Word Art Templates: Title It Home
Falling For You Collection Biggie
ScrapSimple Embellishment Templates: US States Super Biggie
Auntie’s Kitchen Collection Mini
Memories of Green Collection Biggie
Assemble Your Own Zoom Pages: 12×12 Fascination
Buttercup Collection
ScrapSimple Tools – Styles: Basic Shadows 6501
Cottage Rose Collection Biggie
Classic Paper Super Mini
Opposites Attract Collection Biggie
Ballard Collection Biggie

Tutorial written by Carla Shute


