
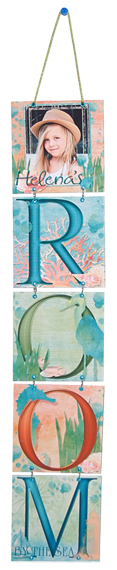
When my granddaughter was a baby I did one of these for her room at home – the difference was I spelled out her name on the blocks. Now that I live closer she gets to spend some nights with me so it’s time for a photo update and a sign for her bedroom door at my place.
Supplies used:
5 Digital Scrapbook Designs at 5×5
Chipboard – 5 pieces cut to 4×4
Cardstock – 5 pieces cut to 3.5×3.5
Glue Stick
1/8” Hole Punch
20 Eyelets
8 Jump Rings
String for Hanging
Digital products used:
Sea Life Beauty Collection
Chesapeake Brush Set
Beachcomber Mini
Dynamic Brush Set: Background Blenders
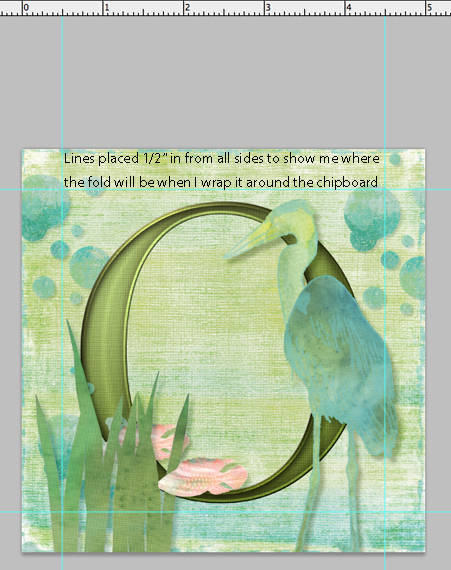
I began with a PS file that was 5×5 inches so there would be enough of the design to wrap around the chipboard pieces. Then I dragged in rulers ½” from the four sides so I could make sure I wouldn’t lose anything important when I wrapped the papers around the chipboard.
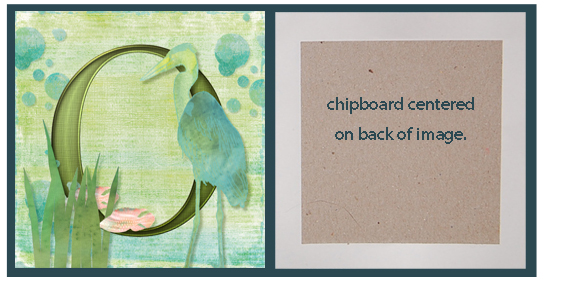
After digitally designing the five panels in PS5, I printed them out onto matt photo paper and trimmed them down. Now I could adhere them to the chipboard pieces.

I adhered a 3×3 inch piece of colored cardstock to the back of the chipboard to cover up where the paper didn’t meet.
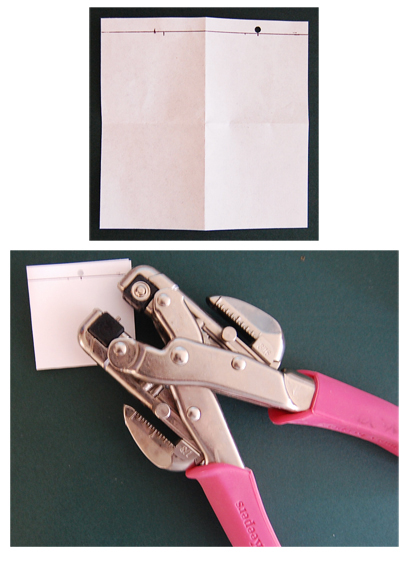
To help make the placement of the holes for the jump rings consistent on all the panels I created a template. I took a scrap piece of paper that was the size of the chipboard, in this case 4×4 inches. I measure down ¼” from the top and drew a horizontal line. Then I measured in 1” from each side edge and make a mark. I punched a 1/8” circle hole on one of the marks, then folded the paper into quarters and punch the rest of them using the first one as a guide.
 Now I can open up my template, place it on top of my chipboard squares and punch the holes, insert eyelets then join the panels together with jump rings. I used a string to make the hanger at the top. I’m also going to put beads strung on string for the bottom two holes as soon as I get to the store and get them!
This is a pretty easy project, but my granddaughter absolutely loves it and I’m so glad I took the time to do it! I hope you enjoyed this and if you make one please upload your pictures to Hybrid/Printable Craft Gallery so we can all enjoy them.
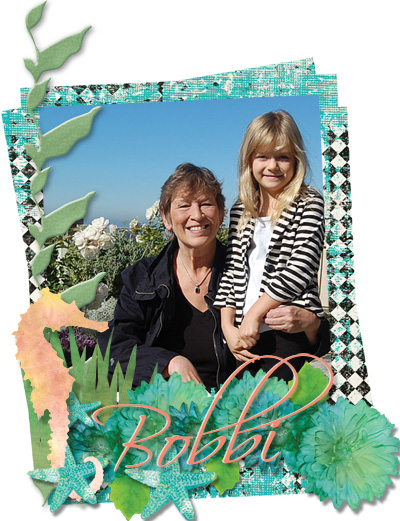
Tutorial written by Bobbi Start


