
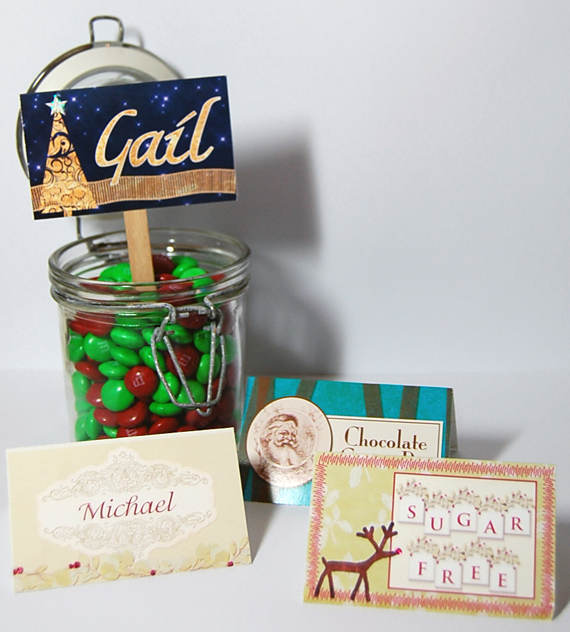
I am so fortunate to have a large, close-knit family that tries to get together for the holidays each year. I wanted to do something extra for the gathering, so I put together these easy printable craft place setting tents! You can use them as place-setting cards or as a label for the buffet table. For those with time limitations you can put together one background for all your cards and just change the names; or if your mind is boggled with ideas you can do each one differently. I’m going to do a small variety of different ones to give you some ideas.
Supplies needed:
Cardstock
Scissors and/or paper trimmer
Adhesive and toothpicks (optional)
I like to make a color swatch first, so I use the ScrapSimple Tools -Action: Color Swatch 301 and by following the directions that are included, I can grab the colors of the products I am using.
For this example I’ve chosen the Mistletoe Green Paper from the Charm Of Christmas Collection for my background.
Step 1- First, I opened the Mistletoe digital scrapbooking paper in PS and then I created a new blank document measuring 3-1/4 x 4 and dragged the paper onto it. I then resized the paper to fit and cropped the excess. Make sure to close the original paper file without changes to keep it intact.
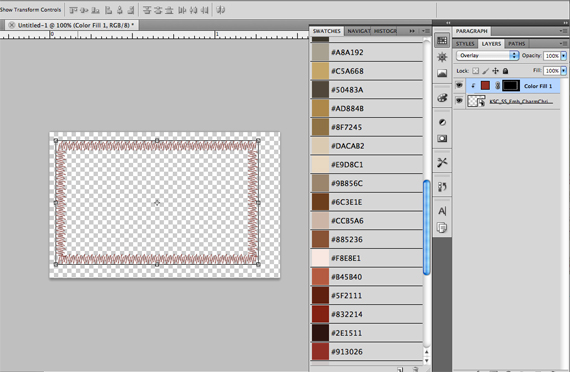
Step 2- I wanted to make the stitched frame a different color than the green that was included in this kit. There is a grayscale version of it included in the kit so (don’t you just LOVE Scrap Girls Digital Scrapbooking designers!) I was able to do this very easily. I opened up the grayscale image in PS and saved it with a different name; I then held down the Command(Ctr on PC) and clicked on the Smart Object icon in the Layers Palette to give me marching ants.

Then I went up to Layer>New Fill Layer>Solid Color (check the box that says: Use Previous Layer to Create Clipping Mask) and chose my color. Go to your Layers Palette, click on the colored layer and make it an “Overlay” layer.
Step 3- Next, I merged the two layers and dragged it over to my document with the paper on it, and resized it to fit.
Step 4- To do the words “Sugar Free” I opened up a new 12×12 PS file then dragged the letters I needed into it. I placed the letters in the order that I wanted and merged the layers. That way I could resize them and they would all resize at the same time. I then dragged them over to my tag document and positioned them.
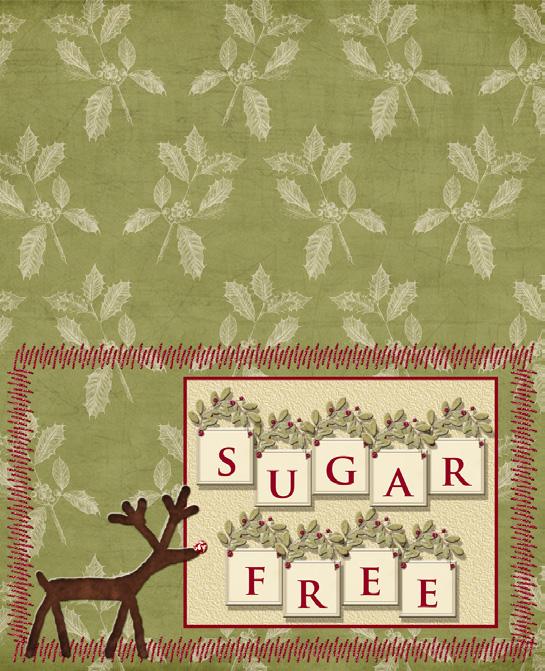
Step 5- Then I printed them out onto a cardstock paper. I then trimmed them down to size and scored them, so that the card folded to 3-1/4×2.
Fold the card in half to make a tent that stands alone or glue a toothpick or popsicle stick between the layers so it can be placed in something.
Kick it up a notch by adding a red crystal to the reindeer’s nose or a star crystal to the top of the tree. I used glitter glue for both of these items.
I hope you have fun putting some of these together and if you do, be sure to upload your samples to the Scrap Girls Hybrid Gallery so we can all enjoy your ideas!


Tutorial written by Bobbi Start


