

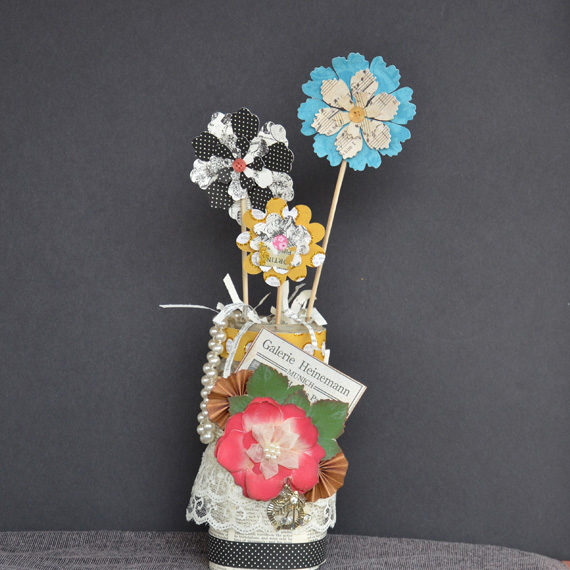
As I shared in my last tutorial, my sister-in-law, Cindy, and I have been preparing for my mother-in-law, Tressie Webb’s 80th birthday party. With my first two projects (invitations and guest book) completed, I was ready to clean up my work area and start on some altered bottles to be used as table centerpieces to coordinate with our shabby chic look with a little bit of glam.
The party is being held in a large church fellowship hall with typical folding tables and chairs, so there is a lot of area to decorate. I wanted to have something on each table and knew that real flowers in pretty vases would cost more than our budget would allow. So to give it that same feel on a budget, I decided on handmade paper flowers displayed in embellished jar and bottle “vases.”
And, oh, for this project my husband helped… REALLY… he came up with a great solution to hold the flowers in place in the “vases.” See step #4.
Digital scrapbooking products:
Flea Market Collection Biggie
Chocolate Heart Collection
ScrapSimple Embellishment Templates: Altered Art Essentials Lockets 2
ScrapSimple Tools – Shapes: Fancy Brackets 6302
ScrapSimple Tools – Styles: Vintage News
ScrapSimple Tools – Styles: Blue
Supplies used:
Digital Scrapbooking Supplies
Silhouette Cameo
Scissors, paper cutter, bone folder, punches, die cuts
Paper – old book paper, linen cardstock weight, glittered scrapbook paper
Adhesive – two-sided tape, 3-in-1 Glue, glue dots, dimensional adhesive
Embellishments – digital embellishments (printed, cut out, assembled), brads, flowers, buttons, lace, ribbon, old jewelry, distress ink, mirror dots
Wooden skewers, variety of bottles, jars, plain tea cups
Can of Great Stuff (expanding foam for cracks and gaps)
Instructions:
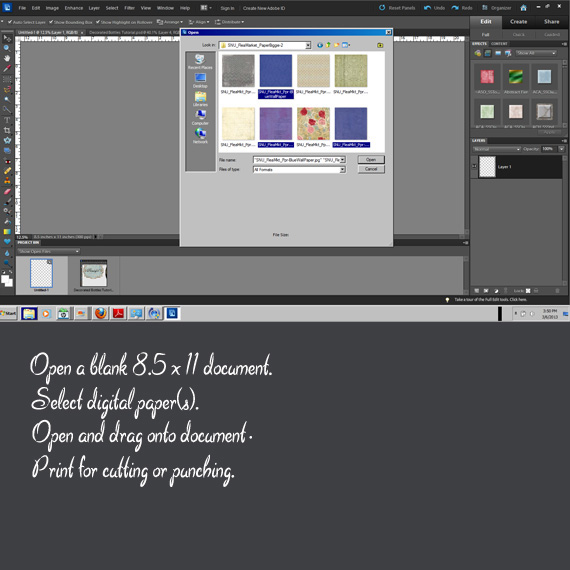
Step 1 – Select a number of printable digital papers and embellishments. Drag them onto 8.5×11-inch documents for printing. Note: These will be used for embellishing the bottles and creating the 3-D flowers. Resize the embellishments to fit your needs.
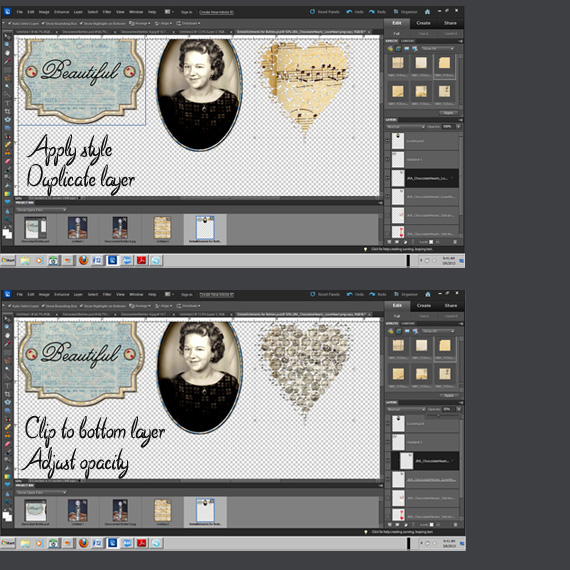
Step 2 – Change the heart embellishment color to coordinate with the design palette. Change the embellishment to black and white. (In PSE 10 – Enhance> Change to black and white) Duplicate the heart layer. (In PSE 10 – Ctrl+J) Apply a ScrapSimple Style to the top heart layer and clip it to the bottom heart embellishment layer. (In PSE 10 – Ctrl+G) Adjust the opacity on the top heart layer to the desired color.
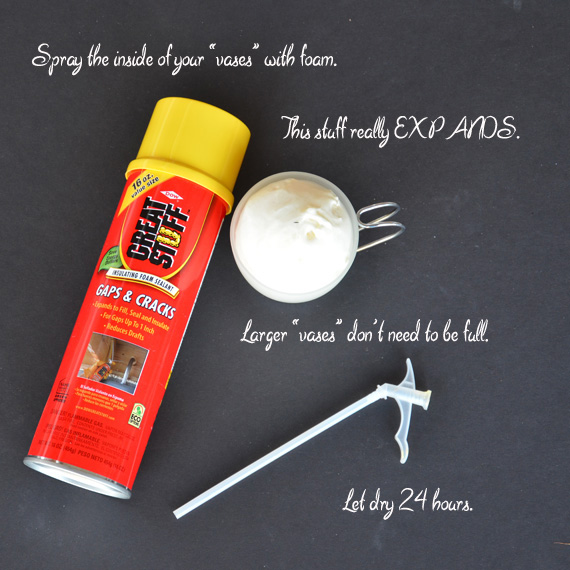
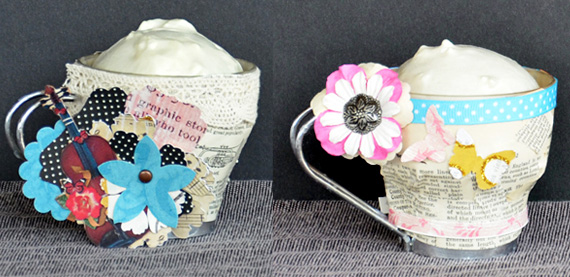
Step 3 – Now you are ready to start decorating your bottles, jars, and tea cups. Spray expandable foam sparingly in “vases.” You can always add more. Read directions carefully; the foam really expands once “shot” out of the can.
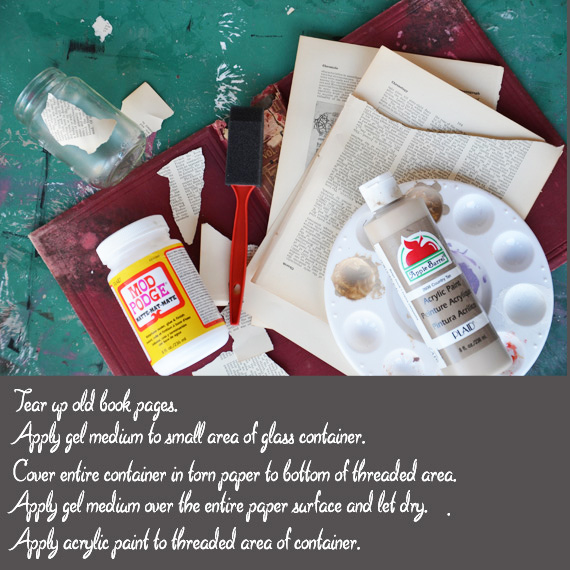
Step 4 – Prepare to get messy. Use Mod Podge-brand or another gel medium to adhere torn paper to “vases.”
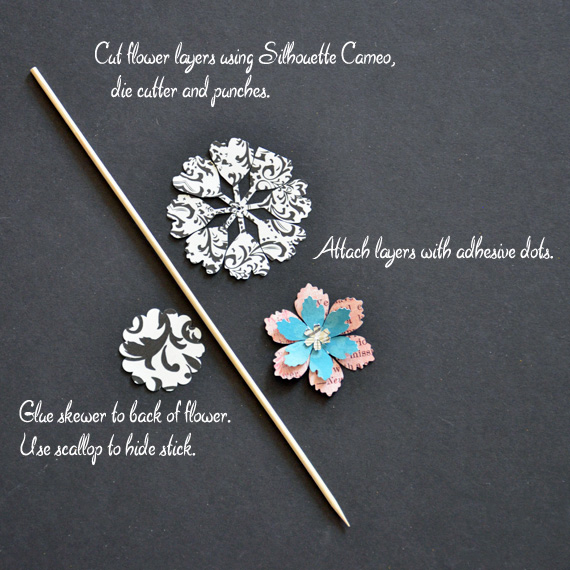
Step 5 – Create 3-dimensional flowers from cutter, dies, and punches. Cut flower layers using Silhouette Cameo die cutter and punches.
Attach layers with adhesive dots. Glue skewer to back of flower. Use scallop to hide stick.
Step 6 – Let your imagination go wild and embellish your vases. Add strips of paper, cut out digital embellishments, decorative trim, ribbon, buttons, lace, jewelry, flowers, brads, etc. Layer hybrid elements to add dimension and detail.

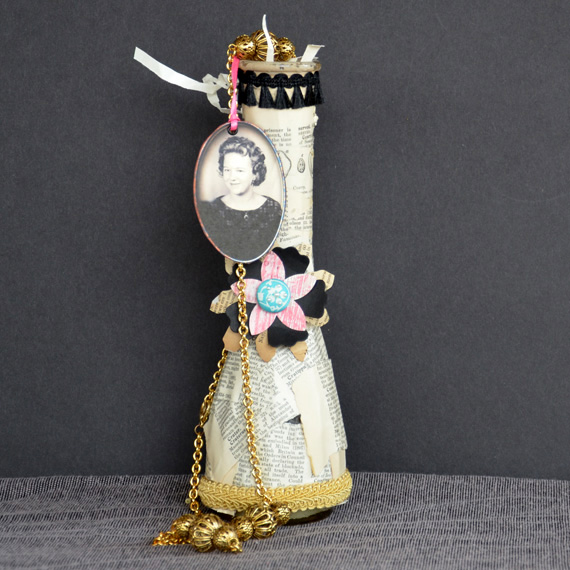

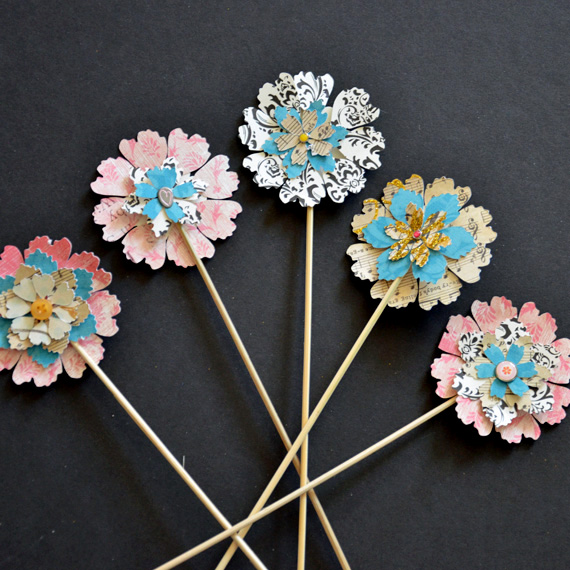
Now, 21 bottles, jars, tea cups and 75 paper flowers later, I think I have a good foundation for our party decorations! We will add other touches of shabby chic with beaded purses, old jewelry, decorative boxes and worn table cloths. I am also happy to say that I have completed my final hybrid product for this party using the same digital supplies, some bling from my stash, and my Silhouette Cameo – a Happy Birthday banner. I am really excited about the party and cannot wait to see the smile on her precious face.
Hope to see your projects posted in the Hybrid Gallery.
Live each day creatively,
Karen
Tutorial written by Karen Webb


