

This month I would like to focus on sharing another quick and easy way to add to your card stash by creating printable sheets of your card mats, elements, sentiments, and titles. You will find that using printable sheets will not only save you money as you waste less cardstock; but saves you time as well because you will build a file of printable sheets. This will come in handy for those “Help! I need a card QUICK” times!
Digital scrapbooking products used:
Persian Breeze Collection
Butterfly Effect Collection
Assemble Your Own Zoom Pages: Collage Art
Supplies used:
digital scrapbooking kits
cardstock
printer paper
scissors, paper trimmer
scoring tool
adhesive, Zots Clear Adhesive Dots
distress ink
Glossy Accents
gold wire
Step 1 – Start by opening a new blank document in your software. Since I will be making a portrait-style standard A2 card, my document measurements will be 4.25 inches by 5.5 inches. Now, begin creating your card by dragging in your papers for the mat, embellishments and title and arrange them according to your design. You will notice in the photo below that it looks very flat. There are no shadows because these will be treated as individual layers once printed and assembled on the actual card and I don’t want the digital shadows getting in the way.
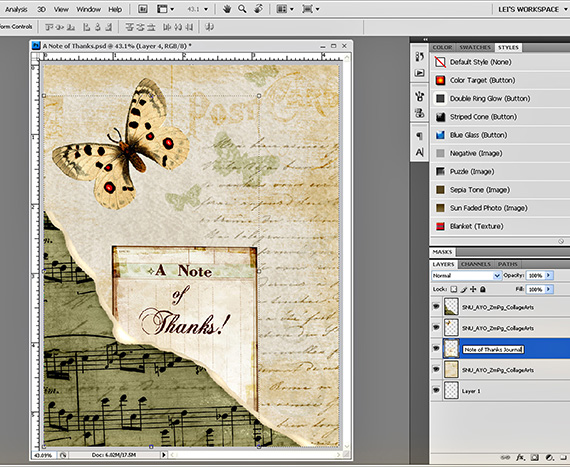
At this point, I am naming and saving the design as a PSD. I am also making sure each layer reflects the designer and collection because my memory just doesn’t hang onto that information long enough!
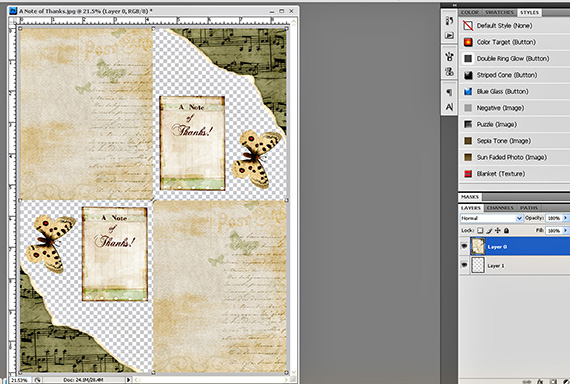
Step 2 – Now we are ready to make our printable sheet. Open another new document, this time 8.5 x 11 inches, 300 dpi and set to transparent background. If you recall in Card Stash 102 I mentioned that you could fit four A2 mats on one 8.5 x 11 inch sheet. When making a printable sheet you can plan on fitting two mats because the other space will be taken up with your embellishments; in this example the torn sheet music, journal card “note of thanks”, and butterfly. From your assembled/layered card, drag each layer over to the 8.5 x 11 sheet and maneuver them around so two of everything fits on one sheet of paper. Save as a png file.
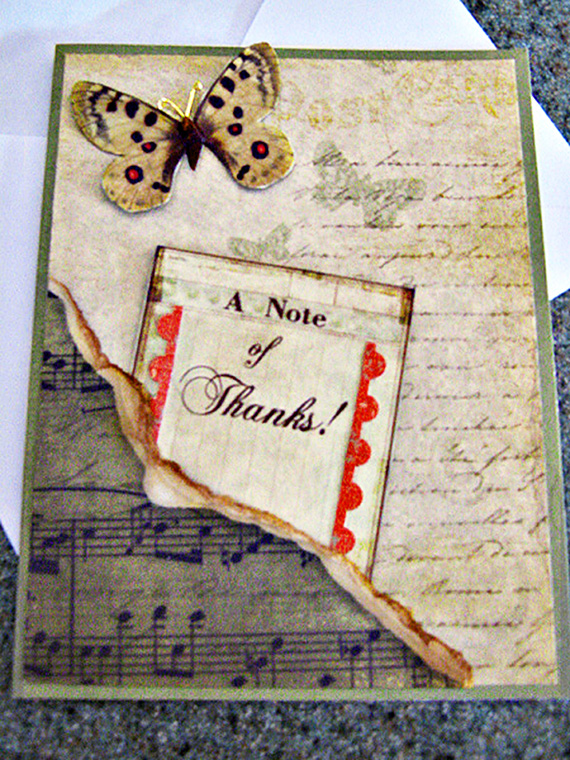
Step 3 – It looks like we are ready to print. Load your printer using your preference of paper/cardstock weight and color. Under printer preferences make sure that you choose “borderless printing” so you do not lose any of your mat or embellishments by being too close to the edge.
Step 4 – Once printed you are ready to cut and assemble your cards. I used one sheet of 8.5 x 11 green cardstock cut in half at 5.5 inches and scored at 4.25 inches. I cut the mat 5.25 x 4.0 – slightly smaller than the card so that the green from the card “frames” the mat. The green paper with the notes on it, I cut the left side and bottom edge so it has a nice clean line, then I mimicked the digital rip by tearing the paper slightly above the digital rip. I distressed this edge by running my finer nail along the ripped edge and then used a photo-linen distress ink to give it an aged appearance.. When I adhered that to the card I only used adhesive on the left side and bottom of the piece so that I could create a “pocket” to tuck in the “Note of Thanks” journal card. I also glued strips of rusty red scrap paper on the journal card to make it pop and pick up the little bit of red in the butterfly wings. The journal card was tucked down into the music note pocket and a dimensional dot was used behind it to give it a little lift off the page. The butterfly was cut and brushed with Glossy Accents which gives it a shiny, plastic like coating. Gold wire was twisted to form body and antenna and Zots Clear Adhesive Dots (very tacky) were used to hold the wire and butterfly in place.
If you give this project a try, please be sure to post it to Scrap Girls Hybrid Layout Gallery so we can see your creation!
And as always . . . Enjoy the Process!!
~ Lei
 Tutorial written by Lei Maier


