Audience: Beginners
Category: PSE Tool Techniques
Operating System: Windows 7
Software: Photoshop Elements 9
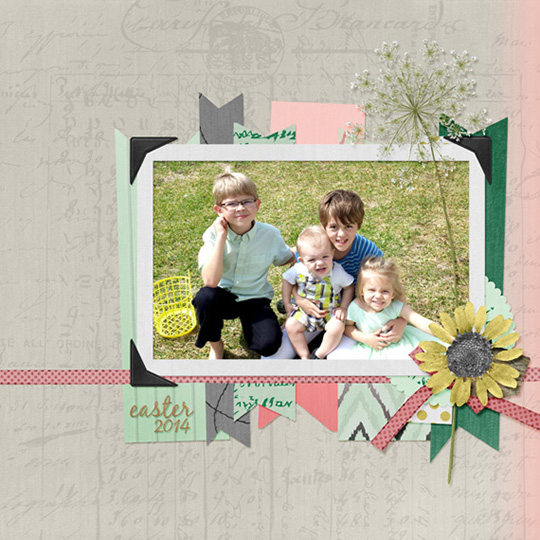
It’s no secret that I love all of the patterned papers included in the wonderful digital scrapbooking collections our designers create here at Scrap Girls. I like to use as many as possible on my pages, but if I’m not careful, the patterns can be overwhelming. One of my favorite tricks is to use small bits of the patterns. Like throw pillows on a solid colored couch, the little bits of pattern on a neutral background all work together to create an interesting look without being too busy.
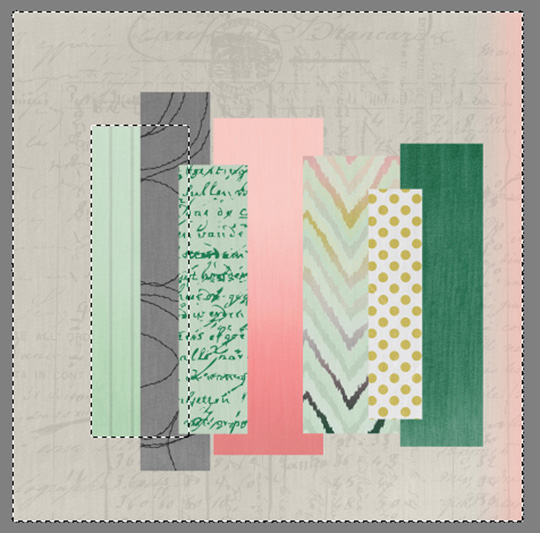
Step 1- Create a new 12 x 12 inch document in Photoshop Elements. Choose a collection that you want to use for the bulk of your layout. All of the papers in a collection are designed to work together, so by sticking to one collection, you can be sure that all of the patterns will work well together. Open a couple solid papers and a bunch of patterned ones, and place them all on your new document. I would recommend 8 – 10 papers total. Pick one solid paper (or one with a light pattern or texture) to be the background, and move it to the bottom of the Layers Palette.
Step 2- Now it’s time to cut some ribbons. Make the top layer active in the Layers Palette. Using the Rectangular Marquee Tool (keyboard shortcut M), draw a rectangle that is about 1 inch wide by 6 inches long. This isn’t an exact thing, just eyeball it. When you have the rectangle drawn (it will be outlined with “marching ants”), everything inside the rectangle is selected. Since you want to get rid of everything outside the rectangle, you need to select the Inverse (opposite). Go Select > Inverse, or use the shortcut Shift+CTRL+I. Now you will see the rectangle is still outlined with marching ants, and the edge of the layout is also outlined. Everything in between is selected.
Press Delete and all of the excess paper is cut away. Select > Deselect (or use the shortcut CTRL+D) to get rid of the marching ants. Repeat these steps for each paper except the bottom one. Vary the widths and heights of each rectangle, to give it a hand-cut look.
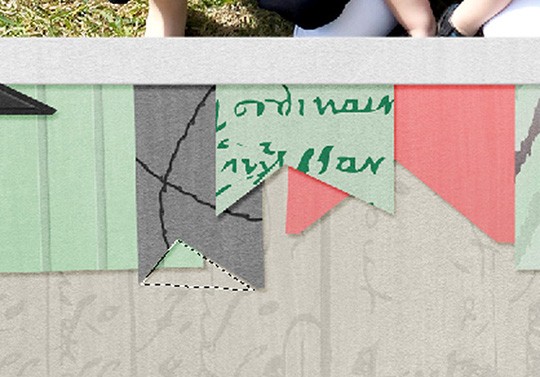
Step 4- Now switch to the Polygonal Lasso Tool (keyboard shortcut L – it’s nested with several other lasso tools, so press L repeatedly to toggle between them). Use the lasso tool to draw a triangle at one end of the paper ribbon, press Delete, and repeat on the other end. Do this for each ribbon, again, making the triangles irregular, just to keep things interesting.