
 We are excited to bring you a new series here on the blog where we interview Scrap Girls Product Designers & Creative Team Members about their layout design process. We hope this will give you insight into the inner workings of their creative process and inspire you along the way!
Where do you find inspiration for your layouts?
I love looking through online galleries (especially ours here at Scrap Girls!), Pinterest, and sometimes magazines. I also love using ScrapSimple Layout Templates as a jumping-off point to get my layouts started.
What is the first thing you do when beginning a layout?
The first thing I do is establish a focal point on my layout. This is super important to me because I want there to be a main idea or area to focus on when you first see the layout. Whether it’s one main photo or a cluster of odd-numbered, photos, I like to place the photo(s) where that focal point is on the layout.
Would you say that you have a ‘system’ or do your layouts seem to fall into place as you go?
I do have a fairly loose system where I’ll place the main focal point first, then I will work on the background paper, and then I start building supporting elements for the main focal point. Those supporting elements can be anything from paper mats to paint splatter to circles and squares – anything that will build up and support the main focal point of the layout. Then it’s all about adding the fun extras on top! Things like buttons, ribbons, title work, glitter sprays, etc. That’s the stuff that really finishes off the layout and makes it look interesting, fun and complete.
Is there a product or tool/technique that you use on most layouts?
I don’t necessarily use one main product or tool when creating my layouts. Usually what will end up happening is I’ll try out the latest technique that I want to learn or have seen done on a layout and I want to try and replicate it or re-interpret it on my own. Although I will say that I tend to go for simpler, less busy papers for the backgrounds of my layouts, with more patterned and bright papers in the supporting spots.
What is the one piece of advice you can give our readers?
Practice and play! A lot of times when I’m trying to figure out which embellishments to use, I’ll just open all of the ones I’m interested in, pull them into my layout, and just start moving them around to see which ones I like the most. My absolute favorite part about digital scrapbooking is that nothing is permanent! You don’t have to worry about gluing something down and then wishing you could move it later! I love moving things around until I get the ‘feel’ of them exactly where I want them. And with the Undo function in Photoshop, you can always go back if you don’t like it. So get out there, get creative, and don’t be afraid of to make a few mistakes along the way!
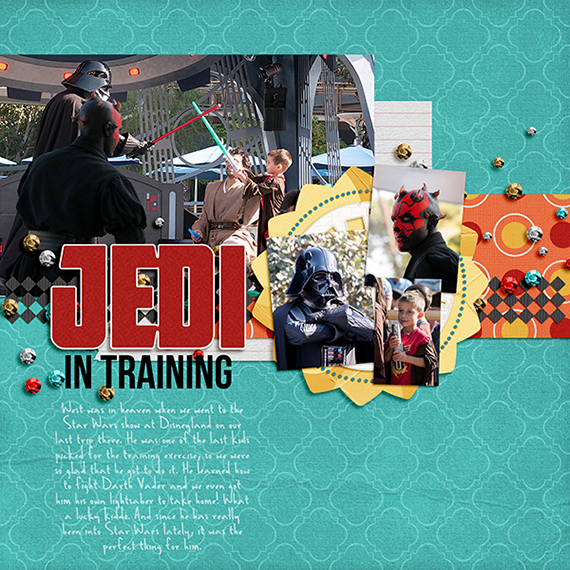
**Below Laurel takes you step by step while she creates the layout above:
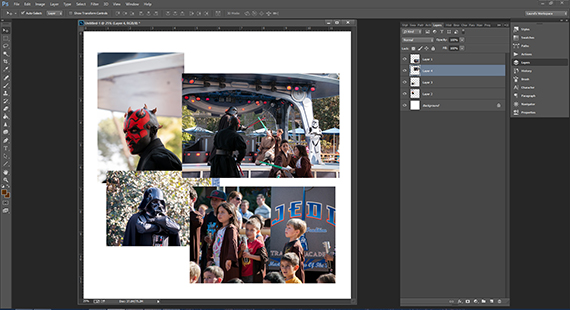
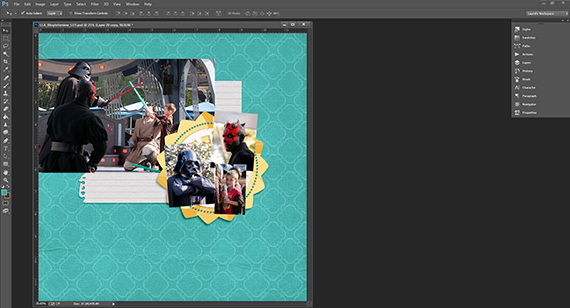
You can see I started my layout by pulling in the photos that I wanted to use and just getting them situated on the page. Once I figured out the sizing that I wanted for each photo, I decided which one would be the main photo and which ones would be the supporting photos.
Here I have placed my main photo and supporting photos, and have added a background paper to get my color scheme started.
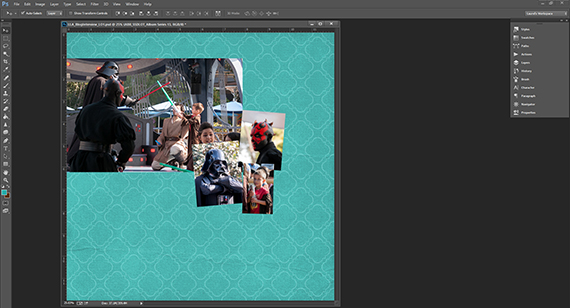
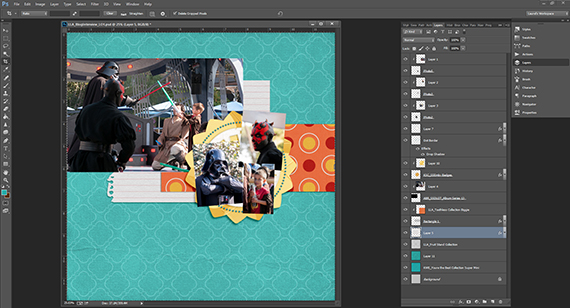
Next I added a torn paper element behind the photos to start building the accent pieces.
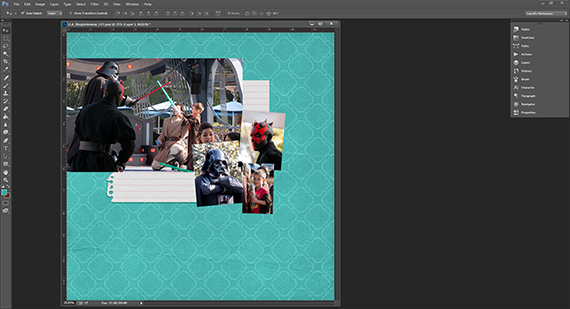
I added a fun shape and clipped a yellow paper to it, to draw the eye towards those clustered photos, as well as hiding a distracting face in the photo that wasn’t part of the story.
Next I added a strip of orange paper to anchor the grouping from one side of the layout to the other. I thought it added a nice pop of color as well.
Then came the title work, which was just a large alpha, colored red, with a white stroke added to it, and a separate text box with the subtitle underneath it.
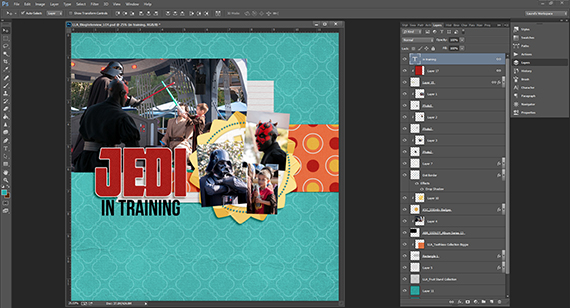
Then it was time for the icing on the cake, so to speak, which meant adding the sequin spray and a black embellishment across the orange paper to break it up a little bit. I also added some faint white journaling so that the story could be told without distracting from the main focal point.

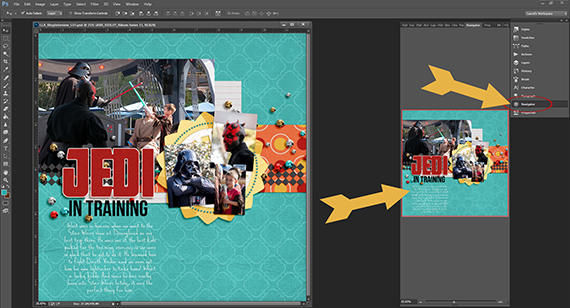
One tip that I wanted to share is that I like to click on the Navigator window to see a smaller version of my layout when I’m putting it together, so that I can see it in a different perspective. Sometimes looking at a smaller version will help you notice if there is anything off-balance in the layout.
Digital scrapbooking supplies used:


