• Facebook
  • Twitter
  • Google
ScrapGirls
  • SHOP
  • LEARN HOW
  • BLOG
  • FORUM
  • CHAT
  • CONTACT US
Select Page
Home / All Posts / Journaling Inside a Shape

Journaling Inside a Shape

Text Inside a Shape

Take your journaling outside the box by typing your text inside a Custom Shape or in the negative space of your layout. This tutorial will show how to create text in a shape using the Polygonal Lasso tool. Notes on how to create a shape within a Custom Shape are included.

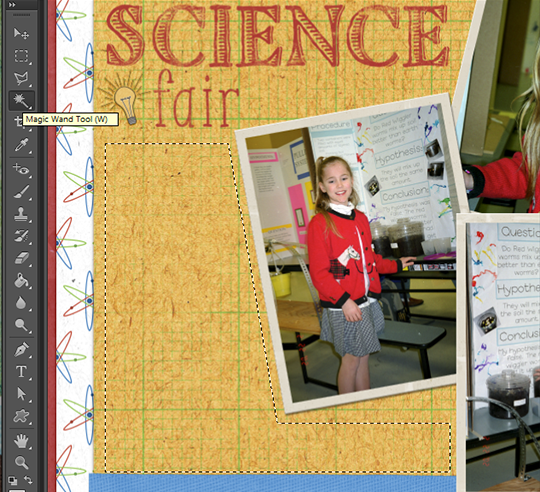
First, select the Polygonal Lasso tool in the Tools panel and use it to draw out the shape you want for your text.

A screenshot showing how to use the polygonal Lasso Tool
Each click of the tool will create a line. To align a line either vertically or horizontally, hold down the Shift key before you click. Your shape will be complete when you click on your starting point. When you are finished, you will have a selection of the shape you drew.

My shape is angled along the side of a photo. Another option is to create a shape to avoid journaling over a cluster or another embellishment.

A screenshot showing how to make a custom shape for journaling
With the Magic Wand tool selected, right-click inside your selection and choose “Make Work Path” from the pop-up menu.

The path will look like a solid black line around your shape.

Note: If you wish to journal inside a Custom Shape, create your shape with “Path” selected in the top menu bar and follow the tutorial from here.

Select the Horizontal Type tool and hold the pointer inside the path. When the Type tool is surrounded by dashed parentheses click to insert text.

A screen shot showing how to use the Type Tool inside a custom shape
The text box will show as a rectangle, but as you type, your journaling will stay within the shape you created.

An example of text justified inside a shape
If your journaling doesn’t conform well to the shape, try justifying the text. You can also change the font size, the tracking (spacing between the letters), the leading (spacing between the lines), or even the font until you get a look you like. I used all of the above techniques on my page.

Note: While this tutorial will not work in Photoshop Elements (PSE), you can add text inside a Custom Shape in later versions of PSE by clicking on the shape with the Text tool. PSE does not have the same tools for justifying the text, you can use the PS shortcuts in PSE! Ctrl+A will select all of your text and Ctrl+Shift+J will justify the selected text.

An even easier option is to simply use one of the ScrapSimple Text Path products in the SG Design Shop!

A finished scrapbooking layout showing text inside of a custom shape

Try mixing up the journaling on your next layout by typing it within a shape. We’d love to see your completed pages in the Scrap Girls Gallery!

Welcome to the SG Design Shop Blog - where modern memory keeping meets heritage scrapbooking! Here you'll find digital products and all the inspiration you need to complete your projects.

subscribe-imgTo our Free Newsletter

Search the blog

Favorite Categories


Learn How Sidebar Badge
Tutorials Sidebar Badge
hybrid projects sidebar button
art journaling sidebar button
mobile scrapping sidebar button
planners sidebar button

Connect with us

SG Facebook Image

Partners

Qwiklearn -The easiest way to learn digital scrapbooking!

Adobe Photoshop Affiliate Badge

Links

  • About Us
  • Storefront
  • Terms of Use
  • FAQs

HELP

  • Contact Us
  • Email

FOLLOW US


© 2023 Scrap Girls - All Rights Reserved.Privacy PolicySite Map