• Facebook
  • Twitter
  • Google
ScrapGirls
  • SHOP
  • LEARN HOW
  • BLOG
  • FORUM
  • CHAT
  • CONTACT US
Select Page
Home / All Posts / Jazzing Up a JIF Digital Scrapbooking Layout

Jazzing Up a JIF Digital Scrapbooking Layout

Article written using GIMP for layout design and Adobe Photoshop Elements 6 for photo editing with Windows 7 Vista

Do you want to make a personalized digital scrapbooking page quickly and easily? Rather than starting from scratch, try beginning with a JIF kit. Each JIF kit contains a layered PSD file for a ready-to-use layout as well as all the papers, elements, and word art used to make the layered file. Once you’ve picked a JIF kit, you can jazz it up using a coordinating collection to make a digital scrapbooking layout that fits your photo and style. Let me show you how I used this technique to create a layout.

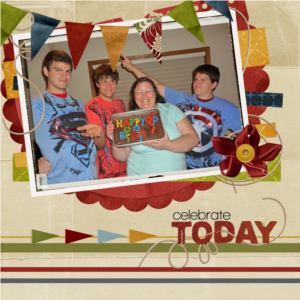
I began my page with JIF Plus: 12×12 Comfort of Home from Shalae Tippets. Here is the layered PSD file after I inserted my photo into the photo mask space.

I could have stopped right there and called this my finished layout. However, I wanted to alter the page using elements from one of Shalae’s matching kits. From Comfort of Home Collection Biggie, I selected a banner, a word art, a button, and two types of string. After I changed the title, adjusted the ribbon bow, removed the buttons, and added the new elements, this was my revised digital scrapbooking layout.

Again, I could have stopped at this point, but I wanted to add some word art and journaling. I looked at more of Shalae’s matching kits and picked out materials from Comfort of Home Word Art Super Mini and Comfort of Home Embellishment Super Mini. After I added the elements, word art, and journaling, I discovered one of the paper strips was hidden, so I moved it to a place where it was visible. My page then looked like this:

I liked this result, so to finish off the page I added add drop shadows, working on the banner shadow first to make the banner look like it was floating above the page. With Photoshop Elements, you can use styles to achieve that effect, but styles don’t work in GIMP. In GIMP, the drop shadows are on a separate layer, so after making a big drop shadow for the banner, I used the Perspective Tool to pull the banner shadow around. Here are the steps I used in GIMP.

Drop Shadow for Banner Using GIMP:

  1. Select banner layer.
  2. Click Filters (at the top) – Light and Shadow – Drop Shadow.
  3. Set values for the shadow: X (left and right), Y (up and down), blur radius (degree of fuzziness) and opacity (amount of transparency). Keep in mind: the bigger the X, Y, and blur radius, the bigger the shadow; the lower the opacity, the lighter the shadow. After setting the values, click OK to make the shadow. I used X=50, Y=50, blur radius=90, and opacity=40 for a big, lighter shadow.
  4. Select the banner shadow layer.
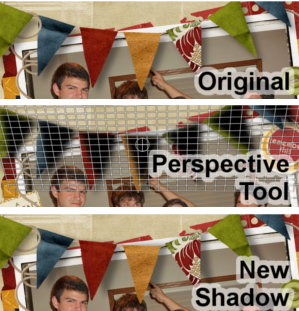
  5. Click Shift + P for the Perspective Tool.
  6. Click on the shadow on the layout. The black shadow will come to the top so you can work on it.
  7. Pull the corners of the shadow however you wish. I pulled the shadow so the top of the banner shadow was close to the top and slightly right of the top of the banner while the tips of the shadow were farther right and slightly shorter than the banner. Play around to achieve the effect you want.
  8. Click Reset to try again or click Transform to make your adjustments permanent. If you don’t like the end result, it’s easy to delete the shadow layer and try again.

Here’s what these steps looked like.

I also used this same technique of altering shadows to get a little lift on the edges of papers and strings.

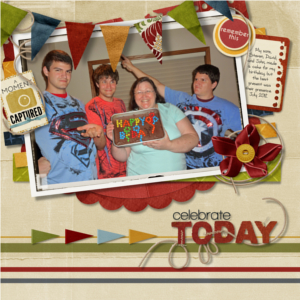
Why not try jazzing up a JIF page, too? Post your digital scrapbooking layouts in the Gallery for all of us to admire! Happy Scrapping!


Article by Sue Maravelas

Submit a Comment Cancel reply

Your email address will not be published. Required fields are marked *

Welcome to the SG Design Shop Blog - where modern memory keeping meets heritage scrapbooking! Here you'll find digital products and all the inspiration you need to complete your projects.

subscribe-imgTo our Free Newsletter

Search the blog

Favorite Categories


Learn How Sidebar Badge
Tutorials Sidebar Badge
hybrid projects sidebar button
art journaling sidebar button
mobile scrapping sidebar button
planners sidebar button

Connect with us

SG Facebook Image

Partners

Qwiklearn -The easiest way to learn digital scrapbooking!

Adobe Photoshop Affiliate Badge

Links

  • About Us
  • Storefront
  • Terms of Use
  • FAQs

HELP

  • Contact Us
  • Email

FOLLOW US


© 2023 Scrap Girls - All Rights Reserved.Privacy PolicySite Map