 How I Digitally Draw and Paint Embellishments
Many times when I start a collection, the embellishments are the first thing I focus on. I make a list of all of the items that I think I might want to include in a collection. After I’ve made my list, I decide which items I want to try and paint, then I study how those items are made. I might have an actual item in my home or I find photos online to look at. Then I mentally work my way through how they are constructed and how I might interpret that as an embellishment.
Actually, I draw in three different styles/ways, depending on the detail of the image:
1. Draw from beginning to end, right in Photoshop.
2. Draw from one of my sketches.
3. Draw from a photograph that I have taken.
I paint all my images using the process described below. I’m going to show you the process I use in #1 (draw directly in Photoshop):
If it’s an image that has a pretty simple structure, I go straight to Photoshop and start drawing on a 12×12-inch paper using the Pen tool. Below, I’ll take you through the basic steps of how I created the Egg Timer in the Grandma’s Kitchen Collection Biggie.

When I start to draw an image, I think from back to front, as in what would be in the back of the image and what would be on top. So, in this case, I started with the body. As I draw, I do it in layers, adding a layer above or below, as needed. Each color in the image is a different layer.
This was my final drawn image of the timer before I began to actually paint it. At this point, I already had 26 layers. I might combine or even delete layers later on, but I like to keep things on separate layers so it’s easier to change and tweak how the image looks further into the process. For example, the feather lines on the wings and main body were eventually hidden, but they served as a guide for painting in those areas.

Step 2 is to start laying on color. I usually work with a palette that consists of four colors: Base, Shade, Shadow, and Highlight.
I change each layer to the base color I have chosen. Starting at the bottom of the image (the grass layer), I add a layer and clip it to the base layer. Then, using a Soft Paintbrush, I paint around the edges of each layer to give it a clean, consistent edge. On the grass layer, I brushed in areas that I wanted to separate out a little bit so it wouldn’t end up being just a green blob beneath the feet.

Step 3 is to start adding in the shade and shadow areas. This is where the magic starts to take place and the image starts to really come together. I work layer by layer. With this image, I started with the grass layer and added and clipped another layer to the base layer (above the previous shade layer I had already finished). Using various paint brush settings, I painted in the shade and shadow areas
The next image shows just the grass layer with the base shade and shadow completed.

And here is the full image, once each layer has gone through the shade and shadow painting steps.

The final step is to add the highlight and to do the blending. I use the Paint brush to highlight and the Smudge brush to blend the feathers and the grass area. This takes the sharp edge off of some of the painting strokes and smoothes and blends the areas.
Here we have the final image:

Next, I want to show you an image using Process #2 (draw and paint from a sketch). This eagle was truly a labor of love and took me several months to complete. If I remember right, I painted this more than 10 years ago, back when Paint Shop Pro was still known as Jasc Software. I pushed the program beyond its layer limits (500 layers) and had to group and merge layers before I was truly ready to do so. I haven’t had that problem with Photoshop…yet!
This image started out on paper.
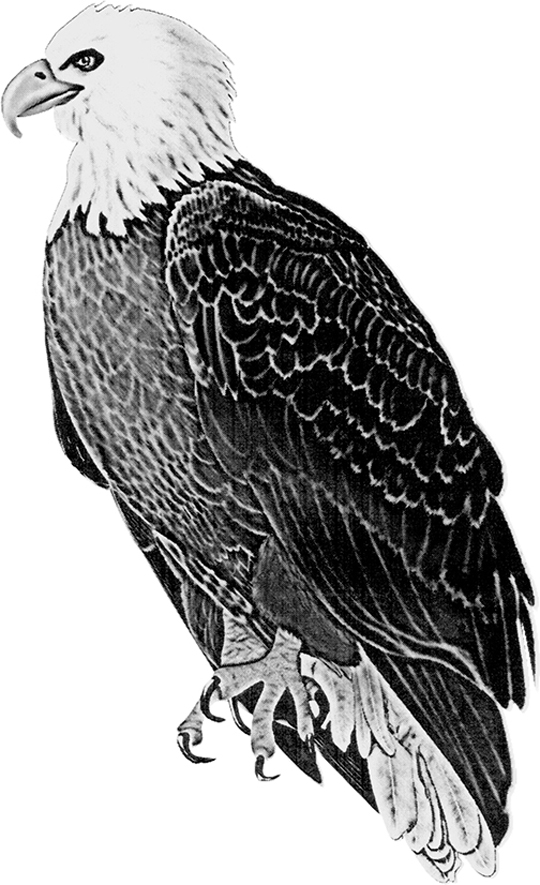
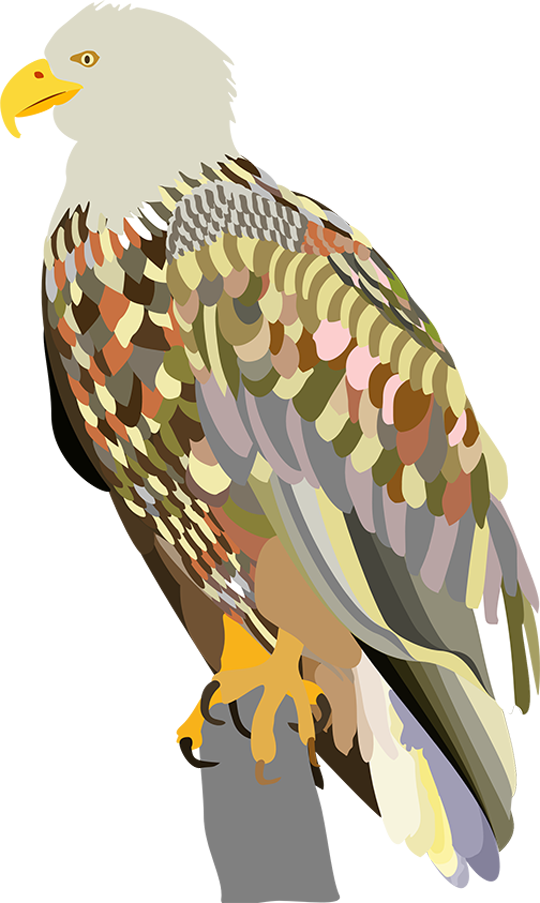
I scanned it into Paint Shop Pro and used the Pen tool to draw in each and every detail. Each piece, feather, talons, eyes, beak were all on separate layers.
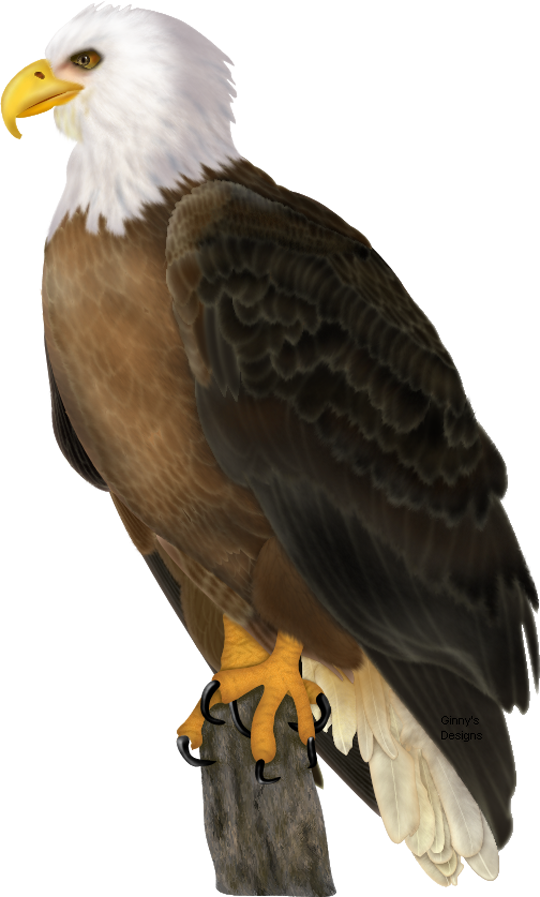
After painstakingly painting and blending each layer, here is the final product.
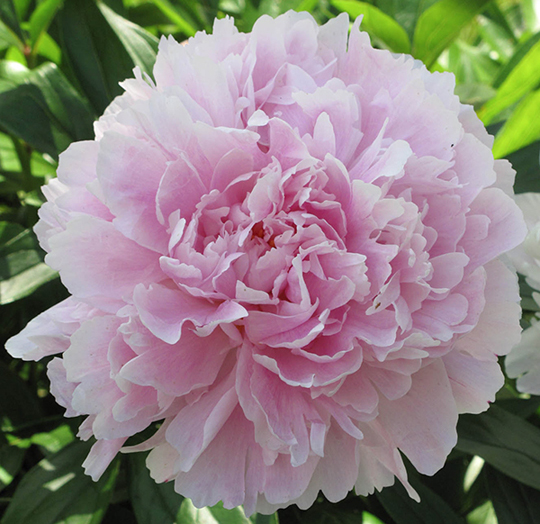
Finally, let me show you Process #3 (draw and paint from one of my photographs). I used a photograph of a peony that I took from my own flower garden to use as the base for this embellishment which is included in the
Beauty and Grace Collection.

This is my original photo.
The next step was the drawing in Photoshop.

And here is the final image.

Thanks for letting me share my process for creating elements for digital scrapbooking kits. As you can tell, I put a lot of myself – and a lot of love – into every piece of art that I include in my Scrap Girls collections!
– Ginny Whitcomb


