
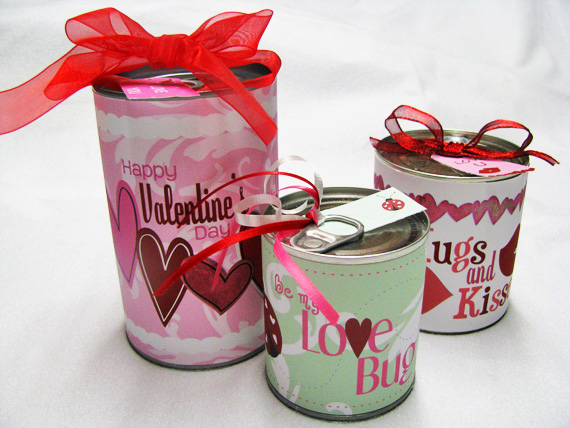
I was looking for something to create in the way of Valentine’s Day gifts for my daughter and her family that would be easy, fun, and a little out of the ordinary. I found these wonderful little ScrapSimple Craft Templates: Pop Top Can gift templates that are the perfect hybrid craft, and I love them! They are just adorable and so simple to create. They can be filled with all kinds of small gift items: candy, treats, jewelry, cash, trinkets, etc., and they are appropriate for all ages.
Digital scrapbooking supplies used:
ScrapSimple Craft Templates: Valentine Day Pop Top
Ever So Lovely Collection Biggie
ScrapSimple Tools – Styles: Dotted Epoxy 6401 Super Biggie
ScrapSimple Tools – Styles: Watercolor Kraft 6401 Super Biggie
Craft supplies used:
Cardstock
Paper trimmer
Scissors
Candies, treats or small gifts as desired to fill the cans
Glue suitable for use on metal
Optional: Ribbon, bows, fibers, yarn, or other decorative embellishments for the can tops
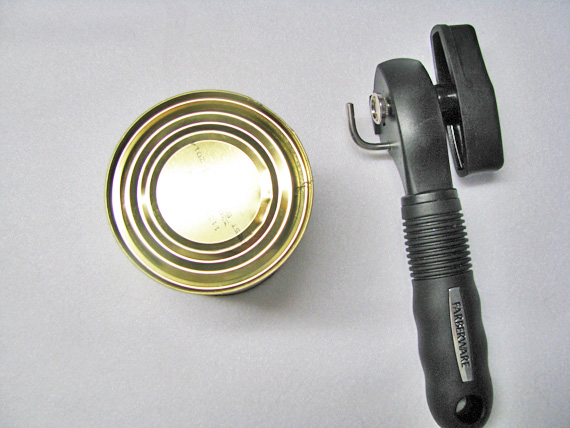
A safety can opener which opens cans without leaving any sharp edges. If you don’t already have one, they are available in electric and hand held types. The inexpensive hand held type is sometimes available in the cooking utensils/gadgets section of grocery stores.
Unopened cans with pop top lids
***Please note: The templates are sized for the following size cans: The small template is sized for a 7.75 oz. individual serving size can of beans and weenies (2.75”h x 8.5” w). The medium template is for an 11 oz. can of mandarin oranges (3”h x 9.5”w), and the large template is for a 20 oz. can of pineapple (4.25”h x 9.5”w). You want to be sure the cans you use have seamed bottoms rather than molded bottoms. The “molded bottom” type of can will not work for this project.
Note: These templates could be used with other cans of similar sizes; you would just need to make the appropriate size adjustments to the templates.
Step 1 – Create Labels
Before you create the label(s) you wish to use, you may want to create a “test” label to be sure it will fit the can you plan to use. One way you could do this is to first open PSD file of the label template you plan to use, print and cut it out. Wrap it around the can to be sure it fits appropriately.
Another way to create a test label is to write down the measurements of the label template as shown in the PSD file, then cut a strip of paper the same size and wrap it around the can to be sure it fits.
If you do need to make any adjustments to the label size, be sure to either re-name or make a copy of the original PSD file before you make your size adjustments.
Once you have decided on the template and size you want to use to decorate the cans, use your digital scrapbooking supplies (papers, styles, embellishments, etc.,) to create your labels and tags. Print these onto lightweight cardstock, cut out and set them aside.
Step 2 – Prepare Cans
Open the can from the bottom with the safety can opener and empty contents. Leave the pop top tab and lid of the can intact.
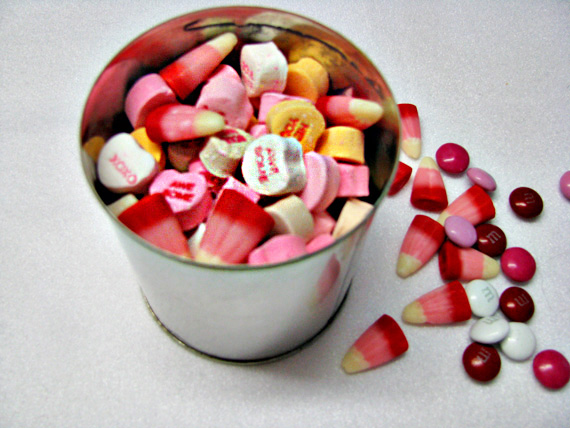
Thoroughly wash and rinse the can and bottom piece and remove the label. Allow to dry completely. Fill the can from the bottom with desired candies, treats, goodies, small gifts, etc.
Step 3 – Apply a thin line of glue around the outer rim of the bottom piece.
Press the piece back onto the bottom of the can and hold for a few minutes while the glue sets. You may want to place a heavy object such as a heavy book on top of the can while the glue continues to set. Allow the glue to set completely before turning the can over.
Step 4 – Now you are ready to apply your label. Apply a line of glue or strip of double-sided adhesive to one end of the label and press into place on the can. Wrap the label around the can and apply another line of glue to the end where the label ends meet and press into place. Add the tag and embellishments as desired.
Now you can have wonderful little Valentine’s Day gifts customized for everyone you love, and you will enjoy the process of creating them yourself as well. This is a great way to truly give “gifts from the heart”. I hope you enjoy making them as much as I do and we would love to see some of your loving creations in the Scrap Girls Hybrid Layout Gallery soon.
Tutorial written by Theresa Guyer


