
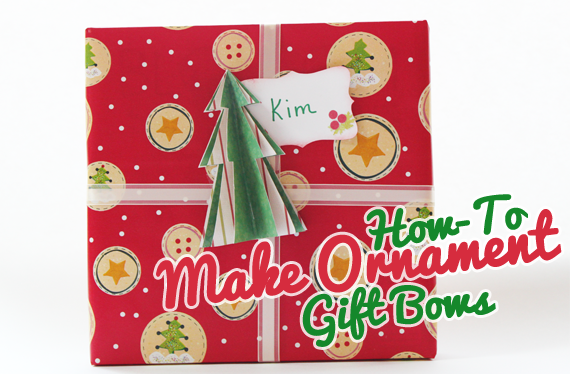
My favorite part of the holidays is watching my loved ones open gifts that I’ve picked out for them! I have one special friend, Kim, who always notices the extra care that goes into the wrapping of the gift. This year, I thought I would “dress up” her gift just a little bit more than the usual wrapping paper and bow. I turned to the Scrap Girls Boutique for help!
Last year, I made these adorable ornaments for my tree using Syndee Nuckles’ ScrapSimple Craft Templates: Ornaments. As I started to decorate my tree this year, I came across these ornaments and inspiration hit me…I could use those templates to make a paper ornament gift bow!
Supplies Needed:
ScrapSimple Craft Templates: Ornaments
Holiday Themed digital scrapbooking kits
Matte Photo Paper or Cardstock
Stapler
Scissors
Paper Scorer
Adhesive
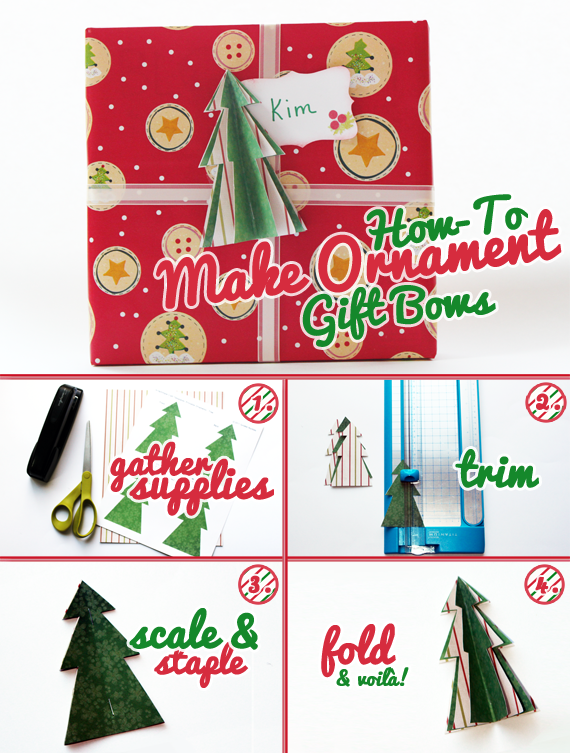
1. To begin, open Syndee’s craft template in your scrapbooking software. I’m using the Tree template, to match the wrapping paper on the gift. Then chose a digital scrapbook paper and place it under the template in your software. Print the template using your printer. Next, choose a coordinating paper and printed that on the backside of the template you just printed.
2. Next, cut out the four trees. Score from the tippy top of the tree right down to the base on all four trees. I have a scoring tool on my paper cutter, but if you don’t have a scorer, you can fold the tree in half vertically and press the seem down with a bone folder or a table spoon.
3. For the next step, layer all four trees on top of each other. Grab your handy dandy stapler and put a staple along the score mark about 3/4 inch from the base of the tree and another staple about 3/4 inch from the top.
**Note: If you would like to make this an ornament for the tree after the gift is opened, you can add some ribbon between the layers of trees and staple the ribbon into the score line.
4. Finally, fold the top tree along the score line. Repeat folding the next two trees. Keep the bottom tree flat to act as a base for the gift. Using removable double-sided tape, or any adhesive of your choice, tape the finished “bow” to the gift, added a tag and some ribbon, and voila! A gift with a unique bow!
An additional idea: Try inking the edges of the tree or adding glitter for a fun touch to this project!
Project uses:


