• Facebook
  • Twitter
ScrapGirls
  • SHOP
  • LEARN HOW
  • BLOG
  • FORUM
  • CHAT
  • CONTACT US
Select Page
Home / All Posts / Fun with Warped Text

Fun with Warped Text

Today I’ll show you how to use the Warped Text feature in Photoshop Elements to help you with designing creative and interesting titles and word art for your scrapbook pages. First, I’ll explain some basic information about the Warped Text feature, then I’ll give you some examples of the different styles and settings.
When the Horizontal Type Tool is active, you’ll see the Create warped text icon in the Options Bar. It looks like the letter T with a curved line below it.

When this option is selected, the Warped Text dialog box will open.

Click on the Style drop down and you’ll see a list of 15 available warp styles to choose from. I like to think of these as the basic “shapes” that the text will warp to.

Below the Style drop-down, you may choose either Horizontal or Vertical to control the direction of the warp. This is not the direction of your text, it is only the warp direction.
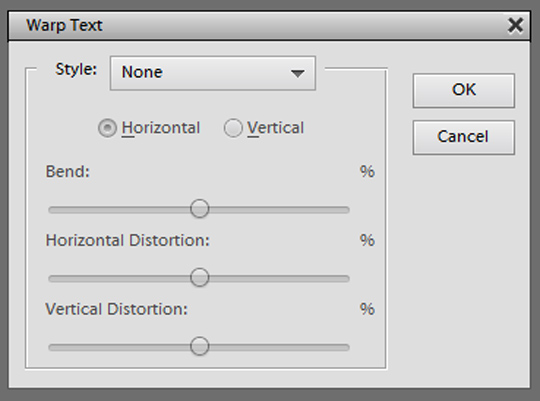
There are three sliders:

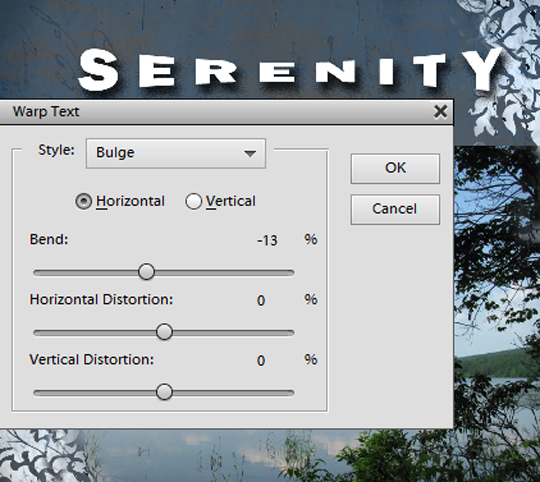
  1. Bend: This is the percentage of Bend or the degree to which the warped text will bend. The default setting is +50%.
  2. Horizontal Distortion: When applied, this will distort the horizontal perspective of the warp.
  3. Vertical Distortion: When applied, this will distort the vertical perspective of the warp.

Here is an example of a title I created and the settings I used:

Just for illustrative purposes, this is what the title would look like with different settings:

Note that I used the same style (Bulge), and I changed the Bend, Horizontal, and Vertical Distortions.

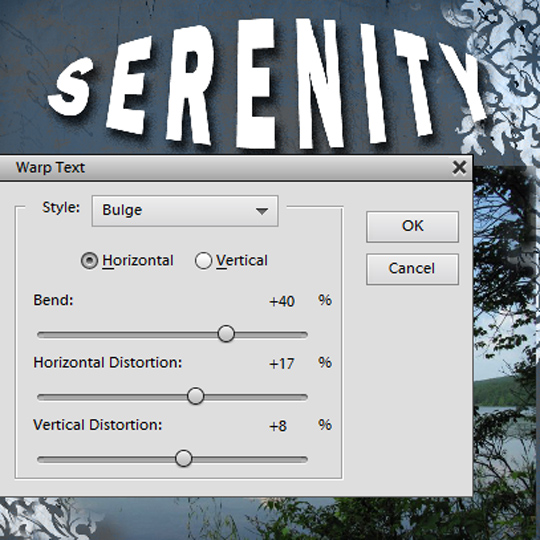
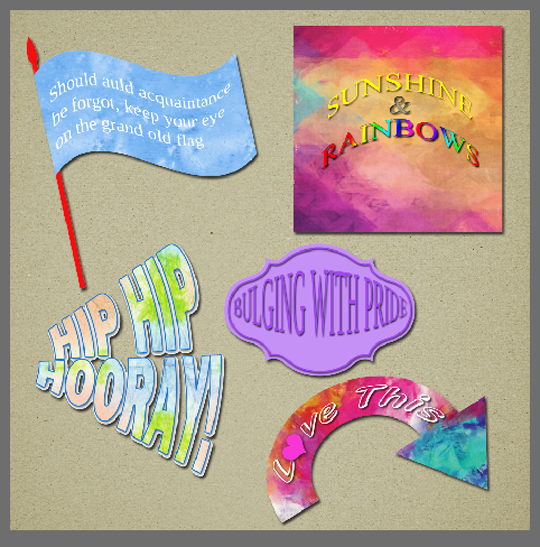
Here are a few more examples.

I think the best way to learn about warped text is to just jump in and experiment with different settings to see what kind of results you can achieve. Just play and have fun!
When working with the Warped Text feature, there are two important things you should keep in mind. First, the Text tool and text layer must be active to be able to use the Warped Text option. Also, if you simplify your text layer, you will not be able to activate the Warped Text feature.
To begin, open a blank document, and select the Horizontal Type Tool. Choose your desired font, size, and font color. Type a title or a few random words.

Now, in the Tool Options Bar, click on the Create warped text icon, select a style from the style drop down, and play with various settings. As with regular text, you can edit, clip papers, or apply layer styles to add interest.

I hope you’ve enjoyed this tutorial. and I encourage you to try warping text on some of your pages. I would love to see some of your warped text creations in the Scrap Girls Gallery.

Shapes Fancy 6301
Tie Dyed Delight Paper
ScrapSimple Tools – Styles: Artful Canvas 6401
ScrapSimple Tools – Styles: Different Strokes 2
Zoomba Collection Biggie
Tutorial written by Theresa Guyer
Created using Photoshop Elements 11 with Windows 7
 

Welcome to the SG Design Shop Blog - where modern memory keeping meets heritage scrapbooking! Here you'll find digital products and all the inspiration you need to complete your projects.

subscribe-imgTo our Free Newsletter

Search the blog

Favorite Categories


Learn How Sidebar Badge
Tutorials Sidebar Badge
hybrid projects sidebar button
art journaling sidebar button
mobile scrapping sidebar button
planners sidebar button

Connect with us

SG Facebook Image

Partners

Qwiklearn -The easiest way to learn digital scrapbooking!

Adobe Photoshop Affiliate Badge

Links

  • About Us
  • Storefront
  • Terms of Use
  • FAQs

HELP

  • Contact Us
  • Email

FOLLOW US


© 2023 Scrap Girls - All Rights Reserved.Privacy PolicySite Map