Note: The watercolor brush I used is from a bonus brush set that is included with the ScrapSimple Tools – Styles: Watercolor Fabulous 6301.
Let’s get started!
1. Select and open the overlay you wish to work with.
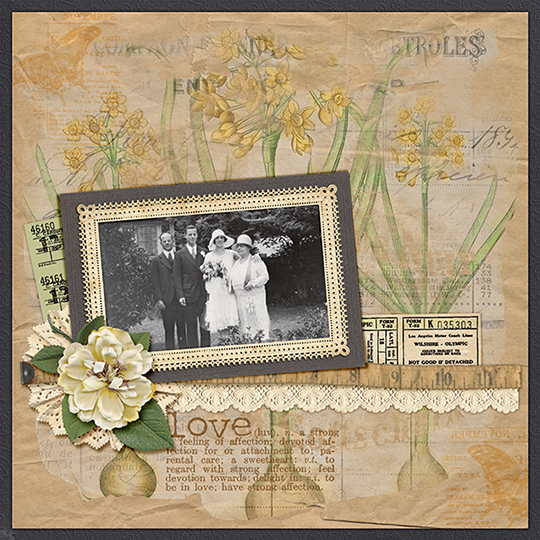
It’s always a good idea to either save the template as a copy or drag it into a new document before you start working to protect your original file. (In order to see the effect of the painting against the background paper I planned to use, I added a paper from Emily’s Antiquities Collection Biggie below the transparency layer.)
2. Create a new layer above the transparency layer (Shift+Ctrl+N).
This is the layer you will be painting on. Set the Blending mode of your new watercolor layer to Overlay. If you want to change the name of the layer in the Layers panel, just double-click on the layer name and type the new name.

3. Select the Brush Tool and reduce the flow percentage.
I set mine to 10%, but the number you choose will depend on your brush, the color you are using, and the effect you like. I used the Watercolor Fabulous Bonus Brush 2 on my page.

4. Choose a color for your brush.
After you choose a color, then with your new layer selected, simply paint color on the flowers and leaves. I used several shades of the colors I used for leaves and flowers to give them a bit more depth. If desired, you can create a new layer for each color to make it easier to edit your painting.
Tip: For even faster painting, use the bracket keys [ ] to quickly change your brush size. The right bracket ] enlarges the brush; the left bracket [ reduces it. If you accidentally paint out of the lines with the watercolor brush, you can either embrace the natural watercolor look (like I did) or simply erase the excess.
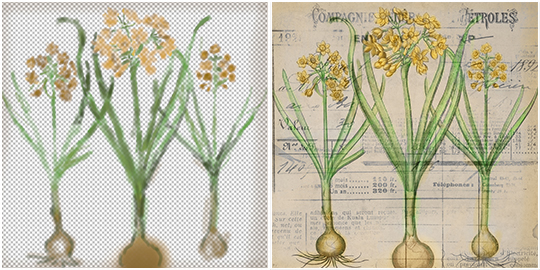
The screenshot below shows what my color layer looked like when I was done coloring it. The finished paper is on the right.
5. Add your finishing touches.
For my finished layout, I used the colored paper overlay with a mask from the ScrapSimple Paper Templates: Ephemera Mask Overlays. To get the same look, slightly reduce the opacity of the floral paper to make it blend better with your background paper.