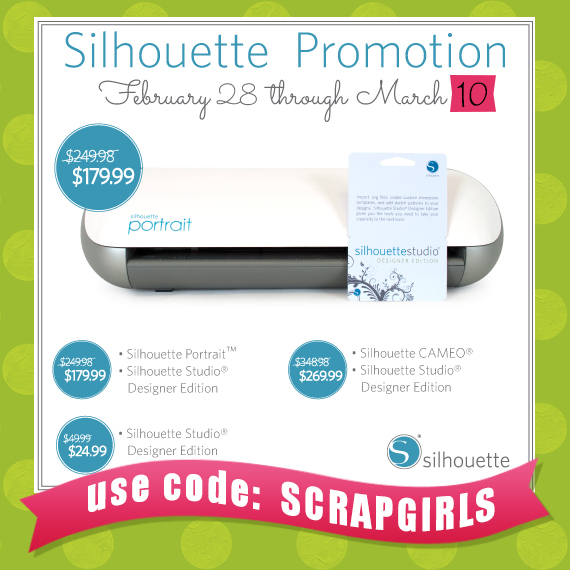
I have some exciting news for you! Scrap Girls is partnering with Silhouette to bring you inspiring new tutorials and great coupons and promotions on Silhouette’s great line of products! We will be focusing on how to use your digital scrapbooking stash along with the Silhouette to create amazing hybrid layouts, cards, home decor and more! You will not believe how amazing and fun this product along with your digi stash can be! This month Silhouette is offering discounts on both their popular Silhouette machines as well as the Silhouette Studio Designer Edition Software. Check out the ad at the end of the tutorial; and make sure to use the Code: SCRAPGIRLS during checkout to receive your discount!
Lori Aragon LOVES her Silhouette Cameo and created this wonderful tutorial just for you using this set of FREE cutting files! Download the FREEBIE below.
[wpdm_file id=8]
Do you have a favorite Season? I’ve been saying the same thing for years now… “I wish it could be Spring all year long!” I love the weather especially; not too hot and not too cold!!! Yes, Spring is just around the corner and it’s a bright and cheery time of year : )
The project I’m going to show you today uses another one of my favorites: Silhouette Cameo ♥ and the Silhouette Studio Designer Edition Software.
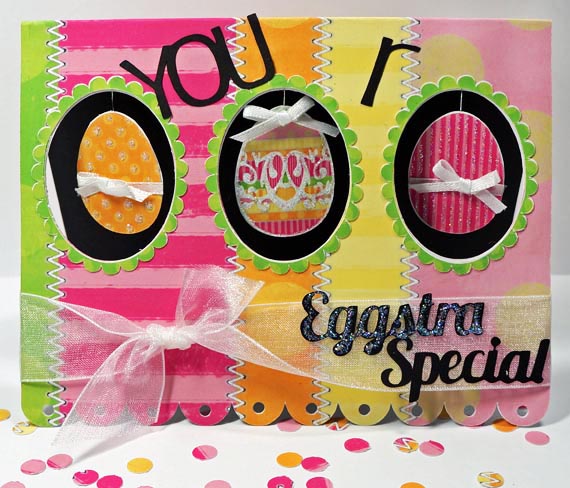
My Cameo is not only one of my favorites, but it’s at the top of my ‘must have’ list! I honestly don’t know how I ever got along without it lol! When I found out that Syndee Nuckles was designing a cuttable file freebie, I was doing the ‘happy dance’ for days!!!!!! I’m soooo excited to share the card I made using her sweet Eggstra Special Cut Files. Enjoy!
Digital scrapbooking supplies used:
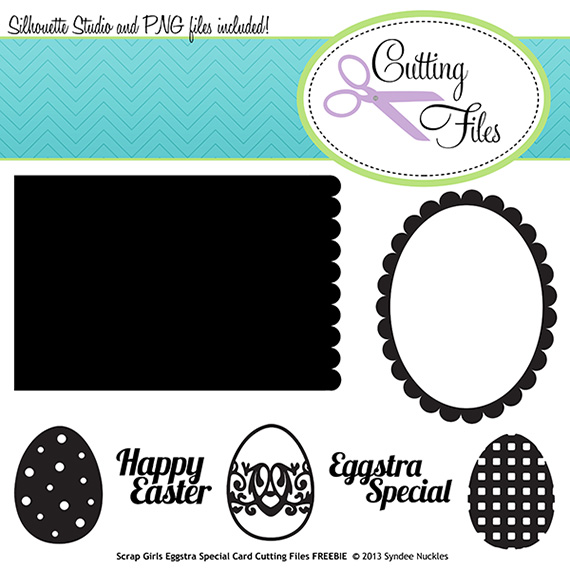
Eggstra Special Cutting Files
Citrus Splash Collection Mini
Citrus Splash Paper Mini 2
Supplies used:
Digital scrapbooking supplies
Silhouette Cameo and Silhouette Designers Edition Software
HP Brochure Paper, Matte 48lb.
White Cardstock
Black Cardstock
Stardust Stickles
1/8″ and 1″ White Ribbon
Metallic Thread
Quickie Glue Pen, Best Glue Ever, Scotch Tape
Paper cutter, Scissors, Hole Punch
Instructions:
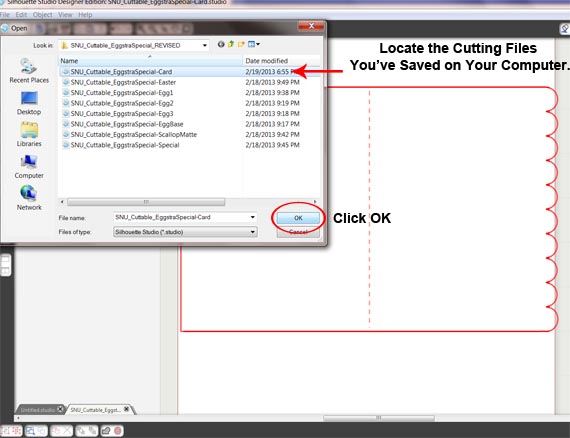
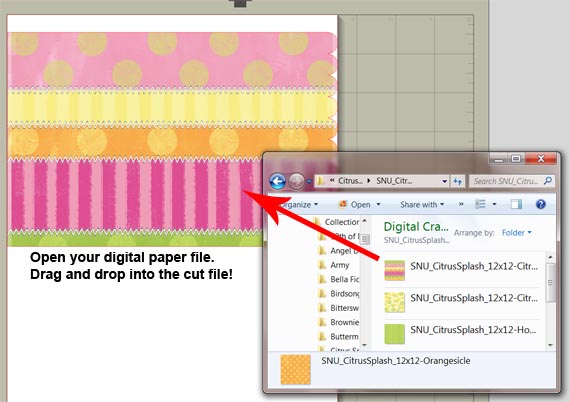
Step 1 – Open Eggstra Special Card Cut File in your Silhouette Designers Edition Software.
Step 2- Open your choice of digital scrapbooking paper and drop into the Card Cut File.
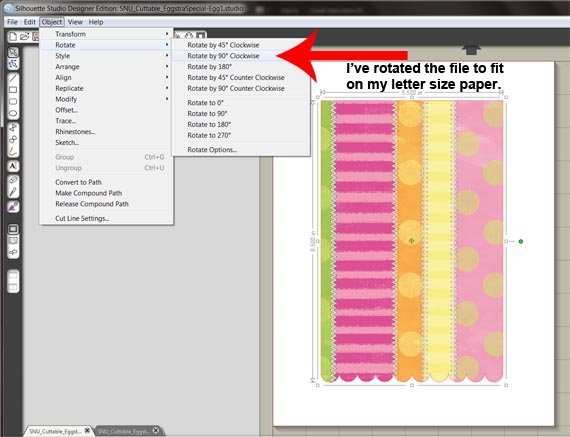
Step 3 – Since I used HP Matte Brochure Paper in 8.5″ x 11″ I needed to rotate the Cut File to fit properly on the page.
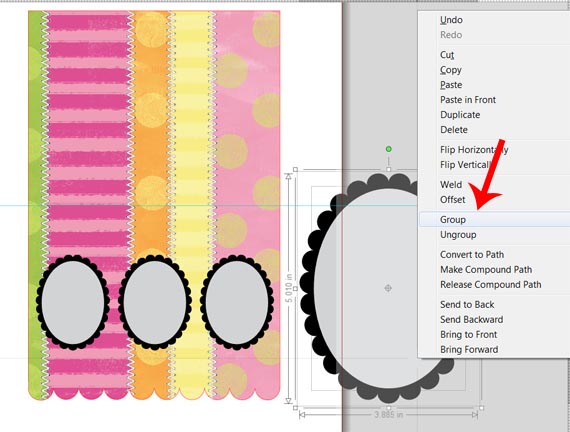
Step 4 – Open the Scallop Matte Cut File and resize if desired. To make sure the oval and outside scallop resize together, select both of them, right click with your mouse and click on ‘Group.’
Here I begin to design my card front… ‘I wanted to fit three across on my 4.25″ x 5.5″ inch card base.
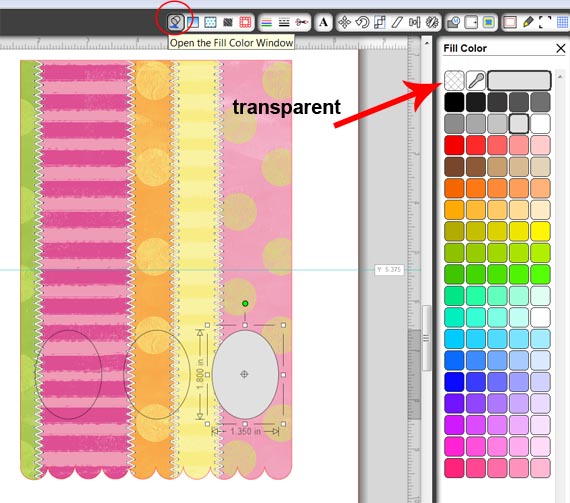
Step 5 – Because I wanted only the ovals to cut, I ungrouped the Scallop Matte and placed the Scallop Frame portion to the side. For print and cut, remove the color of the oval so it doesn’t print by selecting Fill Color and Transparent.
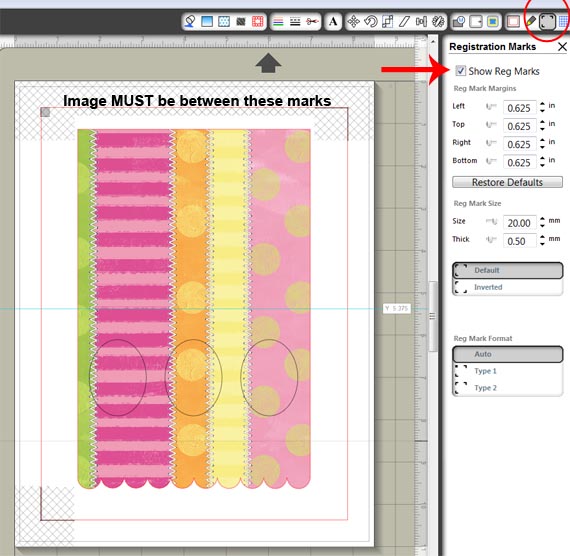
Step 6 – Open the Registration Marks Window and check the box Show Reg Marks. Position your card base between these marks. You’ll notice to the right, you can adjust the marks if necessary by clicking on the Left, Right, Top, and Bottom Margins. Note: The blue line is a guide line I used to see where my card folded.
Step 7 – Check to see how your image will cut by clicking on the scissors at the top. This opens the ‘Cut Style’ window. Click on your card base (and ovals if you haven’t grouped them together) to select, then make sure that ‘Cut’ is highlighted.

Step 8 – Before sending to printer, I’ve changed the colored lines of the oval to transparent. They are still there and will cut, but since I have them black for this tutorial, I didn’t want the black lines to print! Change line color by clicking on the colored lines at the top and choosing a color on the right.
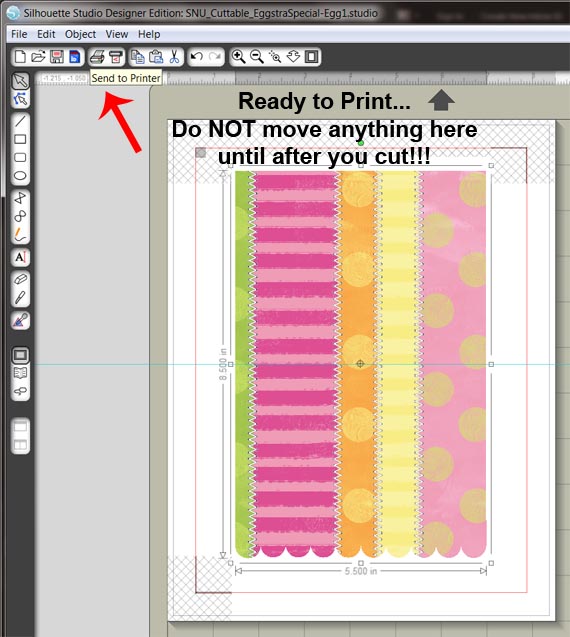
Step 9 – After printing on the Brochure Paper (which gives a wonderful color!) I placed it on the Silhouette Cutting Mat, making sure I placed it the same way it looked on my computer screen. You’ll see the arrow showing you which way the mat will go into the Silhouette first and how your paper is oriented, either Portrait or Landscape.
Here you’ll set your Silhouette Cut Settings. These are the settings I used for the Brochure Paper. You can scroll through this box to find most types of paper and the software will tell you what your blade setting should be!!!

Step 10 – Ready for another print and cut! Again, I opened the digital scrapbooking paper from Syndee’s Citrus Splash Collection and dropped them into the files as shown above.
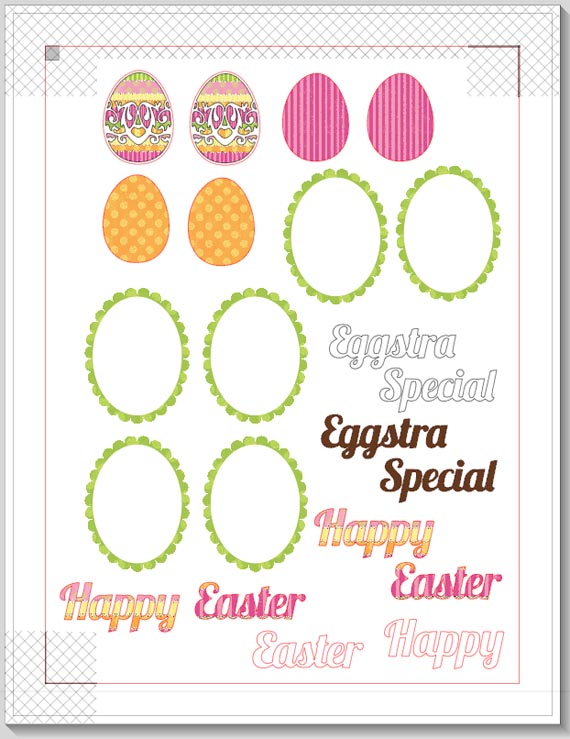
Step 11 – For more stability, I cut the card a second time with white cardstock. I’ve also print and cut three egg shapes which I sized to fit in the center of the ovals.
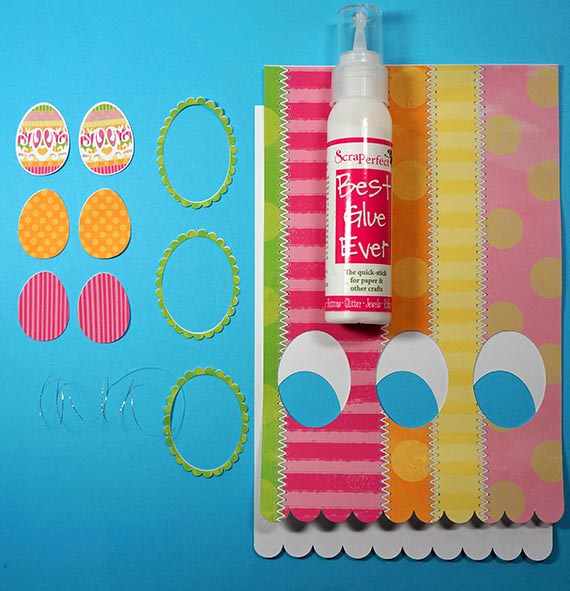
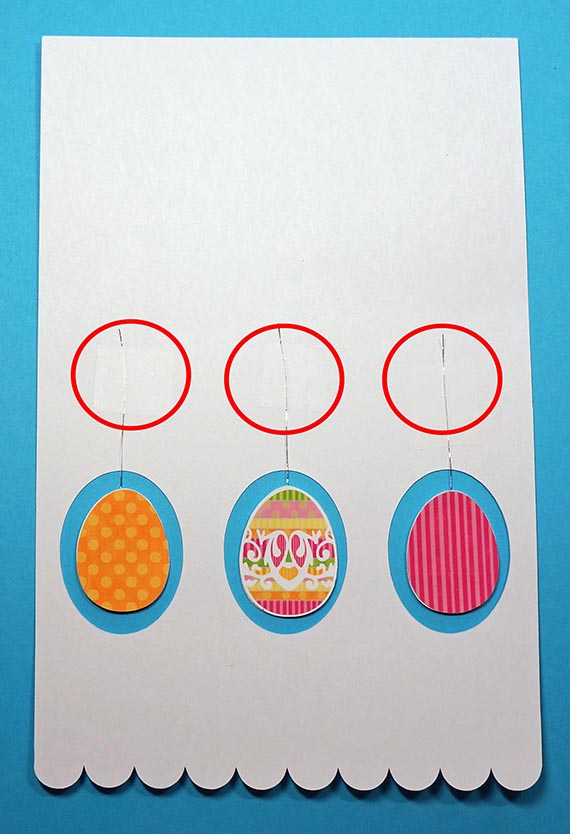
Step 12 – Cut a piece of thread the length desired for your project. I cut mine about 4 inches. I taped one end of the thread to the back of an egg and glued it’s twin together. They are back to back, so as they hang, you can see color from both sides.

Step 13 – Score both white and patterned card bases so they will fold in half (but don’t fold yet!) Position eggs so they will hang in the center of the ovals and tape the top end of the thread to the outside of the white card base.
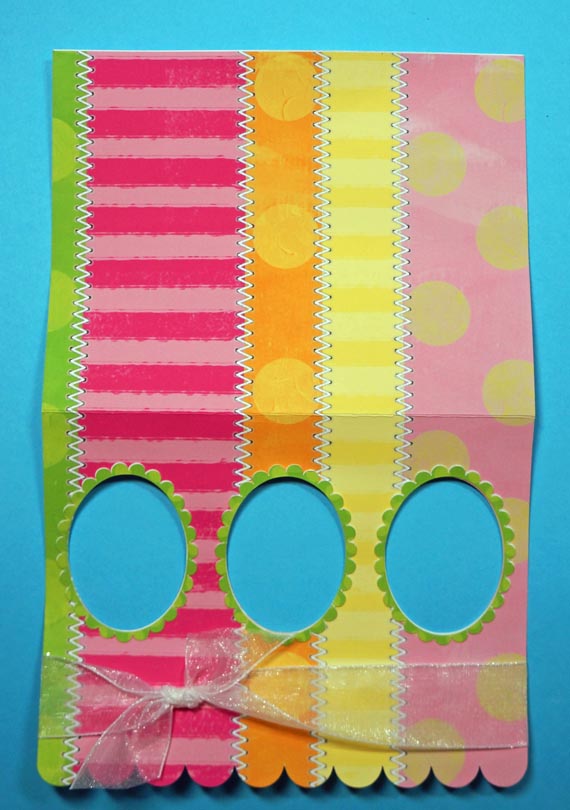
Step 14 – Tie ribbon around the lower portion of the patterned card base and adhere on top of the white card base.
Step 15– Using a hole punch, I ‘eye-balled’ where the holes should go in the center of each scallop. Adhere ‘You R… Eggstra Special’ and embellish as desired.
Tip: You’ll probably want to decorate the eggs before hanging on the card base. I decorated them after and it was a little difficult trying to get in the small areas!
Note: I subtracted the oval from the scallop in the Silhouette software, creating a frame which I used to decorate the inside and outside of each oval cutout. I also created the additional words, ‘You and R.’
Why not try this super cute project with your favorite Scrap Girls Digital Scrapbooking Supplies, then upload your fabulous work to the Scrap Girls Hybrid Gallery. See ya there!
Check out these great deals on the Silhouette Cameo and Silhouette Portrait as well as the Silhouette Studio Designer Software! Please click HERE to take advantage of this month’s discount and don’t forget to enter SCRAPGIRLS as the promo code. Hurry this offer is only good thru March 8th!
Tutorial written by Lori Aragon