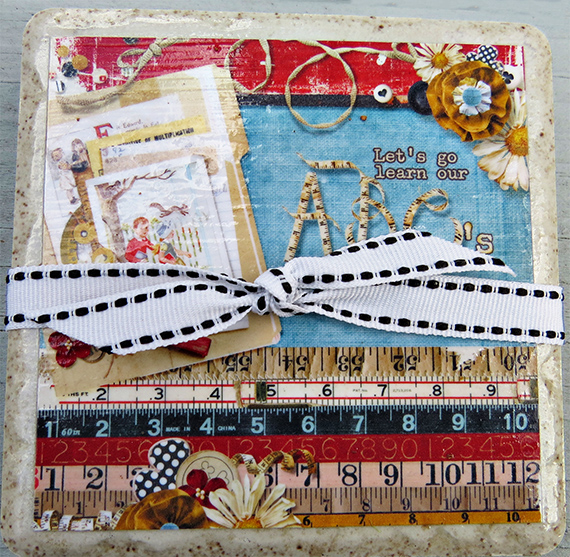
It is never too early to start on Christmas projects and I have a perfectly easy, inexpensive one for all the teachers on your gift list. Easy because you can use your existing layouts or create new ones! I have used the JIFFY Album pages that came with Syndee Nuckles’ adorable One, Two, Buckle My Shoe September 2014 Club
(***please note you only receive the JIFFY Album if you are a club member). Inexpensive because you take these layouts along with 4″x4″ tiles from Home Depot and in a few quick steps you will have an adorable set of coasters to bless your favorite teachers with!
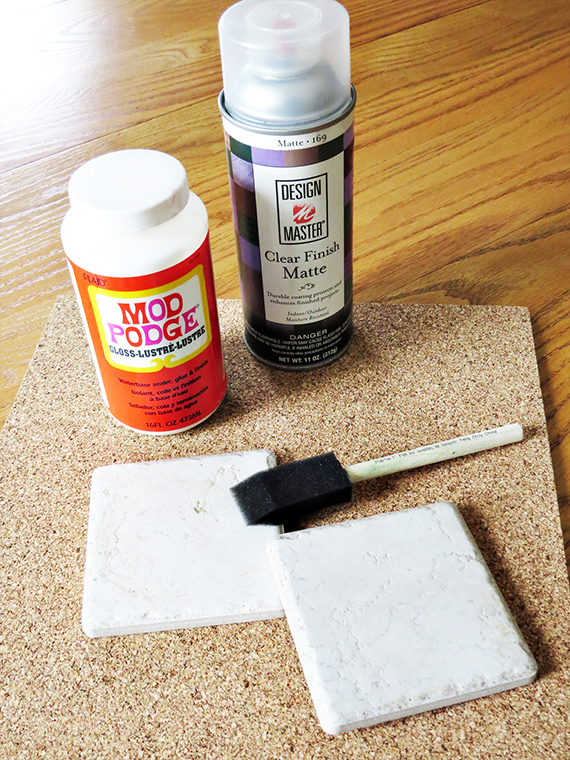
Materials Needed:
4 x 4 tiles (I purchased mine from Home Depot)
Mod Podge & spongebrush
cork board or heavy felt
acrylic sealer
glue gun or your favorite type permanent glue
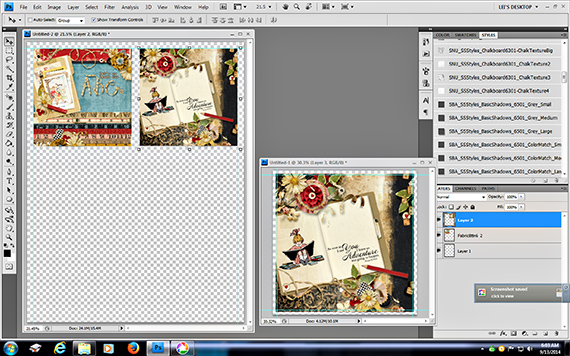
 Step one:
 Open a document in your photo editing program the size of your tile. I put guides on at 1/8 of an inch all the way around as you will want your layout slightly smaller than the actual tile piece. Once you have your small layouts done, you will drag them to an 8.5 x 11 document for printing. Print and cut to size.
 Step two:
 Cover the surface of the tile with one layer of Mod Podge and lay the printed design on top. Using your fingers or a plastic scraper, gently smooth out the paper so there are no air bubbles to make sure you have good contact between the paper and the tile. Let set for about 5 minutes. If you are making a set of four, by the time you lay down the design on the last tile, the first tile should be ready for step three.
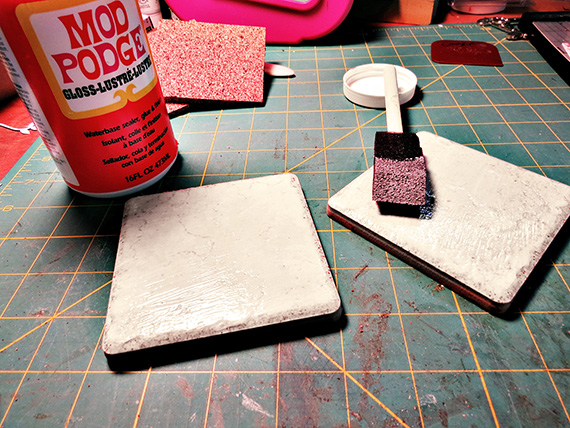 Step Three:
 Apply a coat of Mod Podge over top of the paper and allow to thoroughly dry.
Step Four: While the tile is drying, cut your cork into a square that is slightly smaller than the tile. Hot glue the cork to the back of the tile.
Step Five: Spray the decorative tile with an acrylic sealer. I usually do this part outside or in the garage. You need a space that is well ventilated.
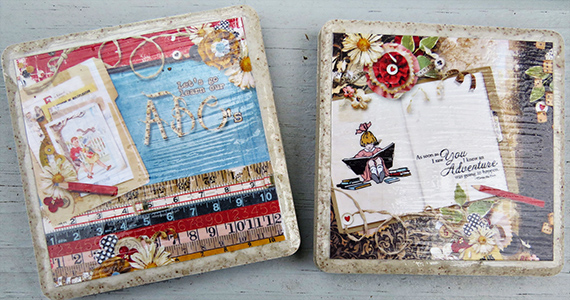
The last step in this process is to tie your coasters together with a matching ribbon and you are all set to gift your favorite teachers with a special set of coasters.
If you give this project a try, please be sure to post it to Scrap Girls Hybrid Layout Gallery so we can see your creation!
And as always . . . Enjoy the Process!!
~ Lei
 (Click on the image below to be taken to the product page)

 . . . . . . . . . . . . . . . . . . . . . . . . . . . . . . . . . . . .
 Tutorial written by Lei Maier


