
Join Hybrid Creative Team Member Karen Webb as she shows you how to create an altered box!
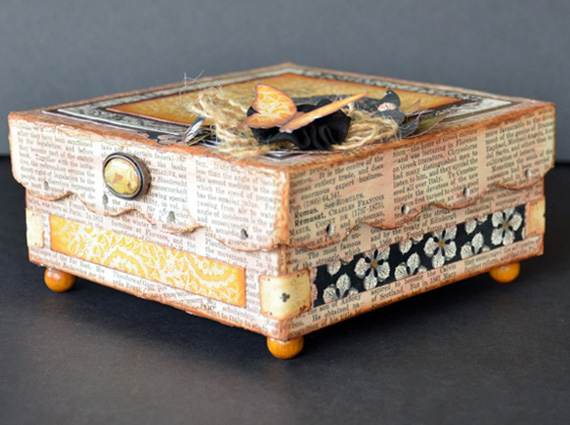
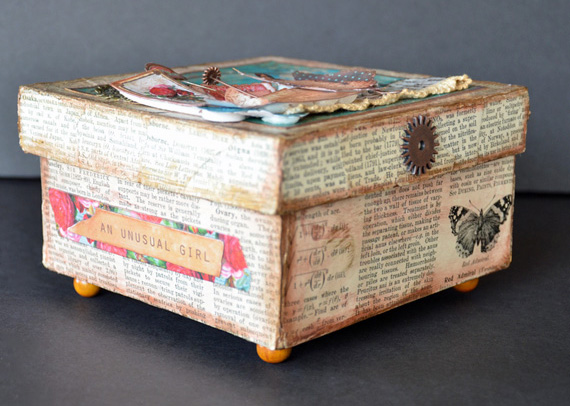
As I have written before I have a bit of an “obsession” with boxes. I particularly like smaller boxes that I can alter to store greeting cards or to hide away a cherished treasure. I have a lot of traditional 12” x 12” inch paper and embellishments in my stash. I also use my paper products, however, there is often a problem with the scale of the patterns when I am working on smaller projects. A pretty piece of 12” x 12” patterned can lose its beauty when you cut out a piece of paper for a 4” x 4” inch project or want to use embellishments designed for 12” x 12” scrapbooking.
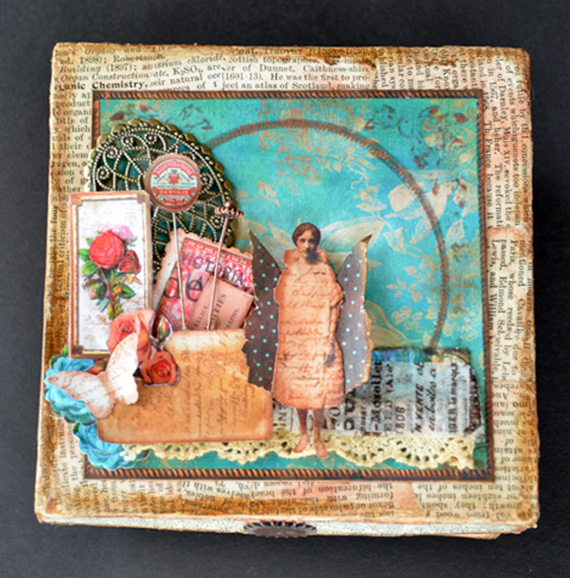
I love that with my digital scrapbooking supplies I have the ability to resize the paper and embellishments to the proper scale. I can create templates for the top or sides as needed, reduce the size of the paper, word art, and embellishments. I am drawn to mixed media so my projects use a variety of supplies and mediums. Working in a digital medium allows me to create a design and move elements around until I have the desired result.
Digital scrapbooking supplies used:
Brookside Manor digital kit
Elegant Quotes Brushes
Vintage Grunge digital kit
ScrapSimple Embellishment Templates: Altered Art Essentials Wings
Craft supplies used:
Scissors, paper cutter, bone folder
Paper – Cre8it Magic Matte if using an ink jet printer (Ink does not smear when gel medium is applied.), old book paper
Adhesive – strong glue, Mod Podge, quality gel medium, dimensional adhesive
Embellishments – printed digital embellishments, metal findings. pins, cloth flowers, fiber, washi tape, beads
Paper box with lid
Distress ink
Various punches
Instructions
Step 1 – Measure the sides and top of your box.
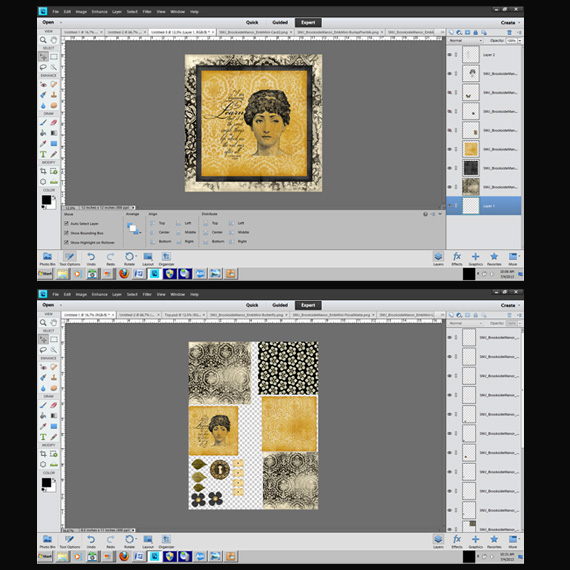
Step 2 – Open a document in your graphics program slightly smaller than the top of your box lid. Create a digital scrapbooking layout for the top of the lid and sides of your box. You could even use an existing layout. Select various digital embellishments, resizing as needed.
Step 3 – Open an 8 ½ x 11 inch document to create a print sheet. Drag digital scrapbooking layout(s) and digital scrapbooking embellishments onto print sheet. Print.
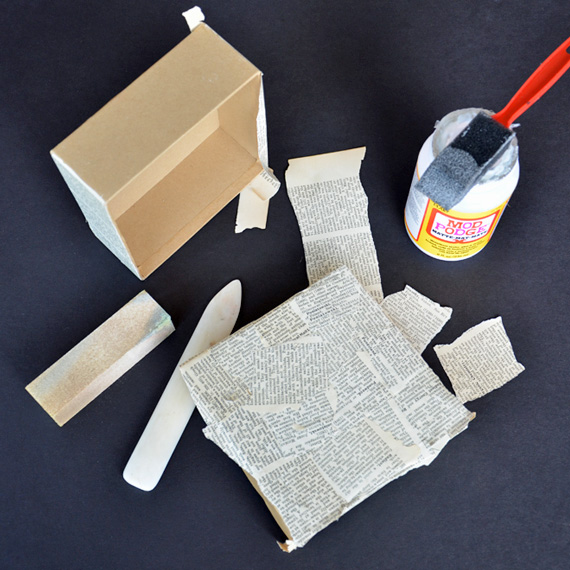
Step 4 – Cover box and lid with old book paper using gel medium or mod podge. Use a sanding block to sand off the paper on the edges of your box and lid.
Step 5 – Cover print sheet with several coats of gel medium. I find it is easier to cover the entire sheet first and then cut out layouts, papers, embellishments. Allow to dry thoroughly between coats.
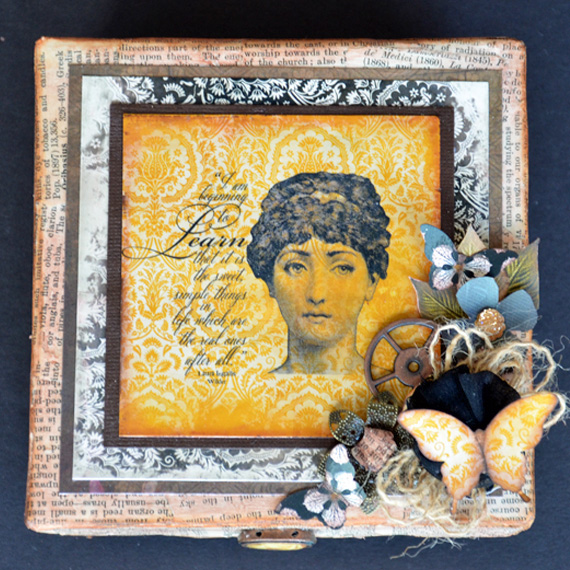
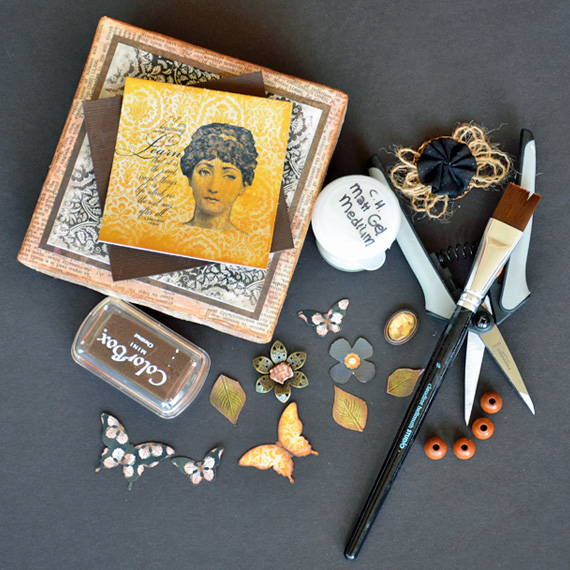
Step 6 – Distress corners of box, lid, layouts, digital embellishments, etc. Affix layout and embellishments to box with gel medium, dimensional adhesive and glue. Affix beads to bottom of box for legs.
I ended up making 2 altered boxes.
I plan to make some cards to go into these boxes for Christmas presents. May seem early to you but I am notorious for waiting to the last minute – lol. Maybe I will be better prepared this year. We would love to see how you use your digital scrapbooking supplies to create your own altered boxes. Post them in the Scrap Girls Hybrid Gallery.
Live each day creatively,
Karen

Tutorial written by Karen Webb


