
As I was putting away the Halloween decorations and putting up the Thanksgiving decorations, I realized I don’t have any fall themed wall art! I have several for Halloween and even more for Christmas, but not a one for Thanksgiving! So, I turned to my digital scrapbooking supplies to create something unique!
Digital Scrapbooking Supplies:
Autumn Riches Collection
1 Scrap Girls Touch of Spice Collection Biggie
Autumn Jewel Collection Biggie
ScrapSimple Tools – Styles: Everyday Glitters Neutrals 6401 Biggie
Other Supplies:
8 inch Embroidery Hoop
cardstock with a texture-I used watercolor paper
printer that will print right to the edges of the paper
scissors
electronic cutter (optional)
ribbon
fall themed embellishments such as stickers, jewels, etc
adhesive
Let’s get started! My printer will print right to the edge of a 8.5 in X 11 in paper, so I created a new document in my scrapping software, 8.5 in X 8.5 in. I am using a 8 in embroidery hoop to frame my wall art, so this size will give me 0.25 in margin to work with. If you have a large format printer, feel free to use a larger hoop! If your printer won’t print right to the edge, choose a smaller hoop for this project. No matter the size, create a new document 0.5 in larger than your hoop.
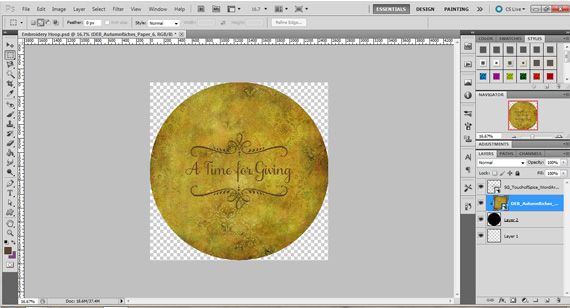
Once I have my new document open, I created a clipping mask in the shape of a circle that fills the whole document. To do this, I used the Elliptical Marquee Tool. I started in the top left corner of my document, while holding down the shift key, I dragged the marquee down to the opposite corner. Now I have circle shaped marching ants. I created a new layer and filled the shape with black using the paint bucket tool.
Next, I chose my background paper. I looked through my digital scrapbooking supplies and chose a gold colored paper from Durin’s Autumn Riches Collection. I placed that paper on top of my circle layer and clipped the paper to the mask below. Then I chose a quote from the Scrap Girls Touch of Spice Collection Biggie. I centered the quote in the middle of the circle.
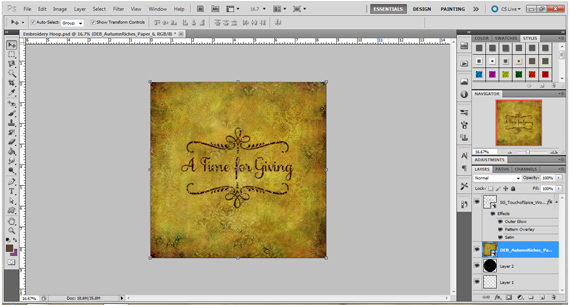
 Even with a shadow, my quote looked kind of flat. I added some digital glitter from Amanda’s Everyday Glitter Neutrals set. It added just the touch I was looking for! Now that I was happy with my quote, I unclipped the background paper from the circle mask. I used the mask to help me visualize the placement of my quote and any embellishments I wanted to print on the background. I chose to print my embellishments separately, but you could definitely print them with your quote and background.
 Now I’m ready to print my project. I wanted to add texture to my project, so I used a watercolor paper. I set my printer to print borderless so I could get the full 8.5 in square on my paper.
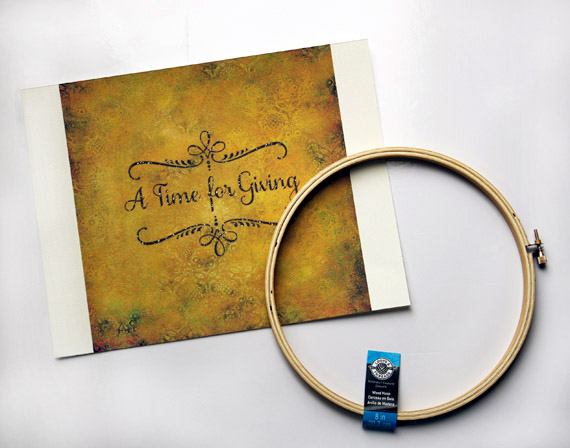 Now the fun begins! I trimmed the white edges off my paper (you can see them in the photo above). I took the outer hoop and placed it on the back side of my background and traced the outer edge. Then I rounded off the corners and cut slits in the paper about 0.50 inch apart. It took me several tries to hoop my paper, and this was the easiest way to get it in the hoop without buckling or wrinkling. Once the paper was in the hoop, I trimmed off any paper sticking out the back that would keep the hoop from hanging flush on the wall. I released a big sigh and got ready to decorate!
My hoop is a boring, unfinished plain color. To dress it up, I glued ribbon around the side of the hoop. While the glue dried, I headed back to my digital scrapbooking supplies and picked several different leaf embellishments and placed them on a new document in my scrapbooking software. I printed them out and cut them using my Silhouette Cutter. If you don’t have a Silhouette, you could cut them out by hand. Once cut, I inked the edges of my leaves with a vintage brown colored ink to take the edges from white to worn.
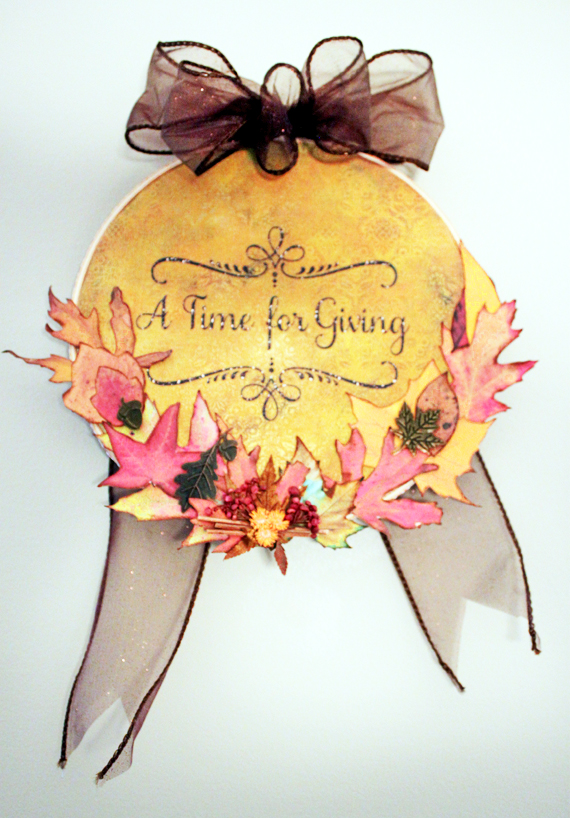
Once the glue on the ribbon was dry, I started to add my leaves to the edge of my hoop, layering them this way and that! I also added some metal stickers and a little fall cluster I found at a local craft store. Finally, I added a bow made from wire ribbon that had just a little bit of sparkle to match the glittered quote. Now I have a custom, one of a kind piece of wall art that I can proudly hang on my wall for Thanksgiving!
I’d love to see what you can create! Post your wall art in the Hybrid Layout Gallery. Have fun!
 Tutorial written by Carla Shute


