

Have you ever looked through your scrapbooking supplies and thought “Hey, that would look cool on a bag or a shirt”? I know I have. And then one day, I was browsing through my local craft store and found iron on transfer paper for my printer! A whole new crafting world opened up for me! Let me show you how I created this one of a kind shirt!
Digital scrapbooking supplies used:
I used Brandy Murry’s Scrap Girls T-Shirt Design Special Freebie
Supply List:
Digital Scrapbooking Supplies
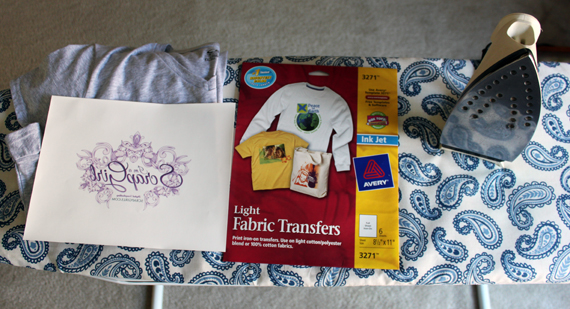
Fabric Transfer Paper for your specific printer (I used Avery Light Fabric Transfers)
scrapbooking software
printer
article of clothing or bag
scissors
pillowcase
iron and ironing board
some muscles
Optional: Iron-On Jewels or Rhinestones
Instructions:
To begin, I opened up my software and created a 5X7 inch document. I dragged in Brandy Murry’s Freebie Special. You can use any digital scrapbooking embellishments, papers, template, photos or alphas in any size you would like! But for my shirt, I thought 5X7 inches would be just the right size.
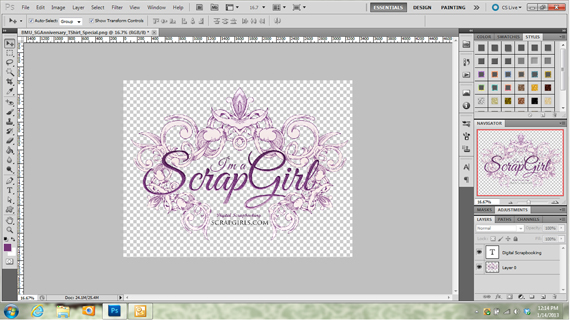
Although this logo was made for Scrap Girls’ 8th Anniversary, I wanted something without a date on it. So, using my eraser tool, I carefully erased the part I wanted to eliminate. I then added the text I did want to replace what I had previously erased. Once you are finished creating your design, the most important step is to flip your design horizontally! Below is a screen shot using Photoshop CS5.
Go to your Edit menu and scroll down to Transform, then select Flip Horizontally and Viola!


The next step is to print your design! When you purchase the fabric transfer paper, make sure you buy the paper that works with your printer. I have an ink jet printer, so I have to use the transfer paper for ink jet printers. Also, the material you will be transferring your design on to is important. I use the Avery brand, and they have paper for light fabrics or dark fabrics. I used the light fabrics paper made for light cotton/polyester blend or 100% cotton fabrics. Just keep your project material in mind when picking the paper. Another important step to keep in mind is the setting on your printer. My HP printer has a Iron-On Transfer setting and that is what I used.
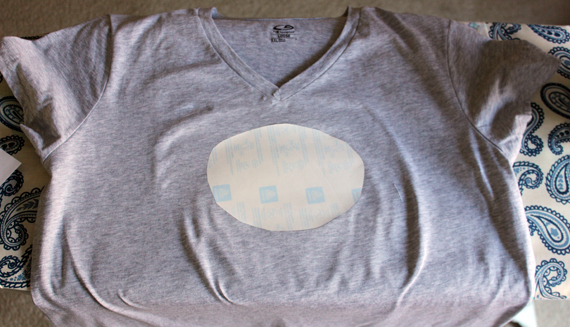
Now comes the fun part!! I’ll give you an overview of what I did, but follow the directions that comes with your transfer paper for the best results. I trimmed my digital scrapbooking design from the paper, staying fairly close to the design. I rounded the edges of my cutting so there are no sharp corners. I set up my ironing board so it was waist high. After making sure my iron did not have any water in it, I set my iron to the hottest cotton setting and let it heat up for 5 minutes. I placed a pillowcase on the ironing board (this was in the directions from Avery), and ironed out any wrinkles. Next, I placed my shirt on top of the pillowcase and ironed out any wrinkles
Then I placed my design, face down, exactly where I wanted the image to be. In this case, it was centered on the front, in the chest area. Your transfer paper instructions will tell you how long to iron the transfer, but I can’t stress enough that it is so important to use pressure! Use full body pressure using both hands (that’s why the ironing board is set to waist high).
Once your design is set, move your shirt from the ironing board to cool. Carefully peel off the backing to reveal your new design! I wanted to add a few last touches to my design. I found Iron-On Rhinestones and added a few to my design. Everything is better with a little Bling!

Now I can take Scrap Girls with me where ever I go. The possibilities are endless! I can’t wait to see what you create and what you showcase it on! Please share it with us in the Scrap Girls Hybrid Gallery.
Have fun!

Tutorial written by Carla Shute


