
One year, the preschool my daughters attended created profile silhouettes of my daughters’ heads. You know the kind, the shape of their profile cut from black paper, mounted on white. It made me so proud and was one of those awwww moments. But now that the girls are older and would never sit still long enough for me to recreate that silhouette, I started to think about other ways I could create art with custom silhouettes. I came up with this tutorial, and the best part is, I created it all digitally!
Digital scrapbooking supplies used:
Holiday Magic Collection Biggie
Brush Set: Fireworks
Twilight Magic Collection Biggie
Scenic Route Collection Biggie
ScrapSimple Tools-Shapes: Costumes
Home Canning Embellishments Biggie
ScrapSimple Tools-Styles: Basic Shadows 6501
Craft supplies:
8X10 frame (or whatever size your project will be)
Photo Paper
Printer
Your own photos
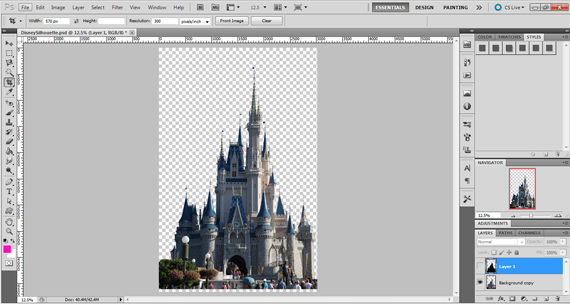
To begin, I thought about what would make a great silhouette. Cityscapes were the first thing to come to mind. I couldn’t find anything I really liked in my photos. Then I got a text from my sister in law, whose family was in Disney World. A light bulb went off! I found a photo of Cinderella’s Castle in Magic Kingdom. I dragged the photo into Photoshop and made a copy of the photo, closing the original.
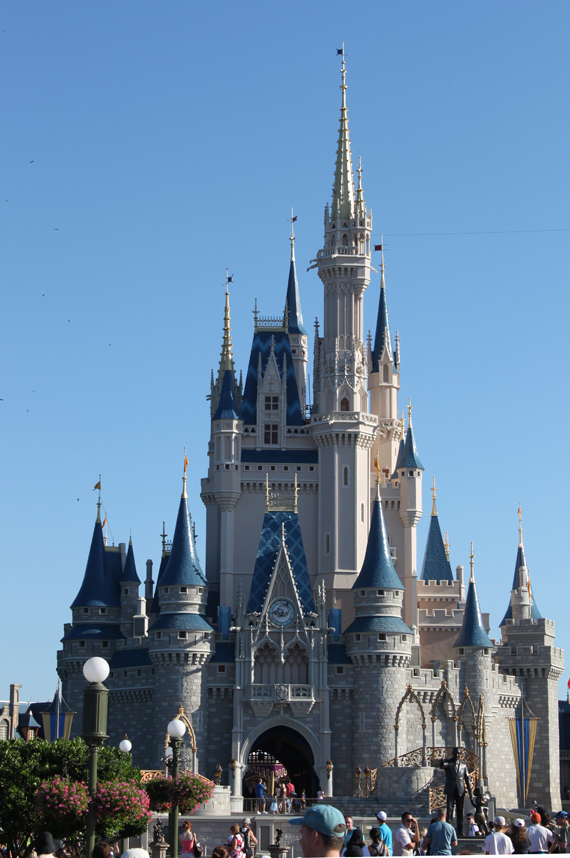
Next, I used the Magic Wand Tool to select the sky and background and deleted it from my photo. Then I used the Magnetic Lasso Tool to select the edges of the castle. Then I zoomed in and used the Quick Selection Tool to make sure I had the lines where I wanted them. I’m not concerned with the details of the castle or the people in front of it. As long as I have nice, clean, crisp lines around the castle, that’s all I want. Then, I chose Select>Inverse and deleted the extra parts of the photo that I didn’t want.
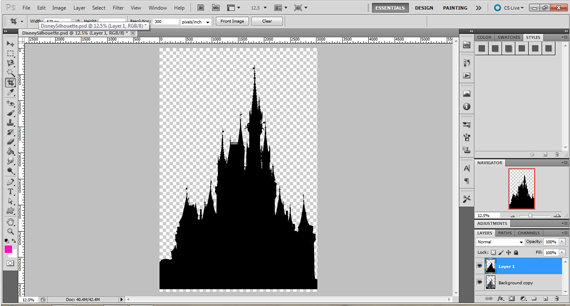
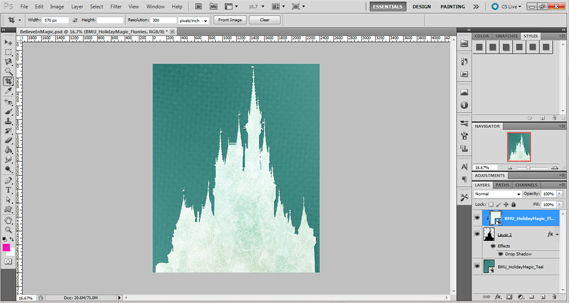
Finally, I added a new layer on top of my photo, and using the Paint Bucket Tool, I filled in the new layer with black. Using a clipping mask (control+alt+g in Photoshop), I clipped the black to my castle shape. I merged the two layers and now I had a silhouette of the Disney Castle. But…I thought I could take it up a notch!
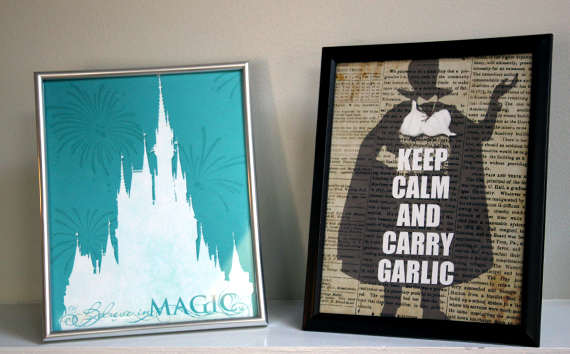
After opening a new document, 8×10 inches, 300 dpi, I dragged my silhouette castle onto it. Now came the fun part! Using my digital scrapbooking papers, I created a background behind the castle and clipped a paper to the castle mask. I thought the papers in the Holiday Magic digital kit were perfect!
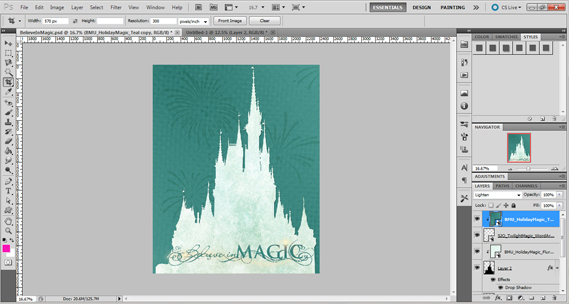
One of my favorite childhood memories of Disney World was watching the fireworks as they went off behind the castle. So I recreated that with the Digital Brush Set: Fireworks! I changed the blending mode to Multiply to create a more subtle effect. Then, I searched for the perfect sentiment to add. I found it in the Twilight Magic digital kit. The “Believe in Magic” word art was perfect! I added that to the castle, clipped the same background paper to the word art and changed the Blending Mode to Lighten. I added a shadow to the castle layer and got ready to print it.
With Halloween approaching, I thought this would make a fun decoration! So, I created a new document, 8×10 inches, 300 dpi, in Photoshop. I wanted a old, newspaper look to my background, so I chose a digital scrapbooking paper from Scenic Route digital kit. Next, I looked through the Custom Shapes available in the Scrap Girls Boutique and found a set of Halloween costumes. The vampire costume was just what I wanted! I created a new layer above my newspaper background layer, with black set as my foreground color, and created my shape by clicking and dragging out the shape. Once it was set to my liking, I rasterized the layer.

I then reduced the opacity to 50% so the newsprint would show through the shape. Next, I added the saying, “Keep Calm and Carry Garlic” using the text tool and the font Impact. I was lucky to find some garlic embellishments in the Boutique, so I added them as well. I added a shadow to the text and garlic and was ready to print. Now I have a cute, one of a kind Halloween decoration for my wall!
If you wanted to follow along with this tutorial and add more hybrid elements to this project, you certainly could. I chose to keep it all digital and print it out so that when I framed them, it wouldn’t be bulky. The possibilities are only limited by your imagination!
I’d love to see what silhouettes you create! Please post them in the Scrap Girls Hybrid Gallery! Good Luck and have fun!

Tutorial written by Carla Shute


