
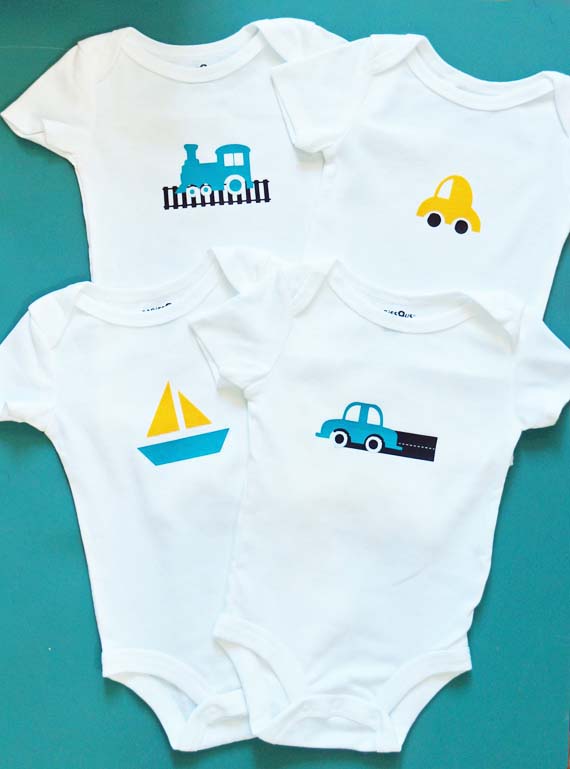
Have we got a treat for you! Lori Aragon has created the most adorable onesies with her Silhouette, Heat Transfer Material and digital scrapbooking embellishments! Just think of all the cool things you can create using this method and your digital scrapbooking stash!
I decided that one of the ladies from church was so thoughtful to have her baby boy at just the right time for this Silhouette promotion. Gage (her third boy) was the inspiration for my project today! I do hope he gets to wear these Onesies for awhile…you know how fast babies grow!!!
Digital scrapbook supplies used:
Supplies Used for This Project:
Silhouette Cameo and Software (I used Designer’s Edition)
Silhouette Heat Transfer Material – Smooth and Flocked
Baby Onesies
Iron and Ironing Board
Clean Cloth
Paper Cutter/Scissors
Instructions:
Choose images from Scrap Girls Digital Scrapbooking Kit (I used Boy Joy Kit) and fill with color in Photoshop (I used PSE 10) or other photo editing software. The images I chose were dimensional, so to make the lines cleaner I filled them with color. This makes it easier when you go to trace the image in your Silhouette software.

Drag and drop the images onto the mat in Silhouette Software. Open the Trace window, click on Select Trace Area, and create a box around the image you want to trace.
Uncheck High Pass Filter and increase Threshold until the image is filled with yellow.
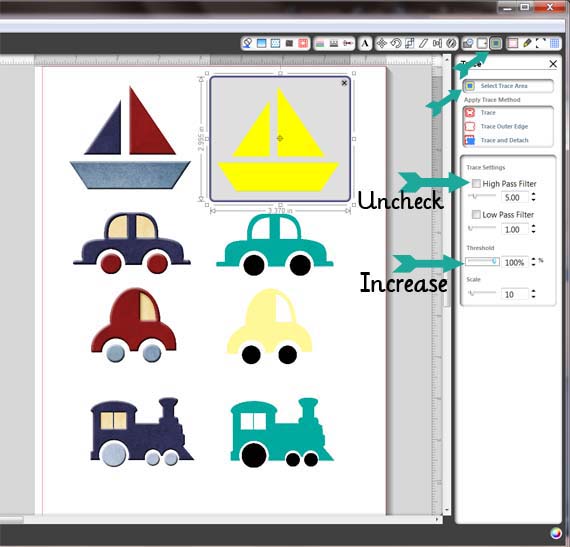
Click on either Trace or Trace Outer Edge, depending on whether or not your image has internal lines such as a window. Move the image aside and you have a new cut file!

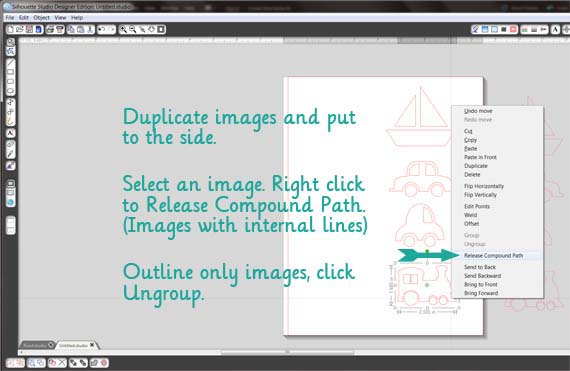
I like to duplicate the files I’m working on just in case… so you can either copy and paste, or a faster way is to drag a box around the images, right click and Duplicate.
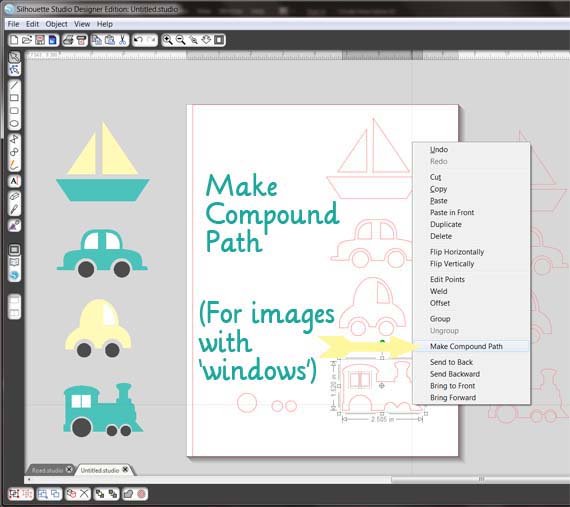
Because I’m using different colors for my Heat Transfer Material, I want to separate the pieces. Images with windows or cut lines inside need to be separated by Releasing Compound Path, otherwise you can simply ungroup.
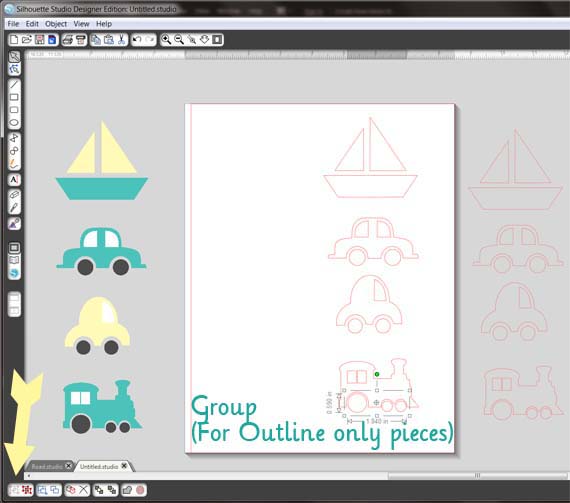
Now that the pieces are separated, I want to group the pieces I want to be cut in the same color. Carefully select each piece without moving them… If you make a mistake, just hit the Undo arrow at the top of your screen! I use it a lot LOL. Now either right click and Group or you can click on the Group Icon in the lower left of your screen. It’s not highlighted in the photo because I already click on it (ooops!)
Move the grouped pieces to the side and select the rest of the image. At this point, if I’m ONLY cutting I can Group the rest of the train together, BUT if I want to fill in with color or a pattern for print and cut, I want to use Make Compound Path. This way the window will remain a window while the rest of the image will be filled with color. Try it .
Using my color-filled images for reference, I filled each shape so I could easily group like filled shapes together for cutting. I also turned on the grid lines in my Silhouette Software for easy placement of the Heat Transfer Material. To turn on the grid lines, go to Open Grid Settings at the top right. Click on Show Grid and adjust spacing as desired. I like to keep the spacing at 1″ with Divisions at 1 as it corresponds with my cutting mat.
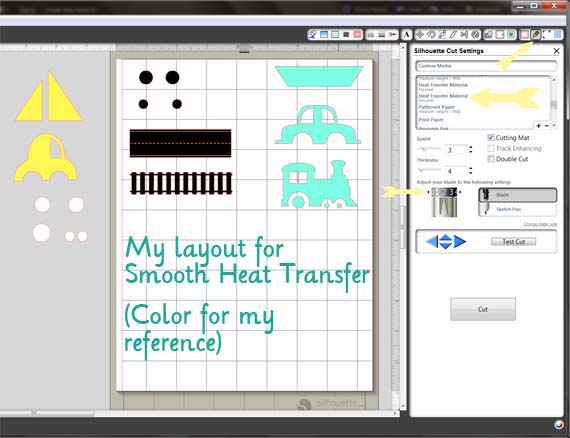
After trimming each piece of Smooth Heat Transfer Material according to the layout on my screen, I placed each piece SHINY SIDE DOWN. Make sure your cut settings are on Heat Transfer Material (smooth in this case); Blade setting is 2 and I like to lower the cutting speed down to 3 or so. See what works for you.
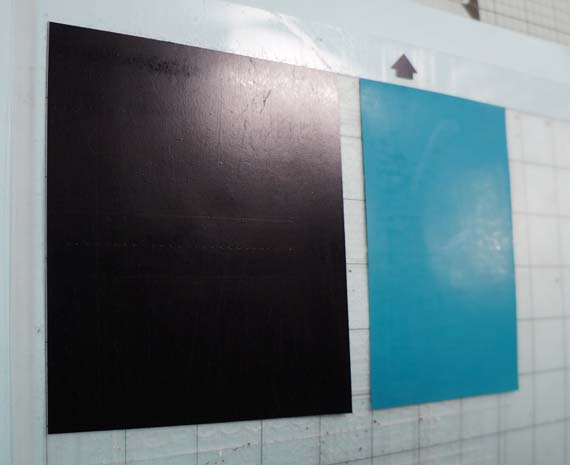
I also cut out some shapes with the Flocked Heat Transfer Material. The procedure is exactly the same with the exception of Cut Settings – Blade is 3.
Using the weed tool, remove the negative space around your images from the plastic backing. You will be left with your design on the clear plastic transfer sheet.
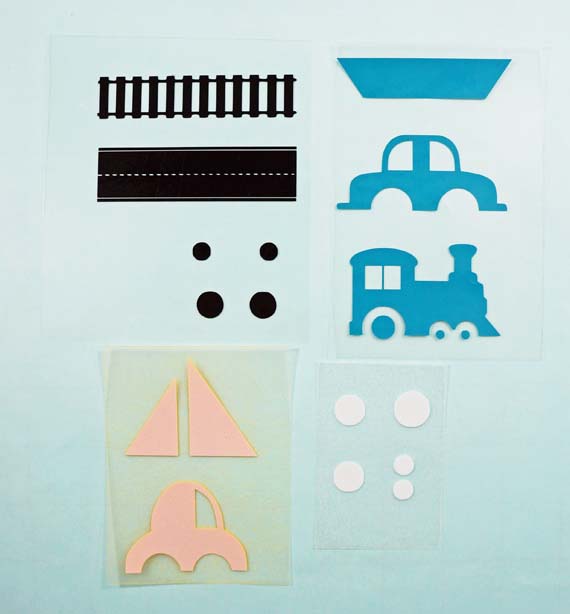
After cutting apart each image, place layers in order for easy ironing. As you position your first piece on the Onesie, you should be able to see the image properly through the clear transfer sheet. IF you are using words, you should be able to see them correctly at this point (and would have MIRRORED the image in the software first…).
Here I’ve already ironed on the Train Track and the White Wheels, next comes the body of the Train.

Place a dry, clean cloth over the transfer and press down FIRMLY with a hot iron for 45-60 seconds. Remove the cloth and peel away the transfer sheet. If the HTM sticks to the transfer sheet, replace the cloth and hot iron again making sure to apply pressure. I really had to press down HARD and let it stay for about a minute!

After removing the cloth and transfer sheet, replace the cloth over your project and press again to ensure the edges are adhered.
You’ve done it! Woo Hoo!!!

We’d love to see what you come up with using Scrap Girls Digital Scrapbook Supplies and Silhouette Heat Transfer Material. Show us what you’ve got at Scrap Girls Hybrid Gallery.
Enjoy!

Article Written by Lori Aragon
Are you itching to try this out yourself? Then make sure to take advantage of the fantastic deals on Silhouette’s Cutting Tool and Heat Transfer Materials now through June 15th! Keep your eyes open for video tutorials on the Scrap Girls Blog featuring more ways to use the Heat Transfer material!
Follow this link Silhouette Heat Transfer Promotion and use the code: SCRAPGIRLS to take advantage of the great deals below!


