
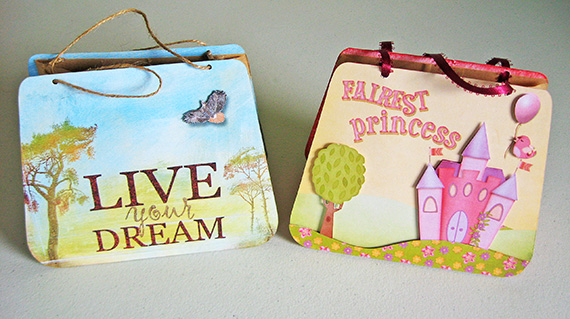
I don’t know about you, but I take such care in picking out that perfect gift then turn around and throw it in any ‘ol gift bag I can grab. This tutorial will show you how to make a gift bag that is as special as your gift. The instructions here are for a 5 1/16 x 3 1/8 x 10 5/8 inches lunch bag, if your bags are a different size you will need to adjust your measurements accordingly.
Digital scrapbooking supplies used:
Super Pack: Naturescape
Prairieland Collection
Scrap Girls May Club — Mayfair
Craft Supplies used:
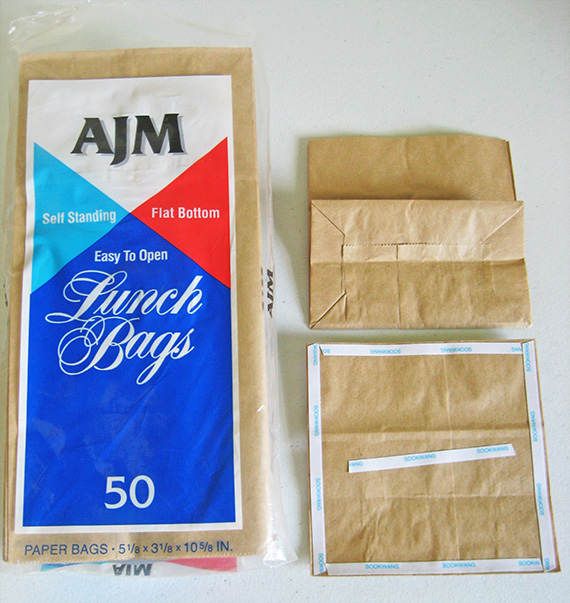
Brown Paper Lunch Bags
8.5 x 11 cardstock for printing
Paper cutter, scissors or Silhouette
Sticky Strip Tape or Other Adhesive
Score Board or Ruler and Bone Folder
Hole Punch or Crop-A-Dile
Pop Dots
Ribbon or twine for the handles
Glitter Pen
Step 1: Cut your lunch bag down to create a square. Mine is 5 1/8 x 5 1/8. Apply adhesive to both sides of the paper bag. Make sure you put your adhesive on the bag. Set aside.
Step 2: Create a new 8 ½ x 11 inch 300 dpi blank document in your photo editing software. Drag in the Gift Card Base Template that I created for you.
Download FREE template here:
[wpdm_file id=14]
Step 3: Next you will drag in your choice of digital scrapbooking paper/papers and clip them to the template using a clipping mask Opt+Ctrl+G (Mac) Ctrl+G (Win) and then merge those 2 layers.

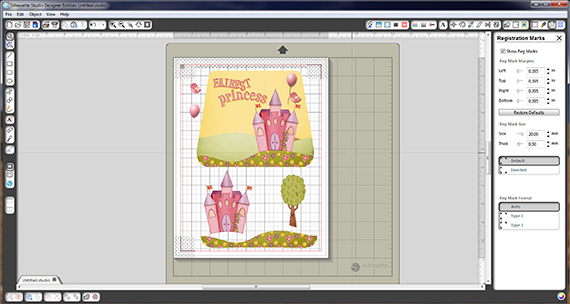
Step 4: Next bring in the embellishments that you want to use on your gift bag, print and cut. I have a Silhouette, so I opened that and dragged in everything that I wanted to print and cut. Remember to print 2 copies, one for each side. Also, remember to print on the back side of your paper because some of that will be showing where it isn’t adhered to the bag.
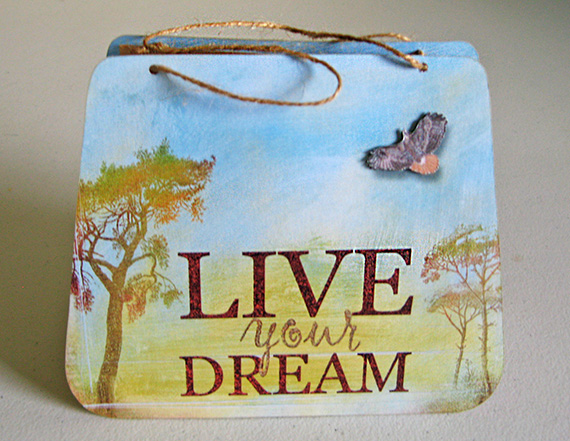
Step 5: Remove the backing from the scor-tape and adhere the base. I found it easiest to place the base facing down, line up the bottom of the bag and the printed base, center and press down. Flip the entire project over and repeat these steps. Add the embellishments. Punch 2 holes on each side of the bag for your handles. That’s is it – you now have a one of a kind gift bag to place your gift in.

I hope you enjoyed this tutorial and will give this gift bag a try. Please share your projects in the Scrap Girls Hybrid Gallery.
Tutorial written by Sherry Davis


