
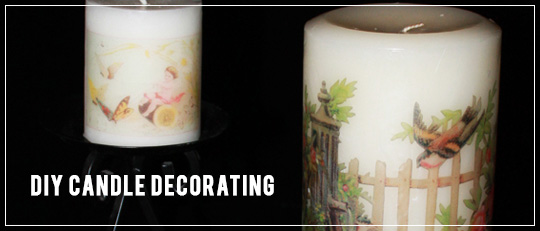
The women in my life love candles! Some love the scented candles, some the flameless candles and some love them both! So for Mother’s Day, I thought I’d personalize some candles for those special women! But you can create these for any occasion!
 Supplies:
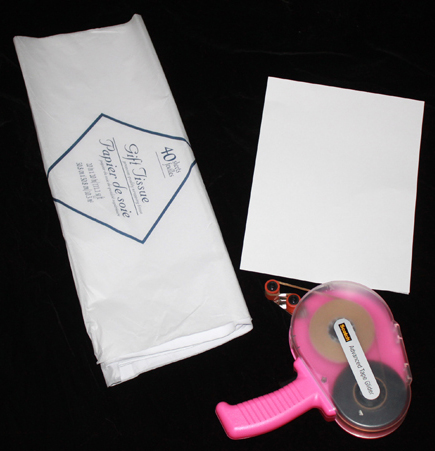
Cardstock
Tissue Paper
Removable double sided tape or spray adhesive
Printer
Scissors
Candles
Wax Paper
Heat Gun or Hair Dryer
Digital scrapbooking supplies used:
Victorian Garden Collection Biggie
Seaside Collection Mini
ScrapSimple Tools – Styles: Basic Shadows 6501
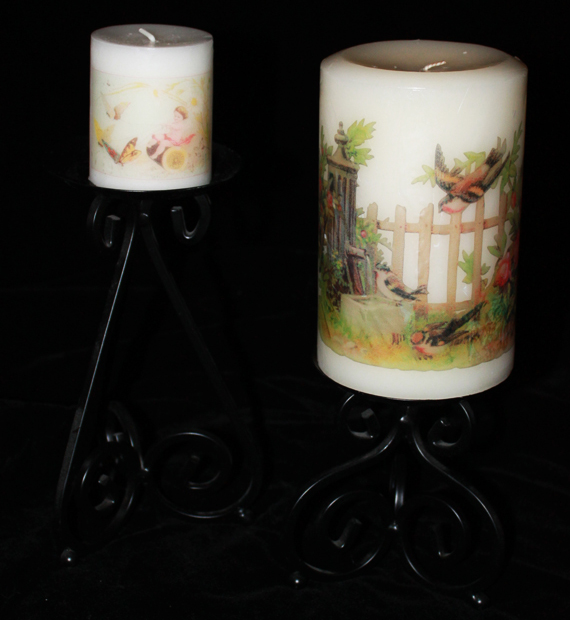
Let’s get started! You won’t believe how easy it is! I found some inexpensive candles at my local craft store, big box store and even the dollar store. Neutral, lighter colored candles are best for this project so that the embellishments can shine.
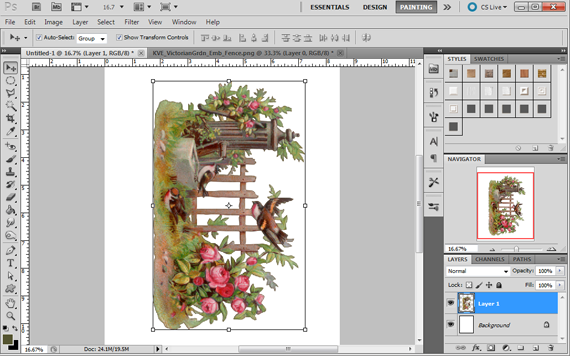
Start by opening a new document in your scrapbooking software 8.5 X 11 inches. Measure the height of your candle and keep that measurement in mind when picking out an embellishment. Drag your embellishment onto your document and resize the height so it will fit on your candle.
Next, prepare your paper. Cut a piece of tissue paper slightly smaller than your cardstock. Attach the tissue paper to your cardstock using either a light spray adhesive or removable double sided tape. Tape the edges of the paper, only. I tried using permanent double sided tape, and had trouble cutting the tissue paper off without ripping it, and had much better luck with the removable tape. Make sure the tissue paper is smooth and not hanging off the side of your cardstock. Load your paper into your printer so the image will print on the tissue paper side. I set my printer settings to photo paper matte finish and printed my embellishment. There is a chance your printer could jam, so keep this in mind.
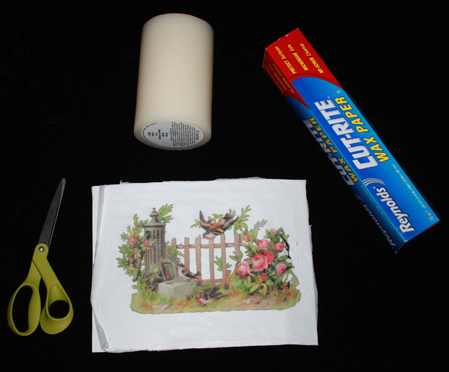
Next, remove the tissue paper from the cardstock, either by cutting it or pulling it off the tape. Then trim the tissue paper close to the design.

Rip off a piece of wax paper slightly longer than the circumference of your candle. This will give you room to hang on to the wax paper. Wrap the wax paper around your candle tightly, so there are no wrinkles or bubbles.
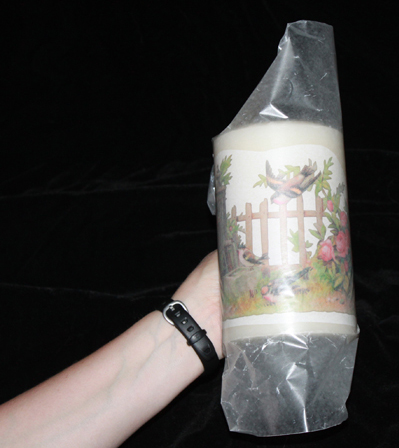
Using a heat gun or hair dryer, heat the wax paper on top of the embellishment. You don’t want it to get so hot that the candle wax starts to warp, but you want it warm enough to transfer the wax from the paper to the candle. It’s hard to describe, but you can see the embellishment become shiny and that’s when you know to move on to another spot. Once you have transferred the wax from the paper to the candle, carefully remove the wax paper from your candle. If any edges of your embellishment are raised, reapply the wax paper and heat it again. Don’t stay in one spot too long or you will start to melt your candle!
That’s all there is to it! So easy and quick. But then I got to thinking…what about those battery operated flameless candles? Off to the craft store I went to research these candles. I found some wax based battery operated flameless candles and used this technique with success.

For the battery operated flameless candles made from plastic, try printing your embellishments on clear sticker paper, trim and attach. Add some beads, sequins or glitter to finish it off!
Paired with a handmade card, my Mother’s Day gifts are all set to send off to my female relatives. They’ll enjoy these one of a kind candles for a long time!
I’d love to see your personalized candles! Please post some photos in the Hybrid Gallery. Have Fun and Get Creative!

Tutorial by Carla Shute


