
Tutorial created using Photoshop CS4 and Silhouette Studio
Supplies used:
Paper
Glue
Pens
Watercolors
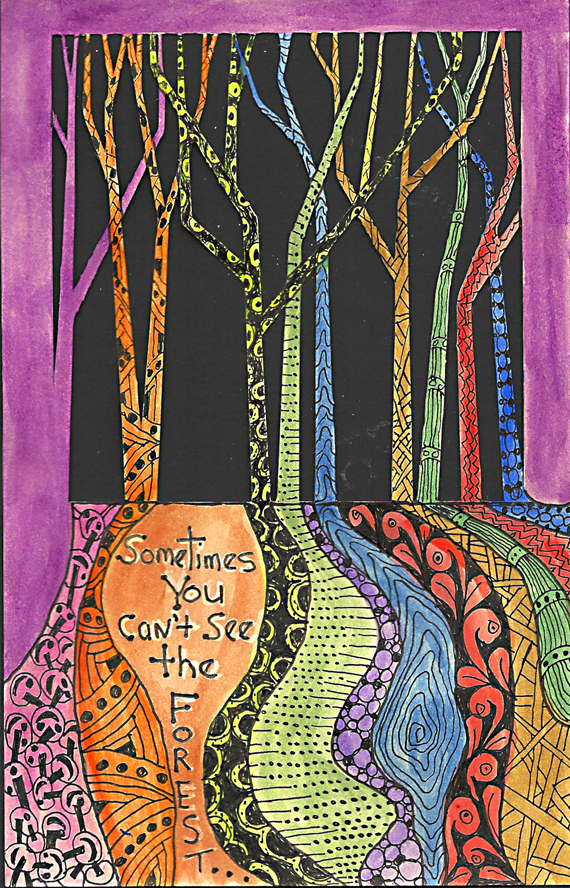
I LOVE “unusual and different” art journal pages; ones that have attention getting un-even edges, and especially ones that have part or all of the design cut out from the page itself. In today’s tutorial I will be giving you 3 design options:
One for use with the Silhouette cutting machine, one for use with an exacto blade and 1one for no cutting at all! Elisha Barnett’s – ScrapSimple Paper Templates: Papercutting is PERFECT for all 3 options.I have chosen her #5 templates for today’s tutorial.
LET’S GET STARTED!
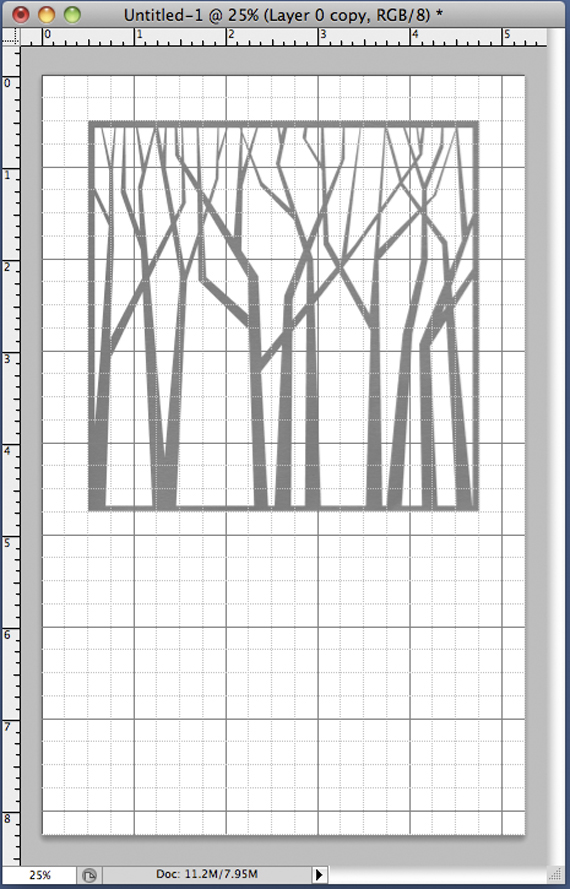
Step 1 – Create a new file the size of your journal page. Mine is 5.25″x8.25″. (I like to turn on the grid for placement help.) Open your design file, duplicate it then discard the original.
Reduce the image size to be able to fit nicely on your journal page by clicking on image>image size. Then making sure the scale styles box is checked, change the width or the height to the measurement that works best for your page dimensions.

Step 2 – Bring your design over to your journal page file & place to your desire.
Preparing Design for the Silhouette Cutting Machine:
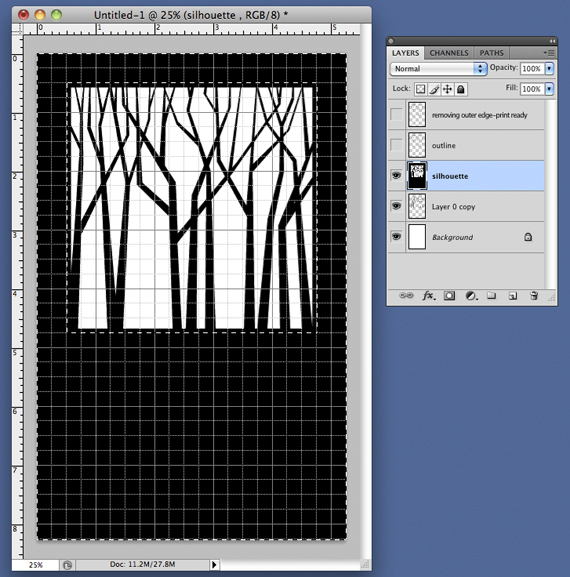
Step 3 – Using the magic wand tool, click anywhere within the grey design area, marching ants will appear.

Click on edit. Making sure that the foreground color is set to black, click on fill.
Step 4 –To get rid of the marching ants click select, then deselect. We now want to color the rest of the page black by using the magic wand tool again. Making sure the contiguous box is checked, click anywhere within the white outside area. Marching ants will appear again. Then click on fill, making sure the foreground color is black. Click select/deselect.
Click on file, save as. .Name it, save it to a place where you can find it easily. (I like saving it to my desktop) and save it in the jpeg format.
Step 5 – Open your Silhouette software. (This technique works in the basic and Designer edition.) Click file, open, then the design that you saved.

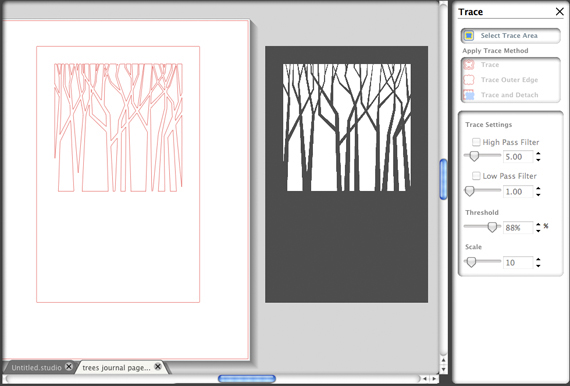
Step 6 – Click on the trace button. Select trace area, uncheck the high pass filter, crank up the threshold until everything is yellow.Then click on trace.

Now click on the move tool and move the design out of the way, leaving just your cut lines.
Step 7 – Click on the cut button to take you to the cut screen. Choose the type of paper. (I used plain card stock) Because the design is complicated, I set the speed to 1. Align your card stock on the cutting mat and load into your Silhouette cutting machine. Click cut! The really “cool” thing is that the Silhouette will be cutting the design as well as the exact page size! This is what my page looks like, scanned with a black piece of paper behind it.
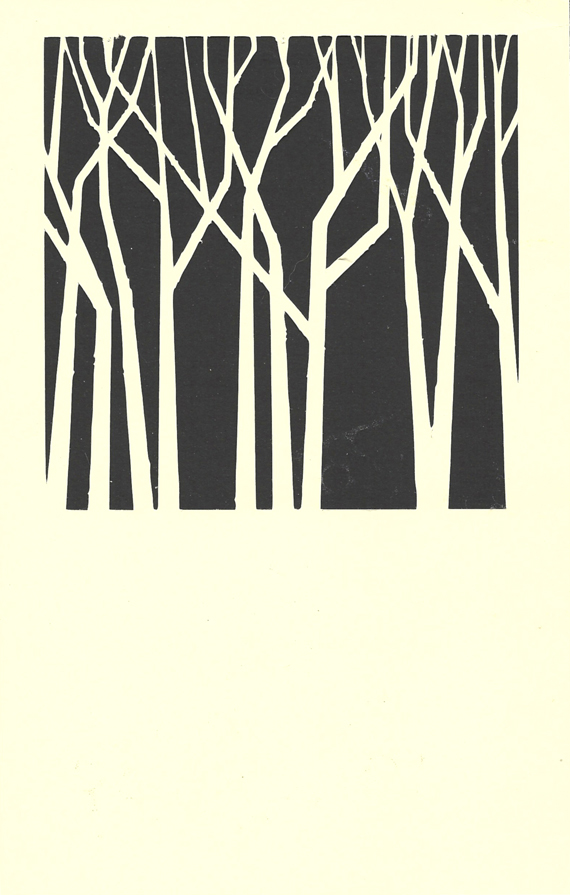
Ready for your artwork!
For Exacto blade cutting: (For those of you that don’t own a Electronic Cutting Tool)
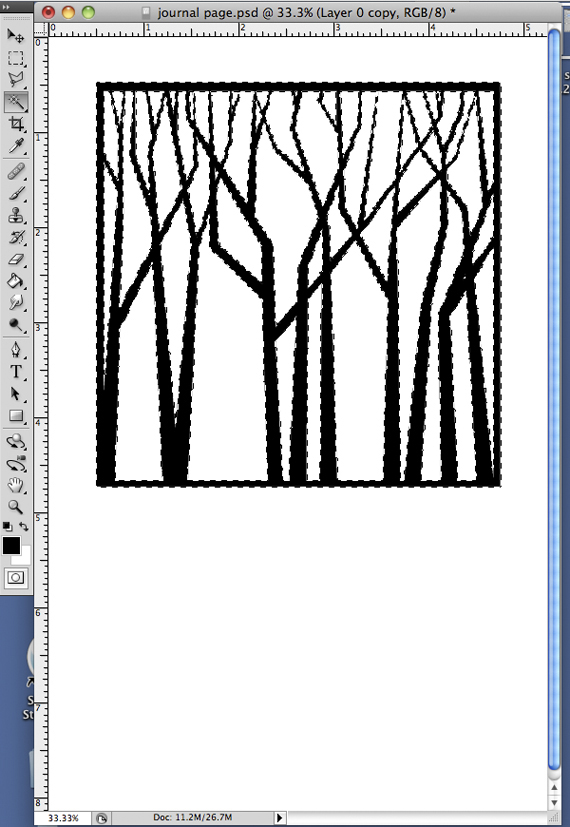
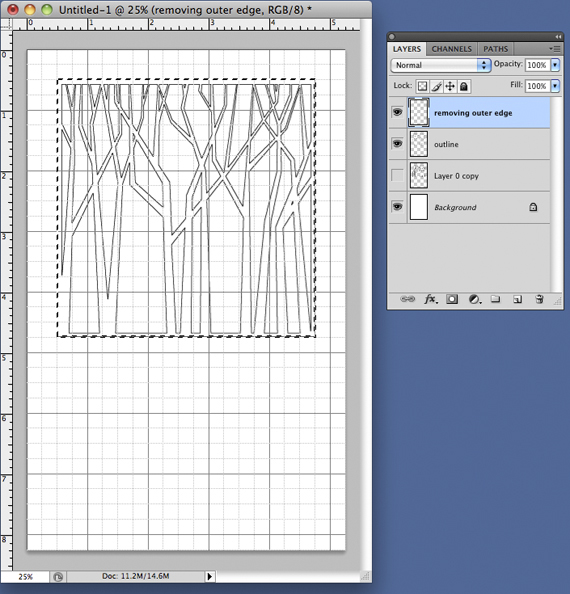
With exacto blade cutting, you want to work with an outline of your design. To do this, follow the tutorial from the beginning up until photo #3 where the marching ants are surrounding the grey design area. Instead of clicking on edit>fill, you will click on edit>stroke. Set the pixel width to 3, color black and the location center. Click ok, then delete. This will leave you with a perfect design outline to print onto your card stock, ready for exacto blade cutting.

For printing:
Follow the exacto blade cutting. Then using the magic wand tool, click on the outer line, making sure the contiguous box is checked. Click on delete.
DESIGN, DESIGN, DESIGN!!
You can attach your page into your journal by the “tip-in” method. (http://gomakesomething.com/ht/ab/tip-ins/)
Or by the standard glue it on the next page, using paper friendly glue like UHU.
See my finished page at the top of this post, which I am planning on using the “tip-in” method for attaching it into my Art journal.
I am a newbie Zen-Tangler. My thanks to CZT extraordinaire, Pat Allard, from Lewiston, Maine, who patiently taught me at the Art Journal Retreat in Santa Fe, NM last September!
See you next month,
Jerrie.
Digital scrapbooking products used:

Tutorial written by Jerrie Hall


