
I think most of us love keyboard shortcuts because they help us work more efficiently in Photoshop. They make quick work of repetitive tasks and can be a huge timesaver! But there are some functions that do not have shortcuts assigned to them. So it might be a happy surprise to know that you can create your own custom keyboard shortcuts! You can assign Shortcuts to pretty much anything in PS, such as menu bar and panel commands and options, filters, adjustment layers, tools and so much more! And you can even create your own set of Shortcuts. If you’re like me there are bound to be default shortcuts that you don’t use, so you can reassign some of those and create completely new ones. This is a great way to make Photoshop work specifically for you.
The next time you’re working away on a project, stop and think about some of the commands and tools that you use the most often that might warrant their own shortcuts.
Photoshop CC+
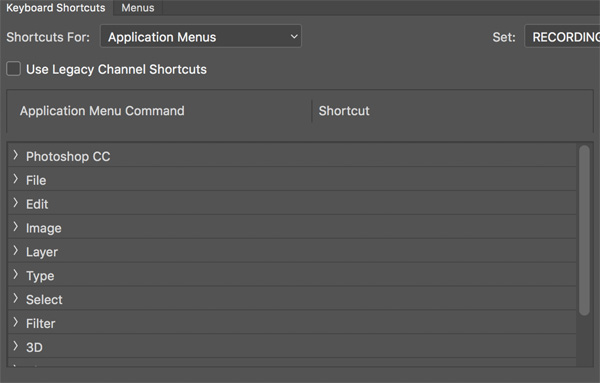
1. Choose Edit > Keyboard Shortcuts.

Once the Keyboard Shortcut panel is open you will see that almost all of the Photoshop menu is listed in the same order they appear in the menu bar as well as subcategories.
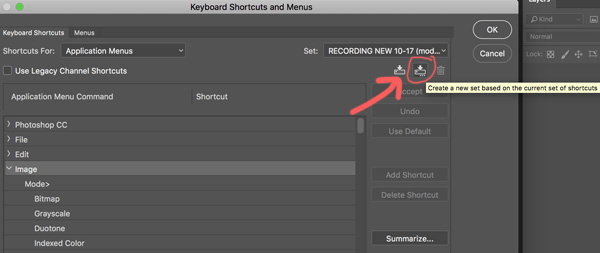
2. Create a new set by clicking on the New Set button. This will make a copy of the set you selected for you to customize. Name the set, and this will be stored in your Keyboard Shortcuts folder.
(In PS CS6: Choose Edit > Keyboard Shortcuts. In the dialog box, select the Keyboard Shortcuts tab.)
Please note: the ability to customize keyboard shortcuts showed up in PS CS.
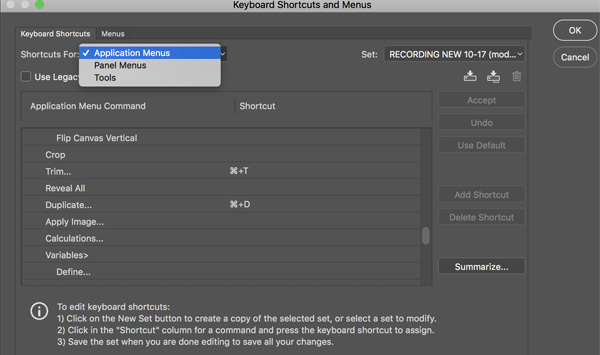
3. In the dialog box, choose a shortcut type from Shortcuts For menu:
(PS CS6: Choose a set of shortcuts from the Set menu which you will find at the top of the Keyboard Shortcuts & Menus dialog box. In most cases you will want to select Photoshop Defaults.)
Application Menus:
This lets you customize shortcuts for all the items in menu bar at the top of your screen.
Panel Menus:
This lets you customize shortcuts for items in panel menus.
Tools:
This lets you customize shortcuts for tools in the toolbox, such as the pen tool, lasso tool, shape tool etc.
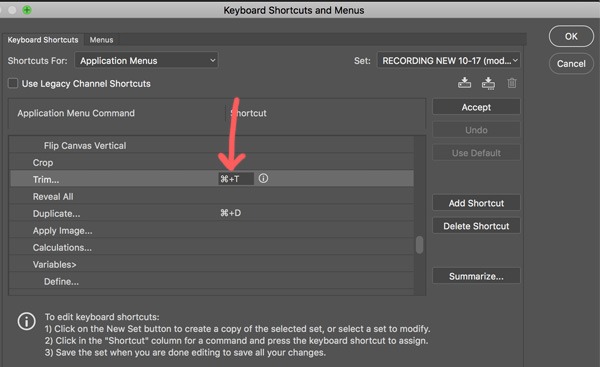
4. Scroll through the list and click on the arrow next to the menu command you want to create a shortcut for to expand the menu.
5. Select the desired command from the list. Type in the shortcut keys you want to assign to that command in the little box.
Photoshop will alert you when you type in a shortcut that has already been used, you can decide if you want to keep it or overwrite it. Don’t worry, you can always go back to the default shortcuts – so edit away!

If the shortcut has already been used for another function you can overwrite it. Or you can choose different keyboard combination. (Press Undo if you want to keep the original shortcut)
For example:
I have changed Cmd t (Windows: Ctrl t) which default is the Transform tool – to Trim since I rarely use the transform tool and can just choose it from the Options bar when I do need it.
Please note: Application and Panel menu commands must include Cmd (Mac) or Ctrl, and/or a Function (F) in the shortcut.
6. Click Accept to create your new shortcut. If you change your mind down the road, you can click Use Default to revert back to the original shortcut. And that’s it! You have created your own custom Photoshop shortcut!
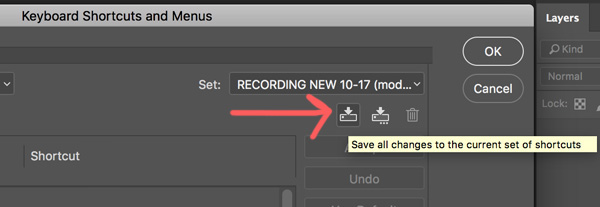
7. When you are finished editing and assigning shortcuts, click the Save Set button (disk icon).
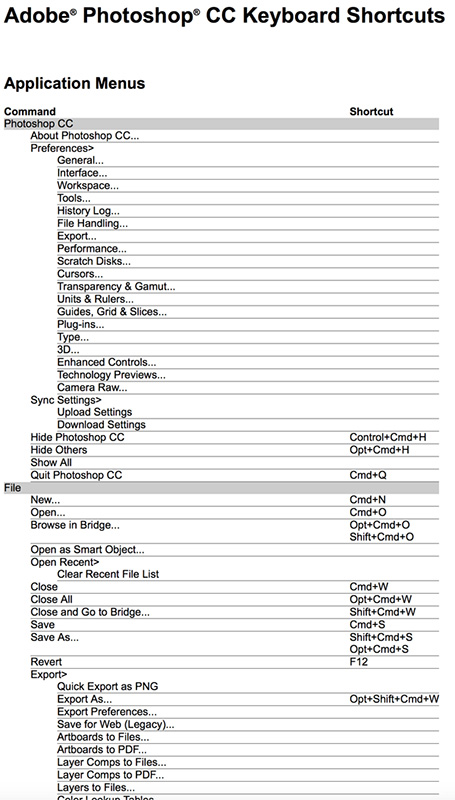
You can click the Summarize button to save your new keyboard shortcut set as an .htm file. This will load in your internet browser. You can print the file and keep it next to your computer as a reference.
Photoshop Elements doesn’t have the ability to create custom shortcuts. But a set of Keyboard Shortcuts created in PS can be exported for use in PSE. Stay tuned for a tutorial specifically covering this topic in the near future.
I hope this makes creating and working in Photoshop faster and more enjoyable by cutting down on repetitive tasks and customizing it to suit your needs!


