
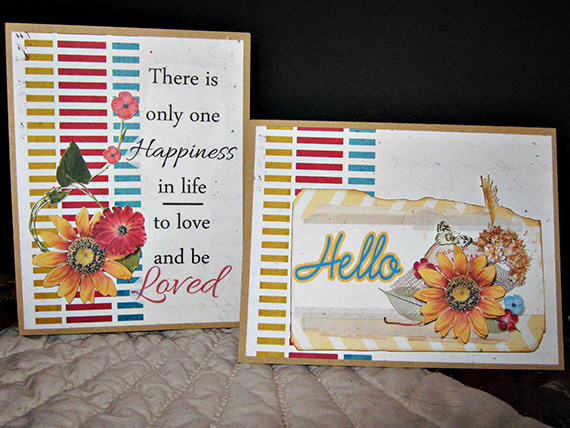
Today I want to show you how easy it is to take Scrap Girls embellishments and use the Print and Cut feature in Silhouette to create a card that really stands out. For this tutorial I am using Angie Brigg’s Falling for You Collection.
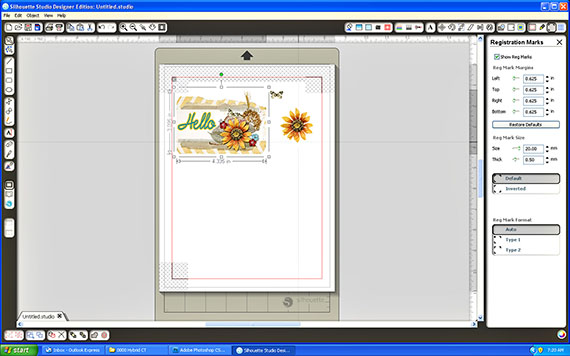
Start by opening up your Silhouette Software. Since I have a standard printer, I select paper size 8.5 x 11. The first thing I always do when starting a print and cut is to set my registration marks on my page. Do this by selecting the “Open the Registration Mark Settings Window” (second button from the right side of upper tool bar), then putting a check mark in the “Show Registration Marks”. This will set your page so you can see where your printing/cutting area is. You will want to keep all of your embellishments within this frame.

Next, you go to File/Merge and a window will open. Navigate to the file that contains the embellishments that you want to use on your project. It will automatically be looking for “Silhouette Studio” in the Files of type, so use the drop down box to select jpeg or png, which ever your ScrapGirl embellishment happens to be. Double click on that embellishment and it is transported to your print & cut page.

Continue doing this for each ScrapGirl embellishment you wish to use. Once they are on your page, arrange them so they fit within the Registration Marks by clicking on them individually and moving them around.
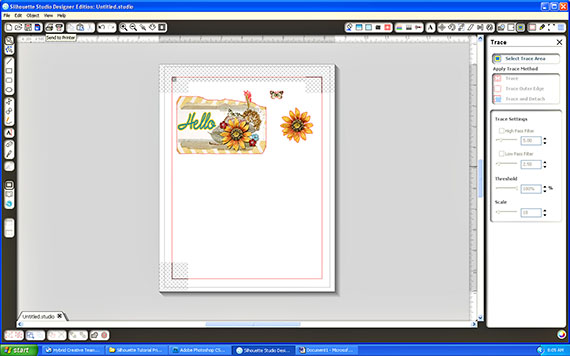
Now that they are arranged, choose the “Trace Window”. Choose “Select Trace Area” and click/drag your mouse over the ScrapGirls embellishments. The area will have a gray film over it and activate your “Trace Settings” options. Uncheck “High Pass Filter” and move the “Threshold” bar to 100%. You will see that each embellishment is solid yellow. Select “Trace Outer Edge” and you will see your embellishments restored to original with a red outline along the outer edge. Now you are ready to. Select the “Send to Printer” button in the upper tool bar.
After your ScrapGirls embellishments are printed on your cardstock, adhere to your Silhouette cutting mat and load into the Silhouette by pressing “Enter” on your Silhouette machine.
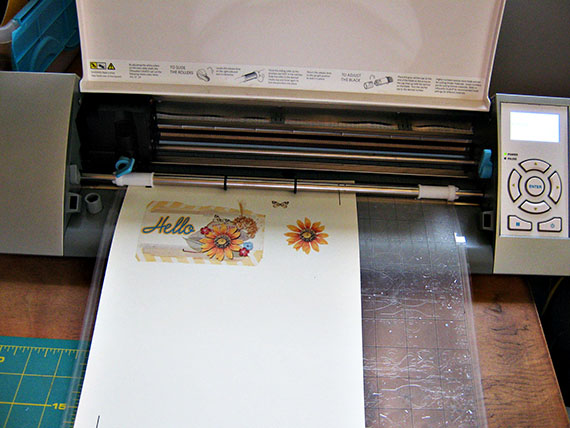
Go back to your computer, to your Silhouette program, choose “Cut Settings” and select the appropriate settings for the type of paper you are using. Hit the “Cut” button, sit back and relax while Silhouette does all the work.
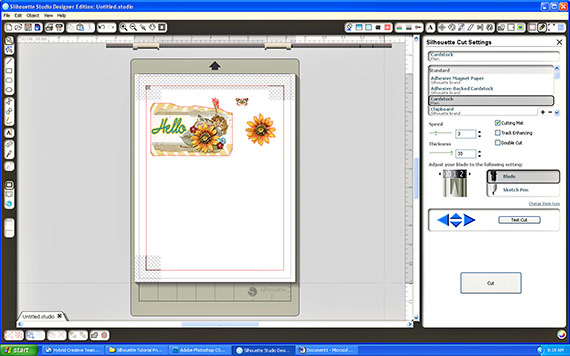
Go back to your computer, to your Silhouette program, choose “Cut Settings” and select the appropriate settings for the type of paper you are using. Hit the “Cut” button, sit back and relax while Silhouette does all the work.
If you give this project a try, please be sure to post it to Scrap Girls Hybrid Layout Gallery so we can see your creation!
And as always . . . Enjoy the Process!!
~ Lei

Tutorial written by Lei Maier


