

About a month ago, I wrote a tutorial on using the Hue/Saturation window to change the colors on the new pre-colored ScrapSimple Templates. The Hue/Saturation window has been my favorite method for recoloring for, well, forever! Seriously.
Until now. I’ve been playing around with the Replace Color window in Photoshop Elements and I don’t know if I’ll ever go back! Let me show you why….
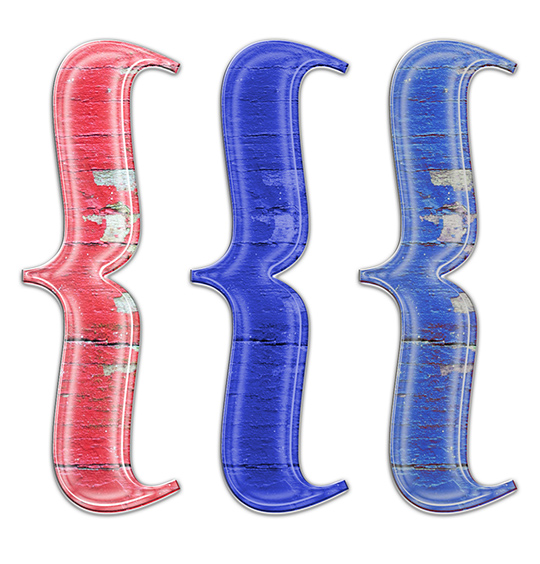
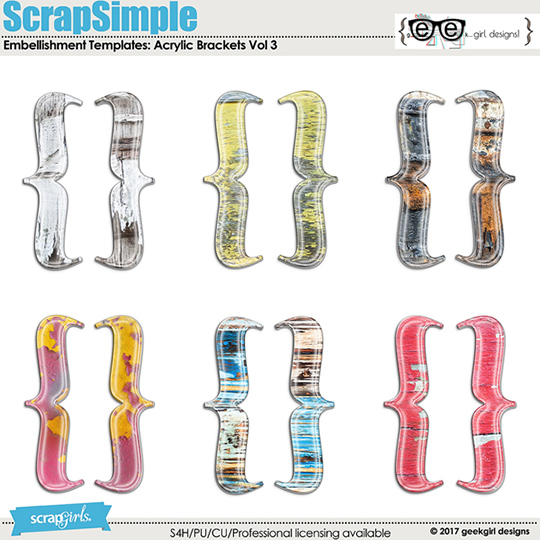
First, look at the difference between these three embellishments. The first is the original ScrapSimple Embellishment Templates: Acrylic Brackets Vol. 3 by Geek Girl Designs. The second was recolored using the Hue/Saturation window. Notice that the grey portions also changed to blue. The third was recolored with the Replace Color window. Notice how in the third version, the pink changed to blue but the other colors stayed the same. Easy selective recoloring.
Isn’t that cool? I love how easy it was. Let me show you.
1. Open a pre-colored ScrapSimple Embellishment Template.
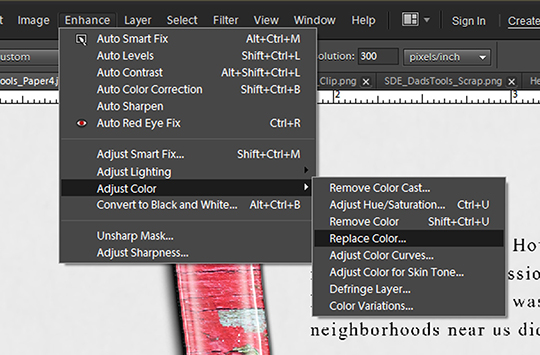
2. Click Enhance > Adjust Color > Replace Color.
(In PS click Image > Adjustments > Replace Color.)
3. When the window opens, click on the first Eye Dropper button, and then click on the main color in your embellishment that you want changed. You will see some of the black mask change to white. Everything that is white will change color in the next step.
4. If not enough of your image changed to white, you can adjust the Fuzziness slider (it’s like the Tolerance slider when using the Magic Wand tool) or click on the second Eye Dropper button (it has a little + next to it) and click on another part of the embellishment. This adds another color or shade to the mask.

5. Once everything you’ve added everything to the mask that you want to add, start playing with the Hue, Saturation, and Lightness sliders. If you find that you missed portions of the embellishment, just adjust the Fuzziness slider to include them in the color change.
6. Click OK — and your embellishment has been changed!
That’s all there is to it. It is so easy to selectively adjust colors on ScrapSimple Embellishment Templates, you’ll want to grab every element in your stash and play around with its color – just because you can!
I can’t wait to see what you come up with, so be sure to upload your recolored masterpieces to the Scrap Girls Gallery.
 (Click on images below to be taken to their product page)

![]()
 Tutorial written by Anna Mansfield


