
There are many ways to create pockets for your art journal page. This method is one of my favorites because it is very simple to create, and easily cut out with scissors. Plus it can be used as a design element as well as an envelope that has an unexpected surprise inside!
The size is entirely up to you, but remember the design has a square format. You can have a pocket that entirely fills up either the height or width of your page, or you can go “out of the page” and have it extend outside the cover to call attention to it!
If you are going to open and close it a lot, I highly recommend that you make it out of “Sheer Heaven” ( http://www.cre8it.com/sheerheaven.html ) Sheer Heaven is virtually indestructible and it accepts photographic quality printing. For this tutorial, I am using 65lb cardstock because the page is in my personal journal and won’t be used a lot.
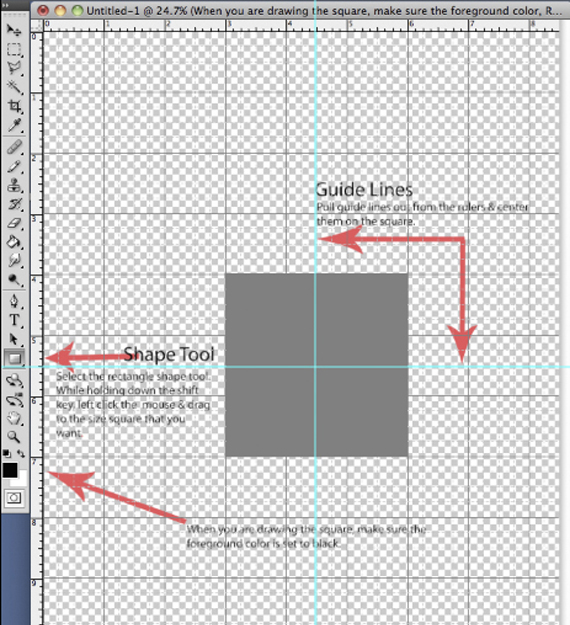
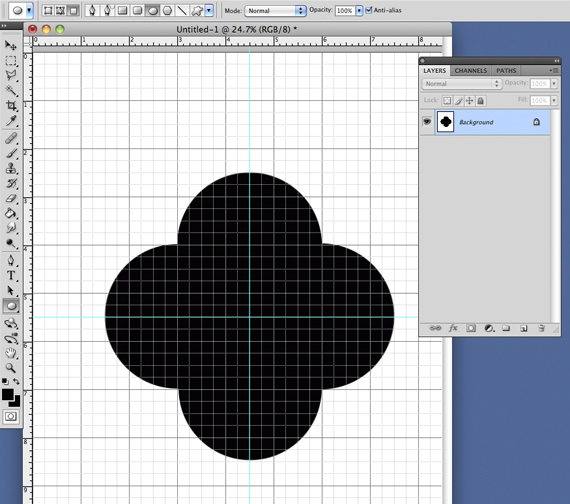
Step 1 – Create a new file in you photo editing software. Set the background to transparent, resolution 300. (I’m using Photoshop CS4 on a Mac) I like to turn on the grid and smart guides.
Change the foreground to any color except black or white, I chose a gray. Select the rectangle shape tool. (This is where the grid comes in handy) Line the crosshairs up with any dark line intersection, holding down the shift key, left click and drag the mouse to the size square you want. Pull out a horizontal and vertical guide line from the rulers and center them on the square.
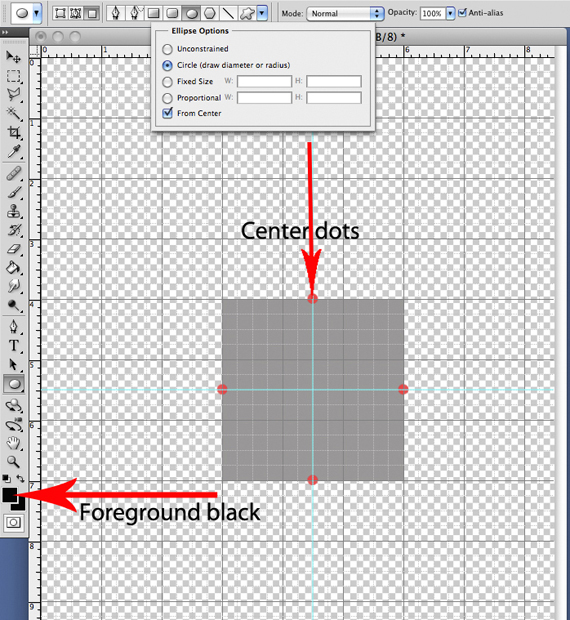
Step 2 – On a separate layer I marked the center points of the square just to make them easier to see. Select the ellipse shape tool. In the ellipse option box, Click circle and check from center. Change the foreground color to black.
Step 3 – Center the crosshairs over a center dot. Hold down the shift key, left click & drag the mouse until the diameter of the circle is the same size as the square.
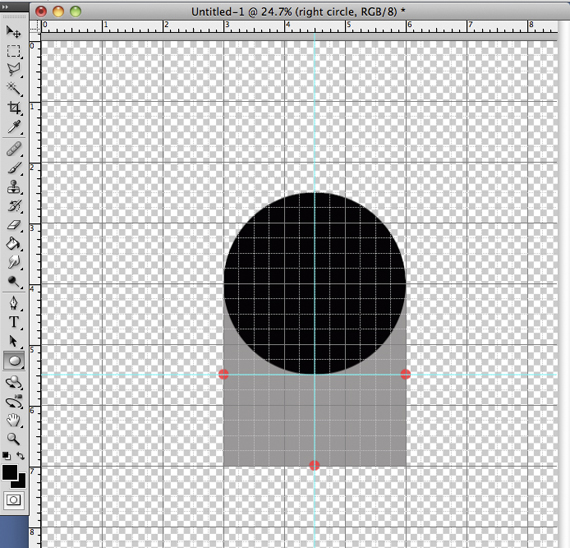
Step 4 – Duplicate on the other sides. You can now merge all the layers of the image.
Double click on the background layer name it mask and duplicate it. Delete your original layer.
NOW THE FUN BEGINS!
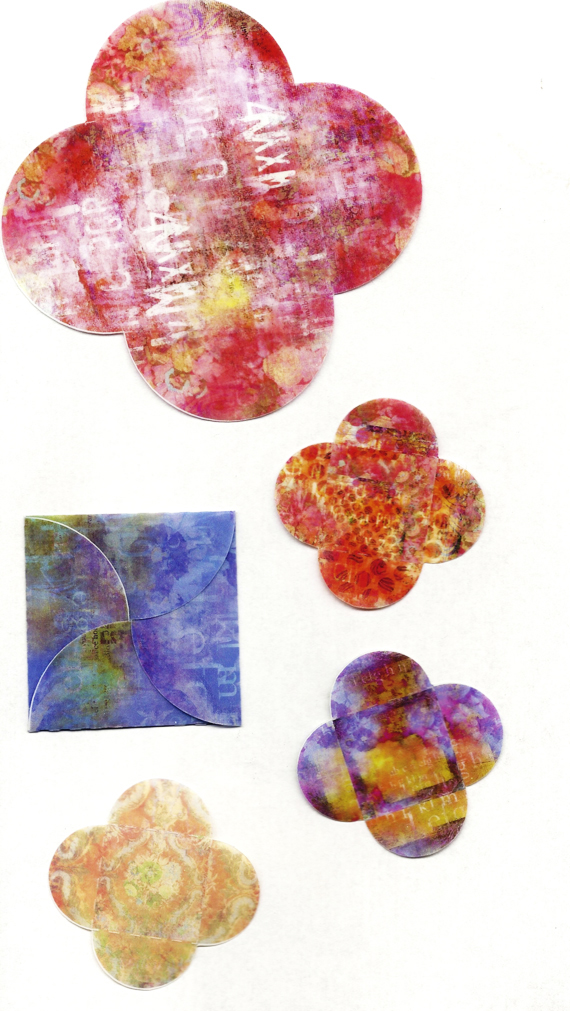
Step 5 – Select a digital paper. ( I chose a paper from Altered Life Paper Mini) Duplicate it, delete the original. I resized it to the width of the design, which in my case was 6″. Bring it over on top of the mask. Right click on the paper layer and click on create clipping mask. VOILA! Print on card stock or Sheer Heaven.

Step 6 – Cut out your blossom pockets with scissors. Fold.
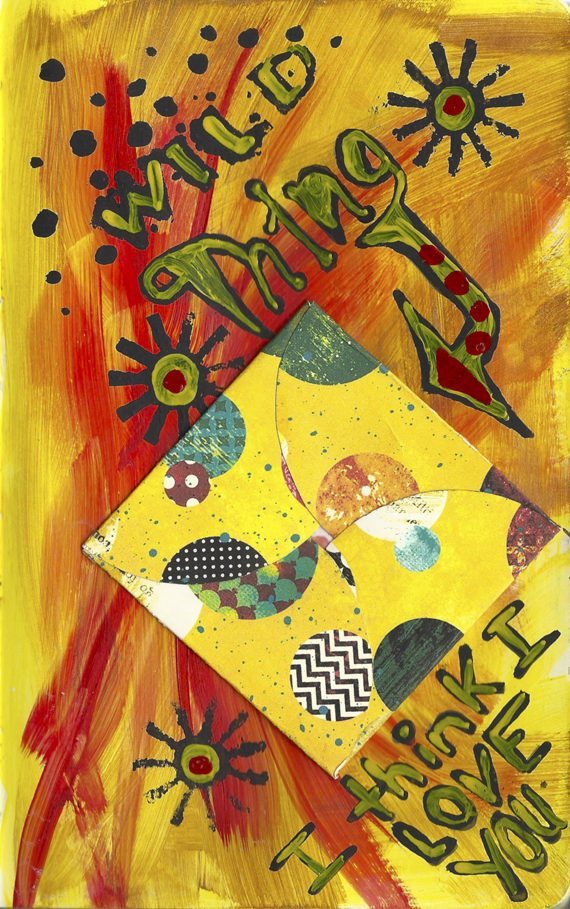
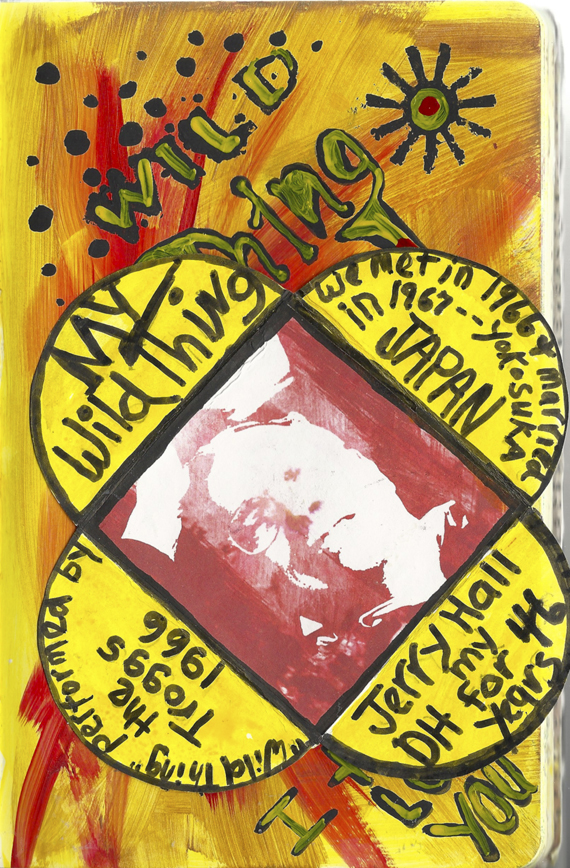
Step 7 – For the center I resized a photo of my DH to the size of the square and ran it through ScrapSimple Tools -Actions: Artistic Photo Masks-Paint and glued it in the center. I chose my journal page paint colors from the digital paper.
I used Golden fluid acrylics, Golden acrylic glazing liquid (satin) and black gesso. I also played around with a small sun stencil. It is definitely a “me” Love You card to my DH!
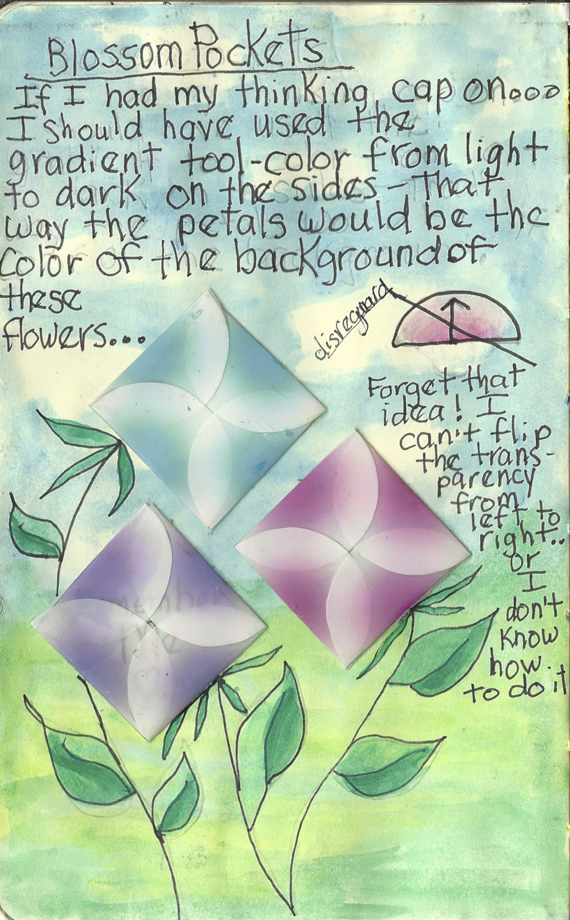
I’ve included a scan of some pockets I printed out on Sheer Heaven (I used paper from Arsty Dreams Collection Biggie) and a scan of one of my original art journal pages from many years ago.
There are sooooo many possible ways you can use these wonderful pockets! I am really looking forward to seeing what you come up with in the Scrap Girls Hybrid Gallery!
HAVE FUN CREATING!
See you next month…
Jerrie
Digital scrapbooking supplies used:


