
Using Templates to Make Your Project Easier!
I love to make my own mini albums. I also love to use templates to simplify the pages! Sometimes there isn’t a template available that will work with what you have in mind, so I’m going to show you how to make your own.
Digital scrapbooking supplies used:
ScrapSimple Tools – Actions: Color Swatch 6301
ScrapSimple Paper Templates: Old Lace Flowers 3
ScrapSimple Paper Templates: Old Lace Flowers 4
ScrapSimple Embellishment Templates: Date Slides
ScrapSimple Embellishment Templates: Fabric Buttons
Supplies used:
6 chipboard panels cut to 4-1/2 x 8-1/2
Dauber Ink or other craft ink
Adhesive
Paper trimmer
Wire binder and punch machine – If you don’t own one, check out your local Staples… most of them will bind for a minimal cost
Instructions:
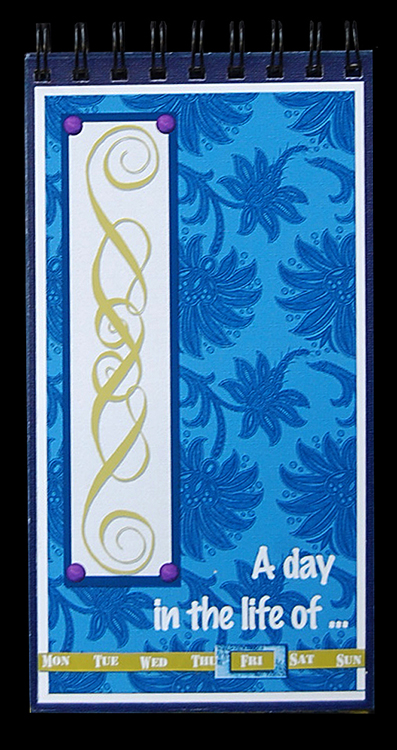
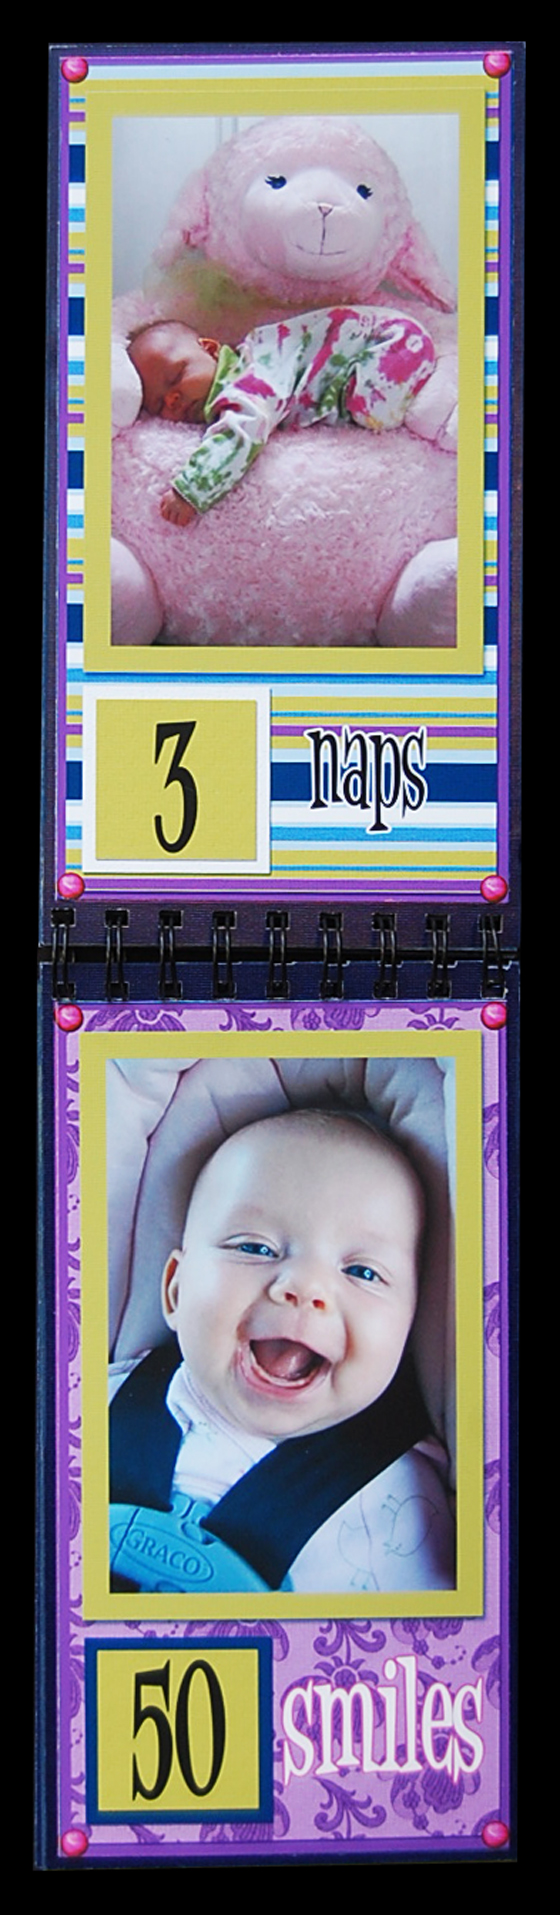
When looking through the finished book I want to flip the page and have the two visible pages flowing from top to bottom.
In order to achieve this I need to place the artwork upside down on the backside of each piece of chipboard. To help myself remember this (because I just know I’ll mess it up!) I stacked the chipboard pieces in a pile and marked the top “outside front cover” then by pretending my binder is already attached at the top I flip that page up like I was opening the book and mark the back “inside front cover,” continue on with page 1, page 2 etc. That way when I am ready to adhere my digital work I’ll know which end is the top by the direction of my number.
Another thing I like to do before I begin is pick out the colors I want to use. Syndee’s Colorwheel Action has become one of my favorite tools – once I pick out the SG Digital Products I want to use I can make a Color Swatch and save it in my project folder to use again. Now I’m ready to begin.
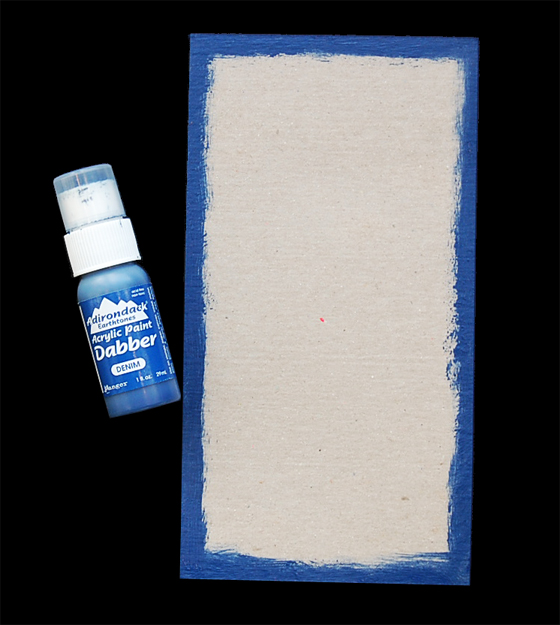
First I apply craft paint around the edges of my chipboard pieces – on both sides. I used Ranger’s Dauber Inks but you can use any craft ink.
Here are the sizes I’m using for the different layers on my interior pages:
Solid Color Matt: 4-1/4 x 8
Decorative Paper layer: 4 x 7-3/4
Photo Matt layer: 3-3/4 x 5-1/2
Photo layer: 3-1/4 x 5
Outer Matt for number: 1-3/4 square
Inner matt for number: 1-1/2 square
Let’s make the templates to use in this book:
- The list above tells me my first layer will be 4-1/4” x 8” so I open a new file in that size, fill it with black & name this layer “Paper Matt”
- I make a second rectangular box 4 x 7-3/4, fill it with white, name it “decorative paper” and center it on top of the first layer
- Continue making boxes in the predetermined sizes and placing them on the design in the position you desire.
- Once it is set up save it as “Template”

Digitally Designing the Pages Using Your New Template:
I’m going to work on page two so I open up my template file and Save AS “page two.”
**Note: If you’re not clear on the difference between “Save” and “Save As” this may help you:
Let’s say I open a template I’ve done (or a digital item from Scrap Girls) and I make changes and “Save.” I’ve just overwritten the original file and permanently changed it – you probably don’t want to do that.
However, if I open that original file and “Save As” I can give it a different name and it would save it as a new file – keeping my original intact and undamaged. Just double check and make sure you are working on the copy you saved and not your original.
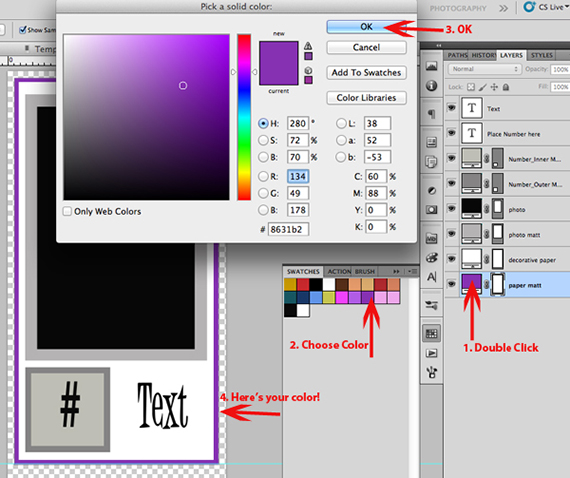
I’ll add a solid color to my bottom layer by double clicking on the black box and choosing a color from my swatches.
Now I add colors to my other solid layers. For my decorative paper layer I drag my scrapbook digital paper onto my open file, place if above the “decorative paper” and create a clipping mask:
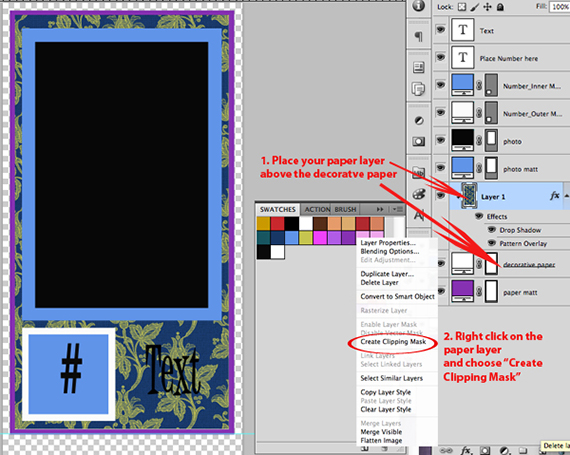
I do the same with my photo layer and clip it. Then I can type in my number and my text and the page is done!
I’ll save it again as page 2, open up my template again, save AS page 3 and repeat. See how quickly this can go with a template!
To make the covers, and page one, use the templates and delete layers not needed and insert new layers wanted.
Print and trim down the digitally designed pages. I like to number the back of them with a pencil so I make sure they go on the correct piece of chipboard.
This book is going to be bound at the top. I don’t want to place anything important in the area that will be punched for the binder so I’ll adhere all the odd pages approximately 3/8” from the top of the chipboard, and the even pages 3/8” from the top. This will ensure that the punch holes only go through my solid background.
Once they’re complete I pile them up in order and pretend the binder is attached so I can flip through them to make sure I’ve done it right! This time I did so I’m ready to punch and bind them.
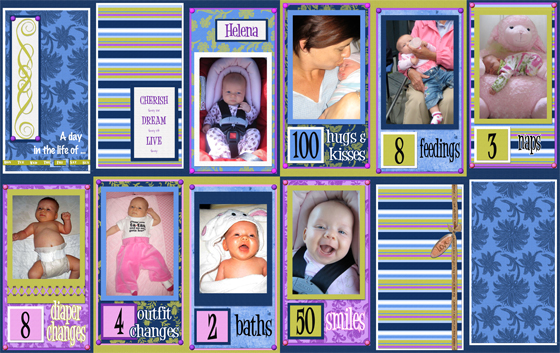
I’ve made different versions of this book and varied them up. I’ve used cardstock instead of paint for the bottom layer and used regular photos instead of digital ones to give them a more dimensional look. In some I printed the numbers out and layered them and adhered them afterward – or even the photos on a cardstock matt and placed them in afterwards. In this instance I used digitally designed supplies for my brads and other elements; in other books I added ribbons and brads to my pages once I printed them out. There are so many options when you work with hybrid scrapbooking – that’s what makes it so exciting!
I hope you’ve enjoyed this tutorial and make some of these small albums yourself and upload them to the Scrap Girls Blog so we can all admire them and maybe even copy your ideas!
Start Hybrid Scrappin’!

Tutorial written by Bobbi Start


