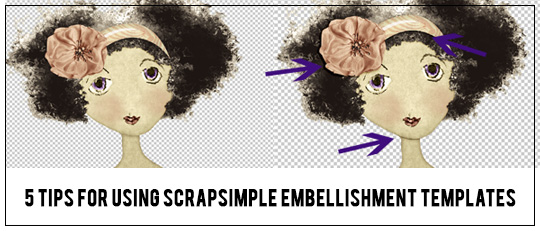
ScrapSimple Embellishment Templates are a wonderful, yet often under-used way to expand your scrapbooking supplies. Many scrappers, however, are intimidated and unsure where to start when trying to use them. In this tutorial, I will show you my step-by-step process for using embellishment templates, as well as a few handy tips thrown in, so that you can start enjoying these little gems.
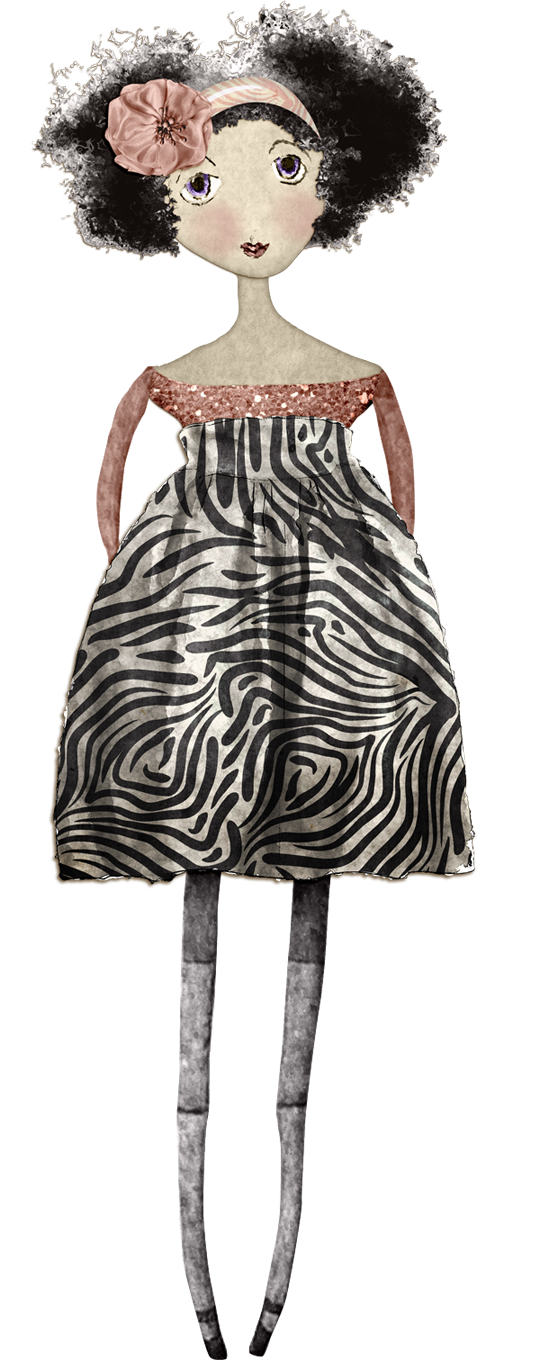
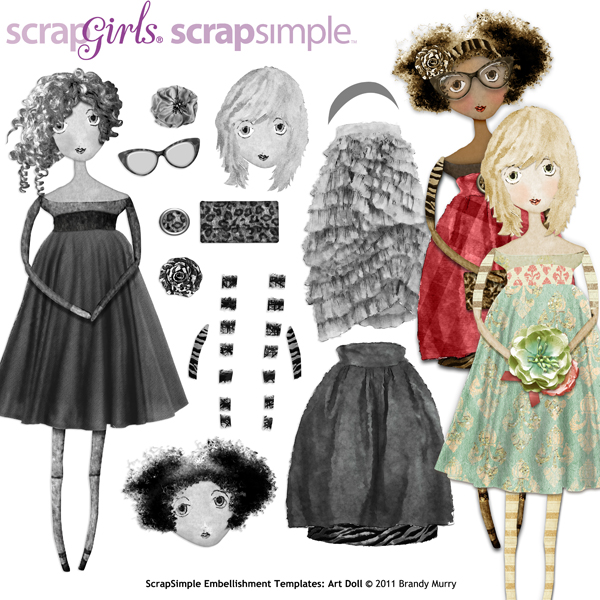
For this tutorial, I am using Brandy Murry’s ScrapSimple Embellishment Templates: Art Doll. These files come as PNG as well as layered PSD files so you can personalize your embellishment.
The Technical Part
Tip 1: Format
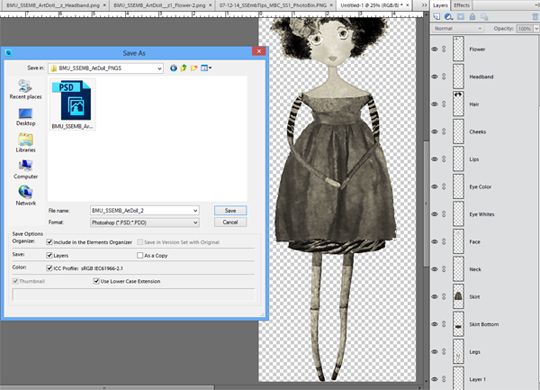
My first step with any template is to make sure it’s in a layered PSD format, and if it isn’t, it’s easy to assemble one myself. (I’ll show you how!)
Most of the templates you find in the SG Design Shop will already be in this format; however, I have run across a few that are not. If they are not in a layered PSD format, chances are there will be several PNG files. Let me show you how I created my own layered PSD file from more than a dozen PNG files.

Tip 2: “Grabbing” the Pieces
Sometimes when working with templates, the pieces may be very tiny or transparent (like shadows), which makes them difficult to “grab” with the mouse and move around your layout. To avoid getting frustrated by this, zoom in on the object, then “grab” it by holding down the Ctrl key in Windows (Cmd key on a Mac) while moving your object into place.
Once I had all the pieces layered into one file, I double-checked my Layers palette to make sure they were in the correct order. I renamed my layers to make them easier to find. At this point, I saved my new file as a PSD file so I can use it another time.
Now that the technicalities are out of the way and my template is in one layered file, I get to play with coloring my templates.
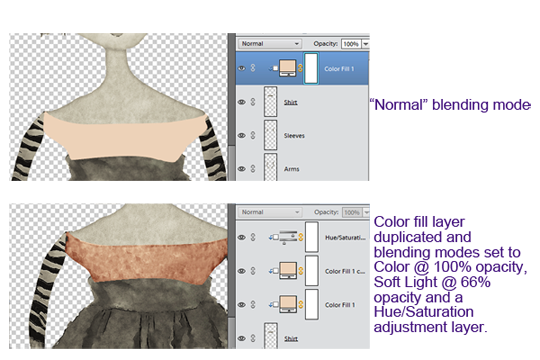
An easy way to color templates is to use a simple color overlay. Choose a color, go to Create New Fill or Adjustment Layer in your Layers Palette menu and choose Solid Color.
After I completed that step, I clipped Ctrl+G (Mac: Cmd+G) the Color Fill layer to the piece I was working on. Then, I started experimenting with Blend modes to get the right look.
Tip 3: Blend Modes
Use Blend modes to get the texture and details from the template to show. If needed, duplicate the color layer and use several different Blend modes, as well as different opacities to get a realistic look.
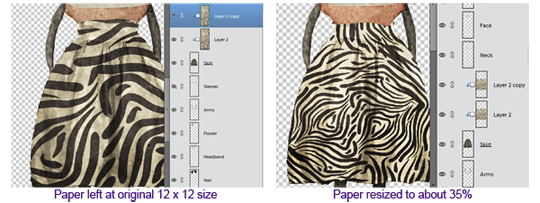
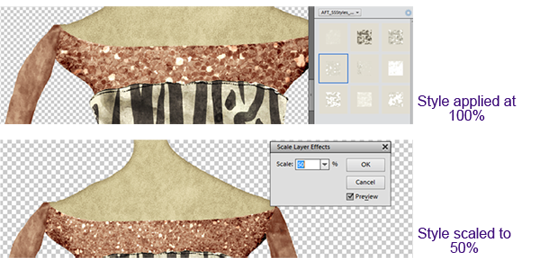
When working with the often tiny pieces in a ScrapSimple Embellishment Template, it may be necessary to increase or decrease the scale of patterns or styles to get the best look for a template.
Finishing Touches
Finally, our Embellishment Template has been layered, colored, pizazzed, and is ready for some finishing touches.
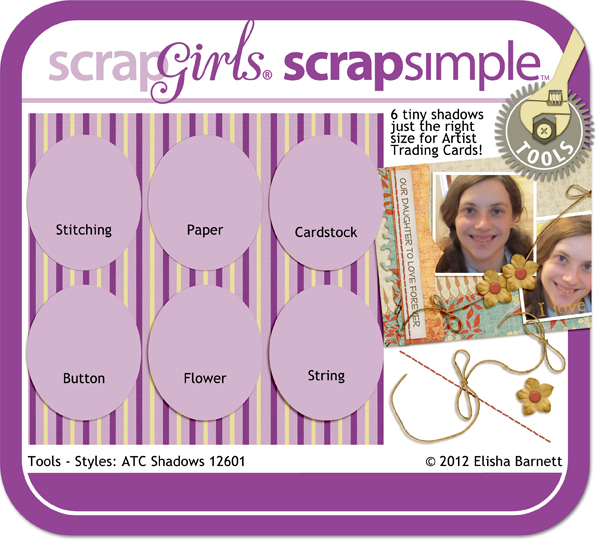
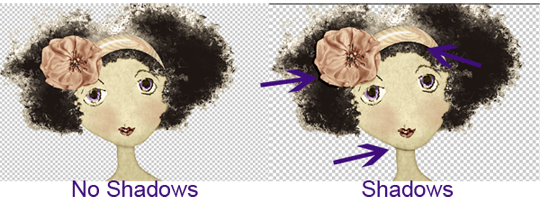
Tip 5: Shadows
Adding shadows to the template layers will add a great depth and touch of realism to an embellishment. Just like other styles, you may have to scale them a bit due to the small size of some of the template pieces.
When working with such small pieces, I like to use Elisha Barnett’s ScrapSimple Tools – Styles: ATC Shadows 12601 as they are ready-made for smaller sizes.
My last step is to use Ctrl+Alt+Shift+E (Mac: Cmd+Opt+Shift+E) to make a merged copy of my embellishment template while maintaining the layers (in case I want to make any changes later) and move my merged layer onto my layout.
There you have it – ScrapSimple Embellishment Templates in just a few easy steps! Come show off your layouts using ScrapSimple Embellishment Templates in the Scrap Girls Gallery. If you have questions while using embellishment templates, don’t hesitate to ask on the Forum, and we will be happy to help you!